Project – testing dyes on silk

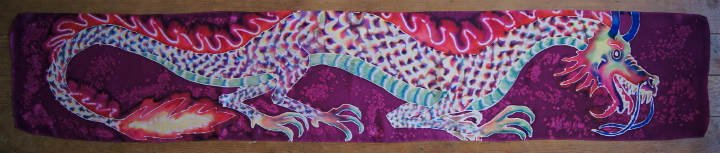
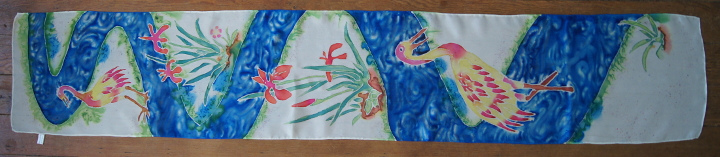
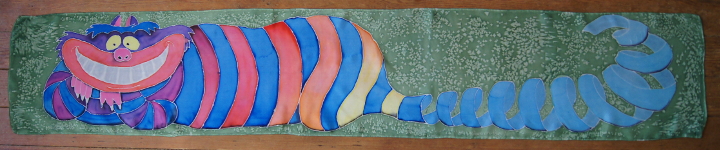
One of the things Jim and I work on a lot is painted silk. He designs and I execute. Dragons, elves, trolls, puffins, landscapes, snow scenes with northern lights. I’ve been painting on silk since 2000, and taught it for several years, but as much as I have picked up in twenty years is nothing next to real experts (Paula Burch and many others). I don’t so much study as play with my materials, but familiarity makes you a more competent artist.

I’ve always used dyes on silk. Fiber reactive dyes. They’re persnickety, but every medium has a learning curve. I was looking thru the vast range of products at Golden paints, at the GAC formulations. They’re mediums of different characteristics that do different things for various different things you might want to do with acrylic paint. And there’s one that you can use on fabric, that’s supposed to not leave much of a hand. {A hand is the term for what a piece of fabric feels like with paint on it (like those embossed sweatshirts. like those screen printed t-shirts). Any stiffness caused by dried paint gives the fabric a hand, and it’s not desirable on something as fine as a light piece of silk. It gets crushed a few times, and whatever’s painted on it will start to crack.)

I once had a used silk sari that had been painted to enhance its natural beauty. And it was a vintage sari, so from maybe a few decades back. While it was a nice painted pattern, the paint was stiff and pokey and the sari didn’t want to pleat. It was easy to flake off whole flower petals. And the silk underneath the paint was dried and fragile, and cracked off in leaf-shaped chunks. So fabric paint is not archival, while dyes are (as far as that goes). But what do I know? I use my silk scarves until they’re full of holes, blowing right past archival and into the compost pile.

Fabric paints have improved over the years since that sari was painted. And they’ve developed these acrylic mediums with special powers. I read a bit. Golden has two kinds of acrylic paint that will work on fabric. And two different mediums that go with fabric paint. So I called them up and asked my usual dumb questions, and then went to some art supply store online (not trying to be coy, I just don’t remember which of the several I ended up buying from this time) and bought the mediums and a process-color spread of both the fluid acrylics and the high flow acrylics. There’s a difference. And I’m going to explore it. But not in this post. Because shit happened and now I have to wait to play with the acrylics.

I got GAC900, for fabric painting. It’s heat set (and I wonder if that includes steaming (note – no. steam setting is not recommended for gac900. use an iron)). It’s used with high flow acrylics for tie-dye effects, and with fluid acrylics for brushing on. It’s supposed to leave a very soft hand. (I’m just reading this, here; I have no idea how it works yet) I also got a wetting aid, which reduces surface tension and helps the paint flow. I guess that’s like ox gall for watercolors, but for acrylics. I don’t know. Anyway, I had to wait forever for these products to show up, and in the meantime I ordered all new fiber reactive dyes, because my big tubs of dyes were several years old, and I don’t think you’re supposed to keep them all that long…)

So the whole process I was going to document with this post would be way too long anyway, covering as it does two different mediums. So I’m just going to leave all this talk about acrylics here, and continue with the dyeing, simply because the acrylics took forever to arrive in the mail.

The first test scarf, with black resist before steaming. Looks pretty good

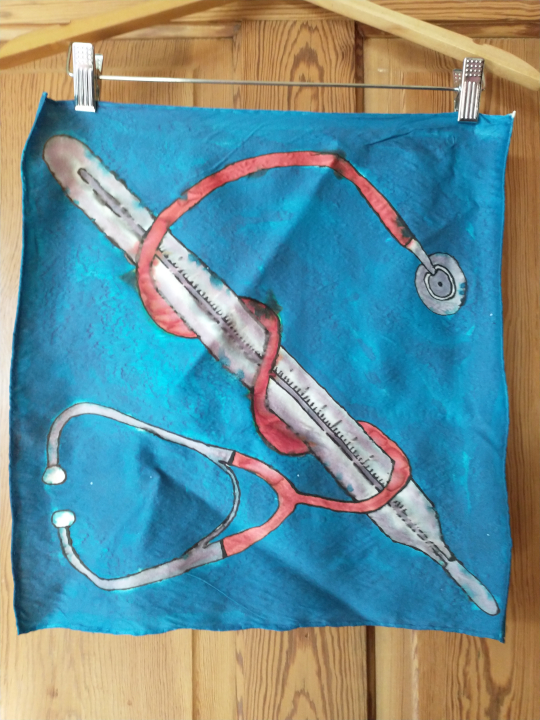
I had known the ancient dye in my tubs were going wonky when I tested my dyes and resists in preparation for painting a silk tie, something I need to do for one of my nephews who’s all grown up now.

The same scarf after steaming. Everything is faded, and the black is gone.

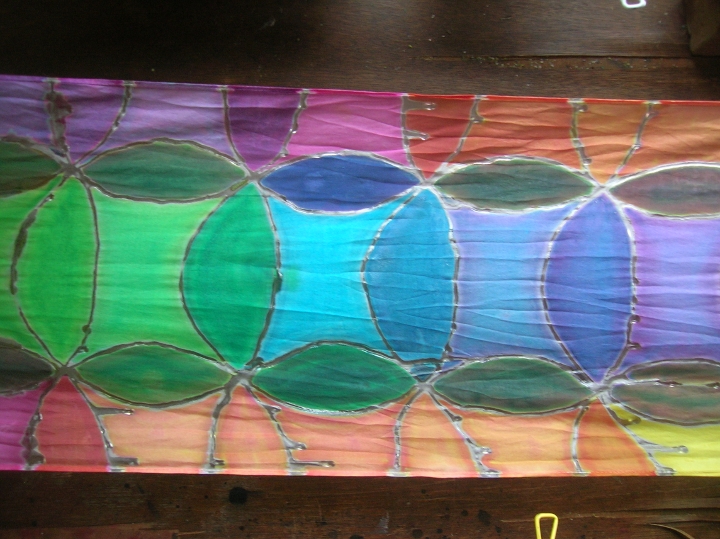
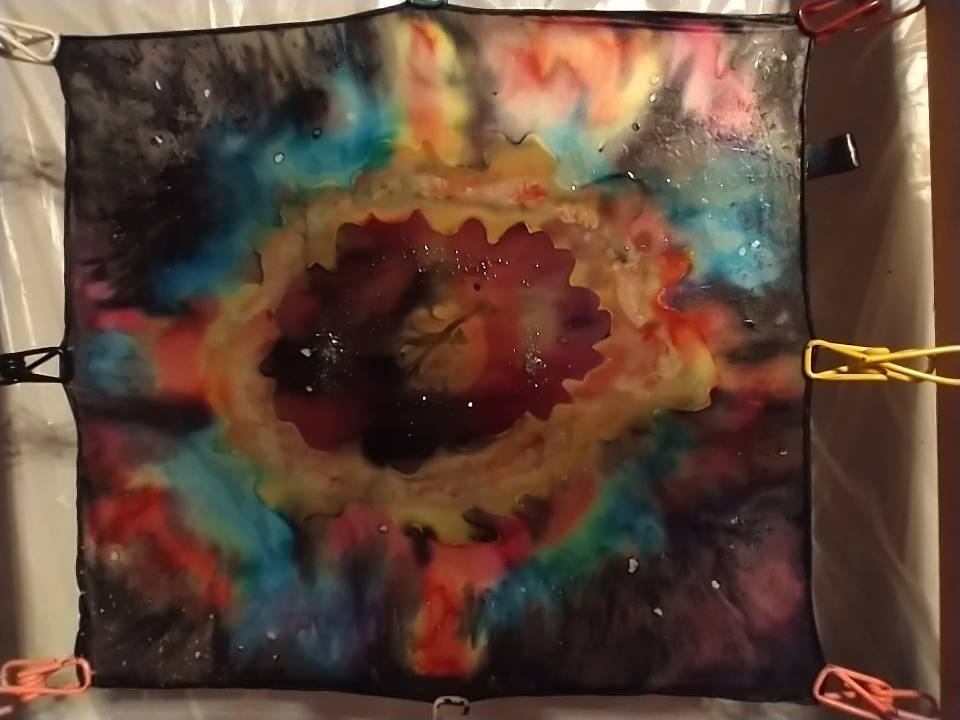
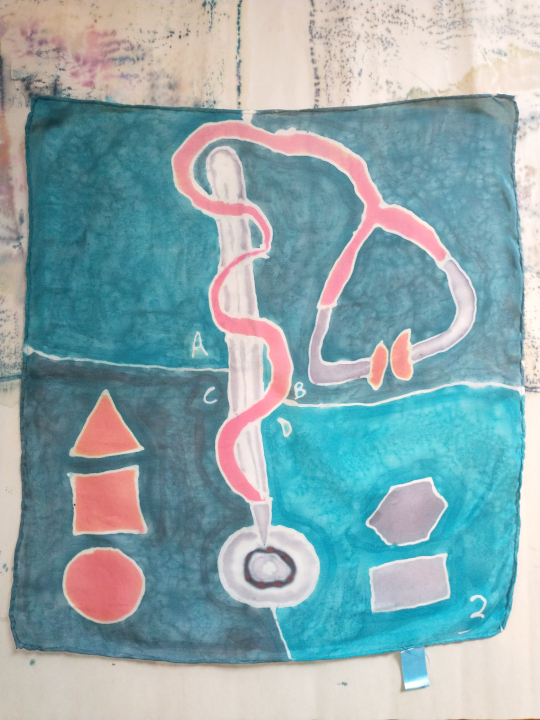
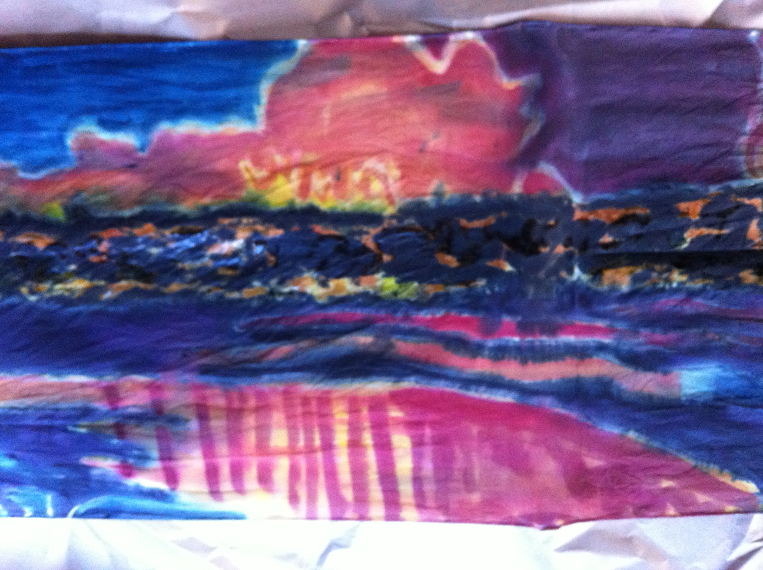
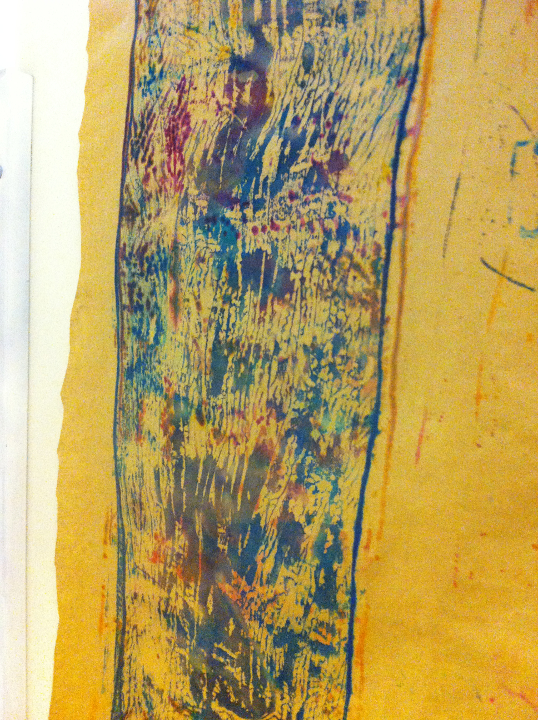
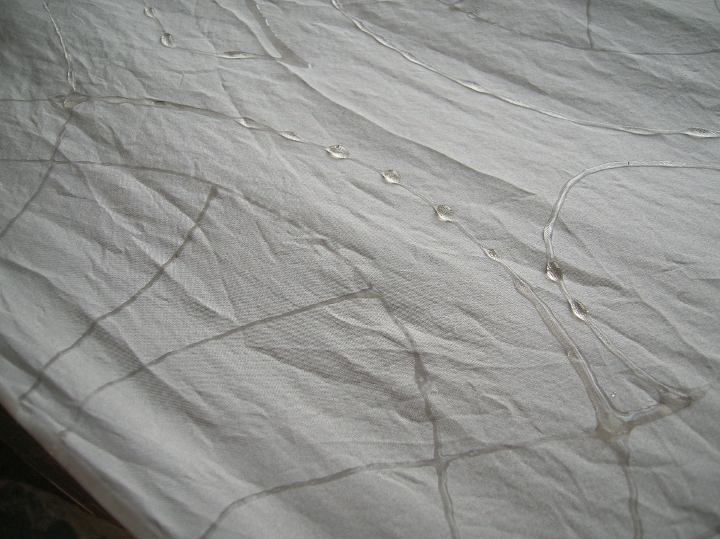
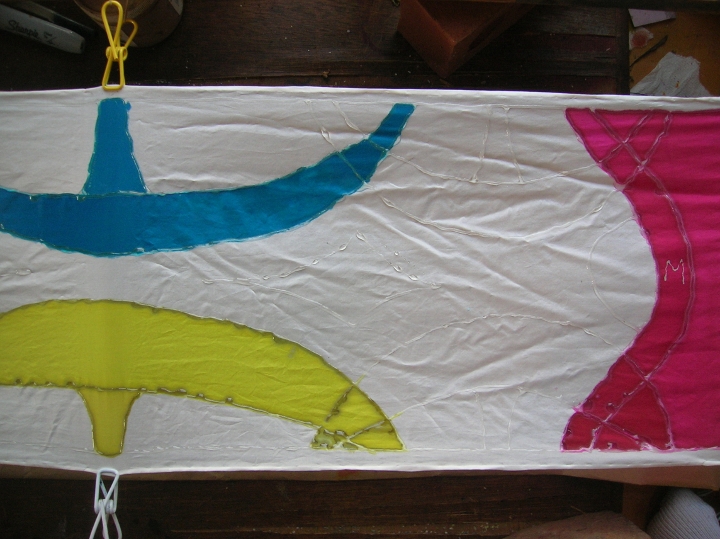
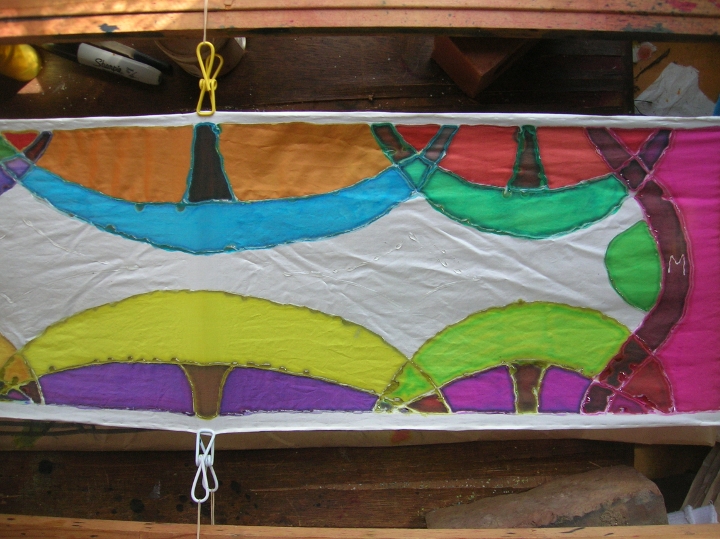
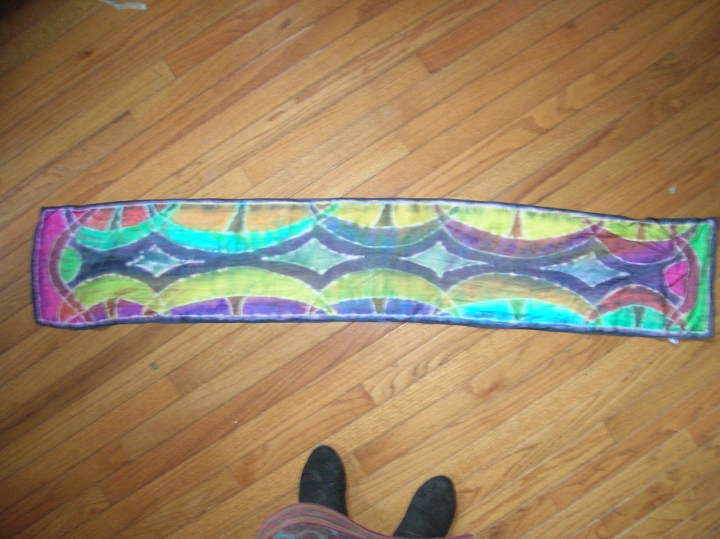
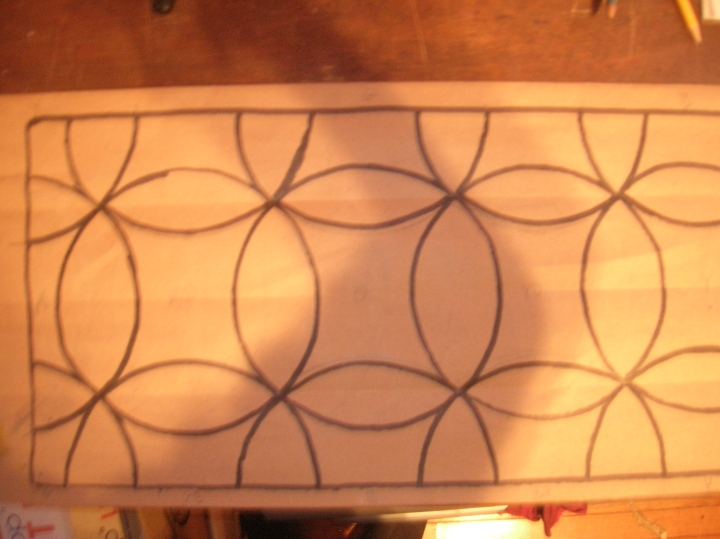
So when I started making test scarves for the painted tie, in July, I decided I wanted to use black resist. When I mixed black dye with my favorite sodium alginate resist, the thick gooey resist fell apart, got all watery. So, no. Can’t do that. Wonder why. So I bought some black water-based resist online, and it was horrible, quite unstable, washed right out. That’s the resist in the square scarf above. Useless. I left a bad review. I ordered new sodium alginate and tried again. It made a perfectly good resist by itself, but something about the black dye just destroyed its thick viscousness. Shrug. Okay, then, I’ll use clear resist.

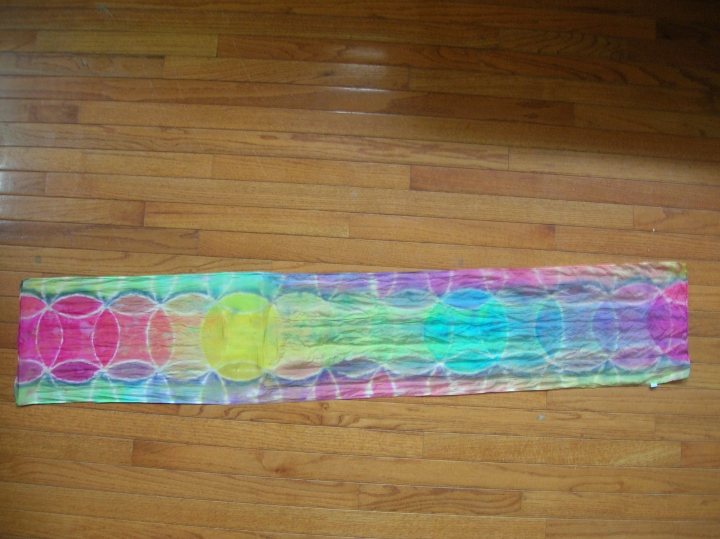
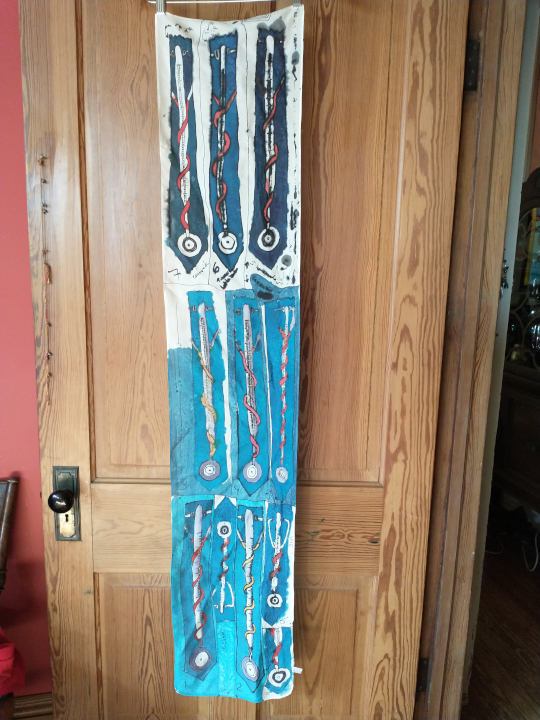
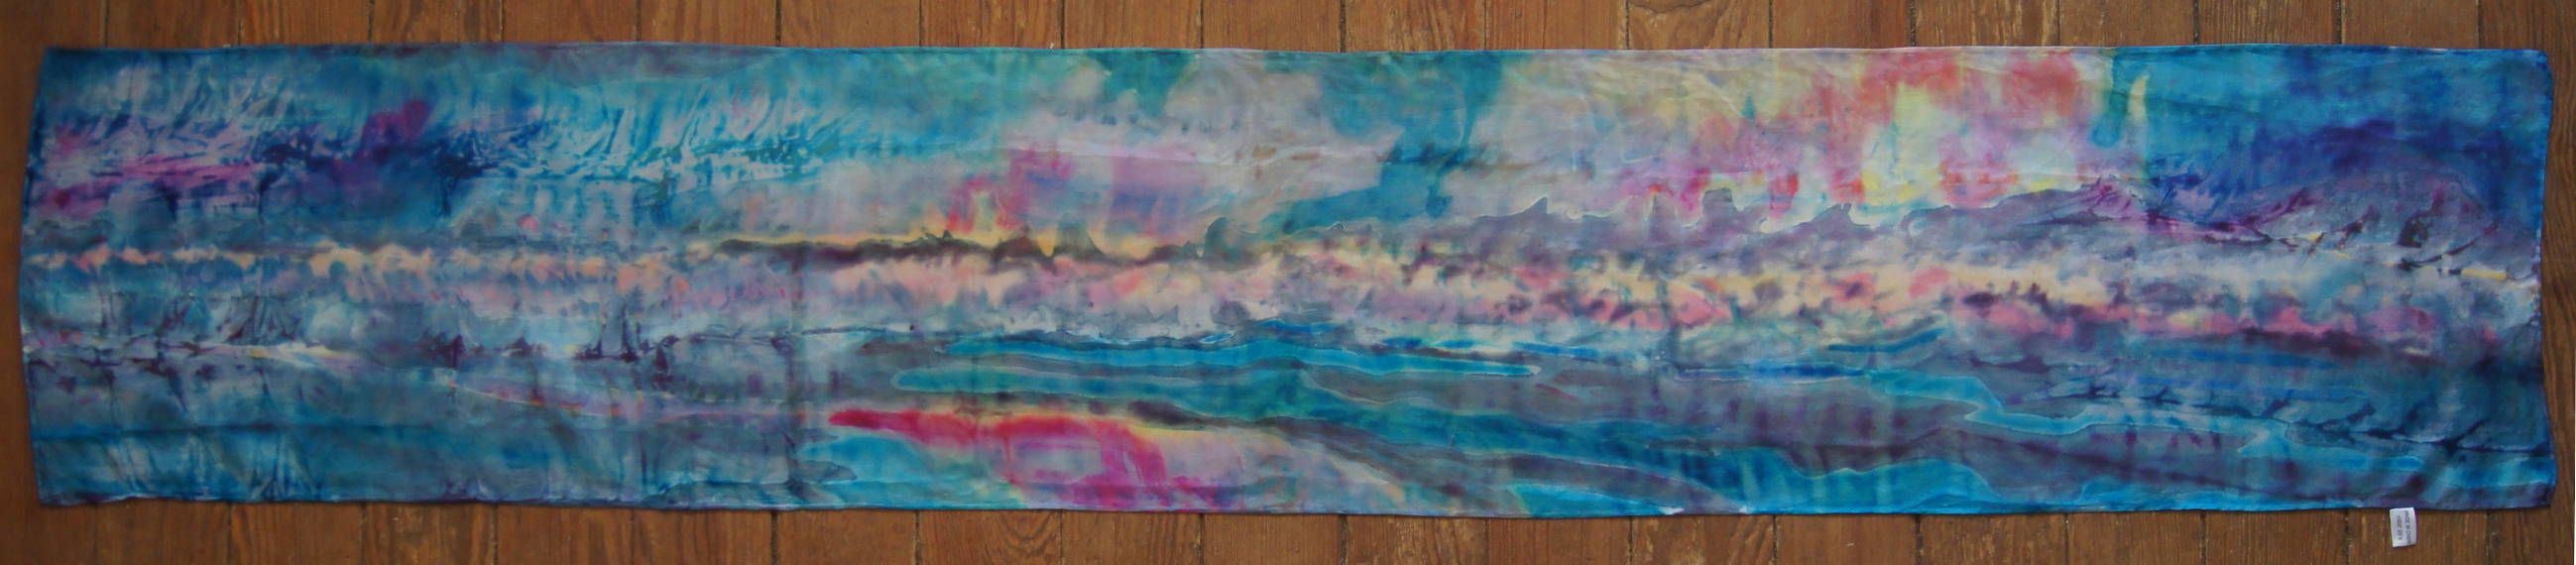
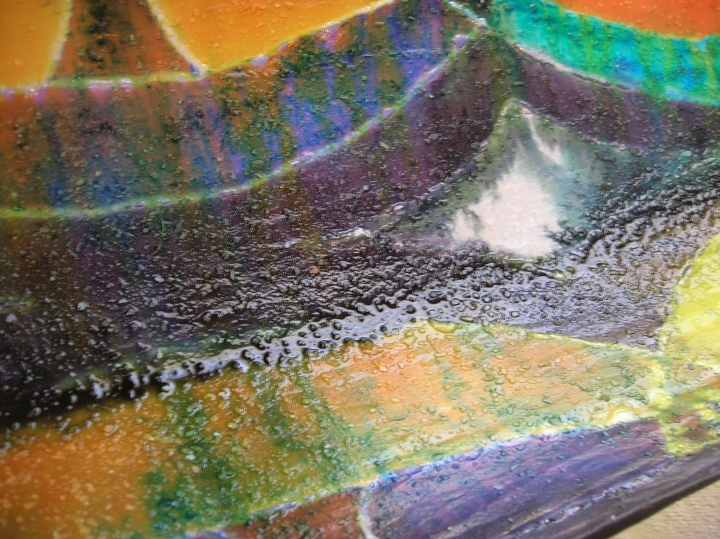
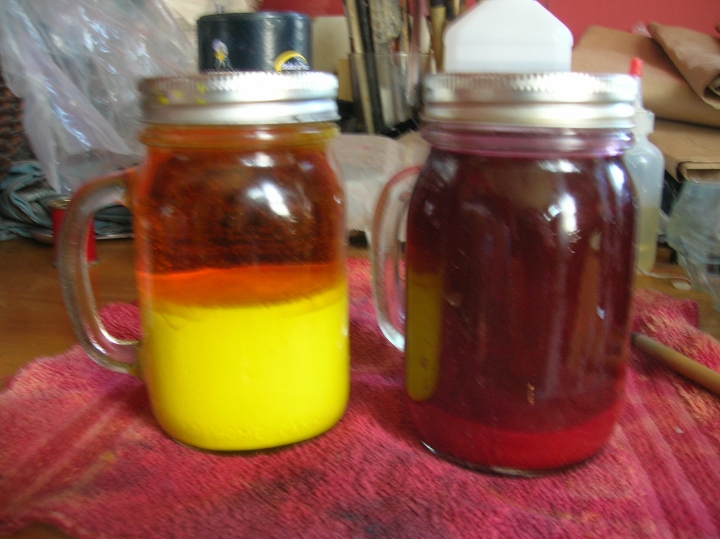
I did a bunch of tests for the tie, on 60×10″ silk habotai scarves. I was trying to see what exact blue/black background would both take salt well (salt makes a cool texture), and would look good against the most crimson red I could get with a mixture of magenta and lemon yellow (both primaries).

I kept careful (if cryptic) notes, because it’s for a commission, and I don’t feel as comfortable being all inspired and slapdash if I’m trying to produce high quality work. And arrived at a need for further tests. hah. The black dye was way too strong, and wouldn’t spread at all on the scarf – good for drawing precise lines that won’t move. I had to dilute it by 10x or more to get it to flow, and had to use 50:1 mixtures of clear water to black dye in order to achieve a silvery metalic kind of color. So I needed to toss the dyes I’d made up and start again, with even better record-keeping.

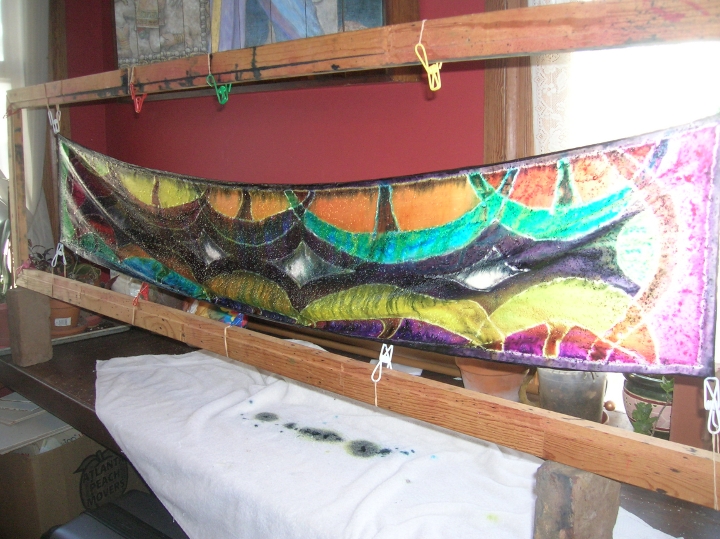
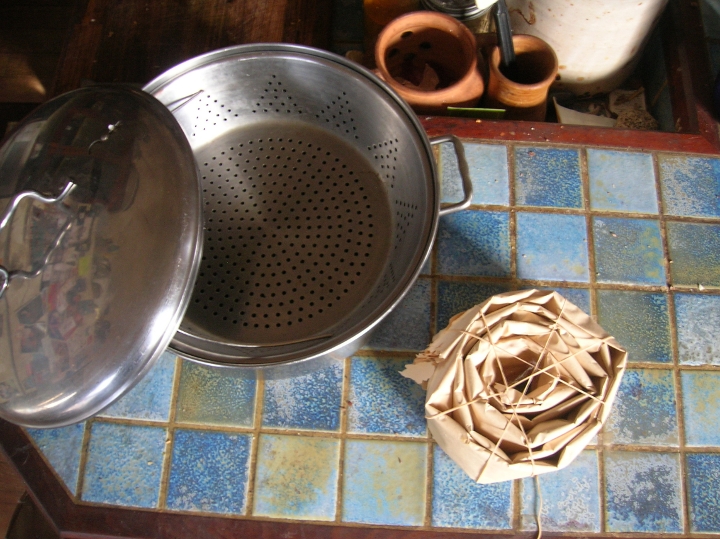
Then I steamed the test pieces. You have to steam silk to get dyes to set. I have a handmade steamer, from a stock pot with a steamer insert, and a six foot length of 12″ exhaust duct, all taped together. Because a professional steamer costs $700, that’s why. People who come to the house wonder if it’s a bong.

It was very disappointing to discover that a very great percentage of the blue washed out, as well as lots of the yellow. for that matter, the black was mostly down to gray after washing out the steamed scarves, even tho the black was so strong when I painted it on. So, more testing. I threw out my big tubs of dye.

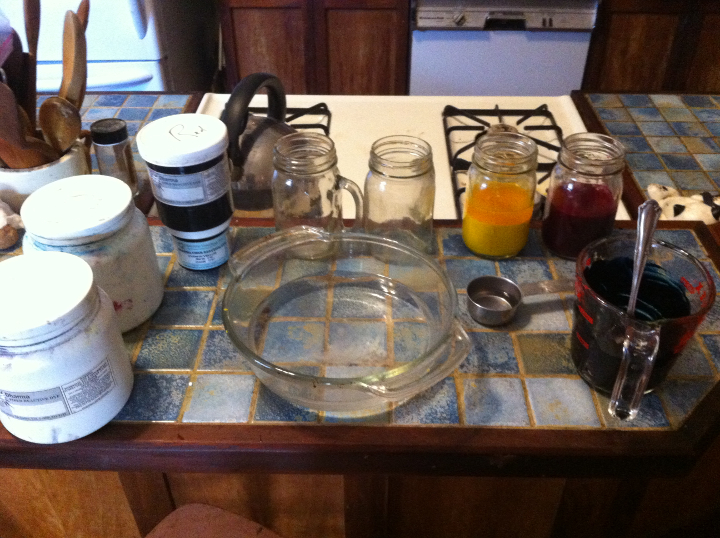
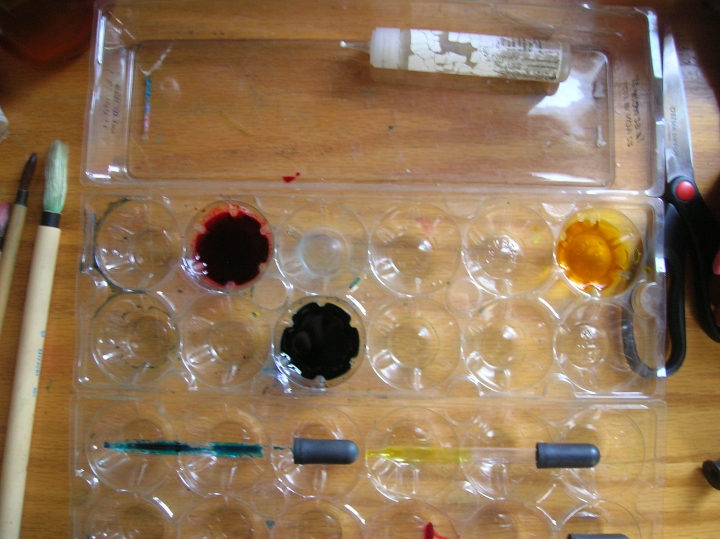
I went to Dharma Trading and ordered 2oz jars of the four colors I use (there are close to a hundred colors available), the same colors you use for commercial printing, called process colors. Primaries of a sort. Not blue, red, yellow and black, but cyan (turquoise) and magenta, yellow and black. You can make all the colors with them, but cyan is a greenish blue, and magenta is a bluish pink. There’s a learning curve.

I also ordered a dozen 11×11 habotai handkerchiefs to use to test the new dyes, and the new paints. Next post.

Sodium alginate needed mixing. After seeing how it fell apart when I added black dye, I was afraid it might be old, so I ordered new alginate, and it made up resist beautifully. Way stronger than that nasty commercial resist. I just had to move on from the idea of using a black resis for this design.

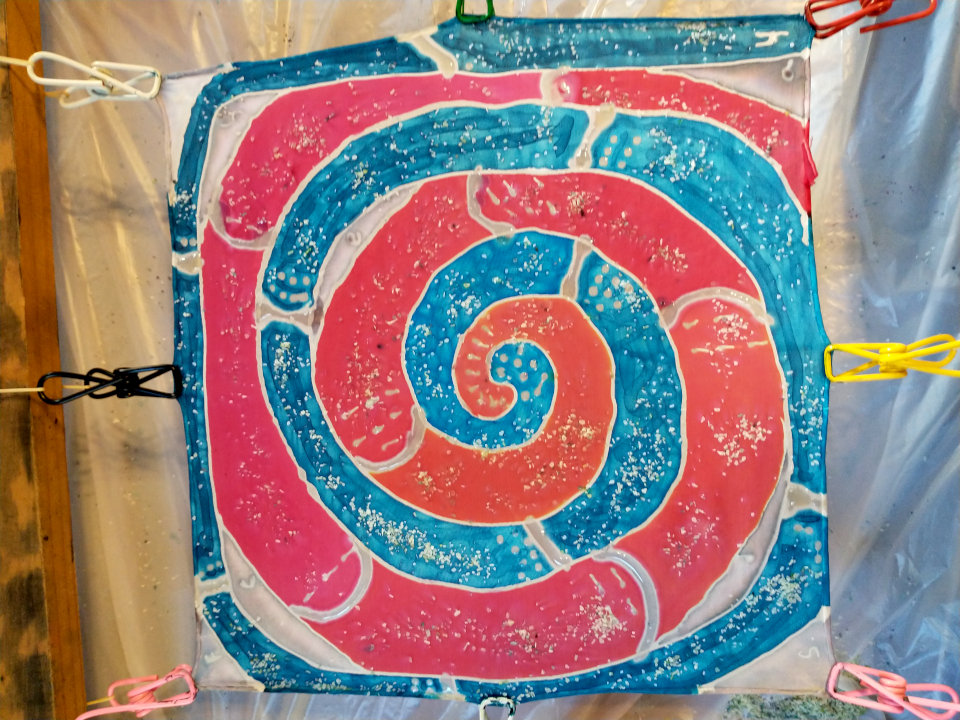
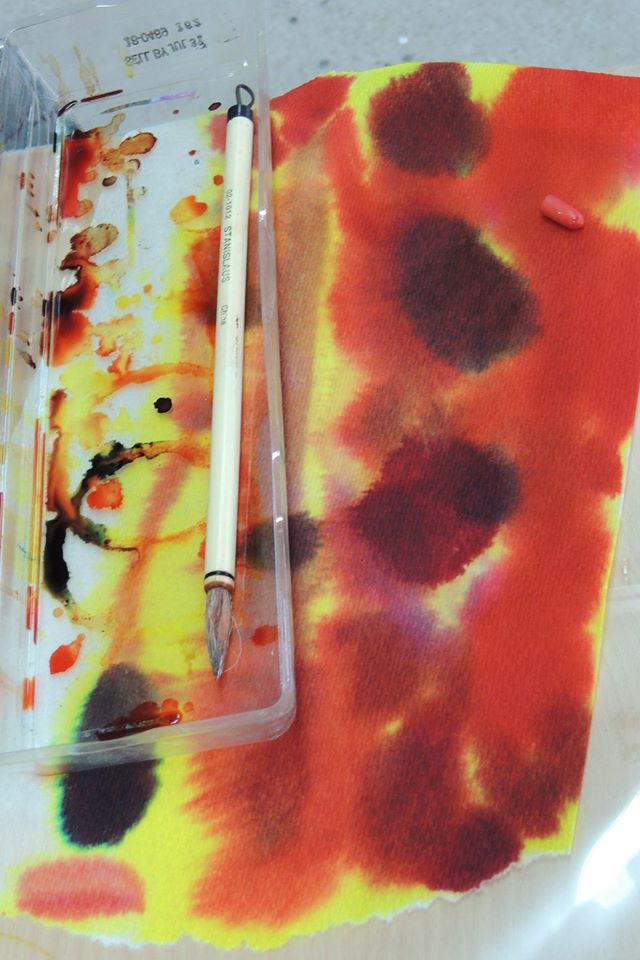
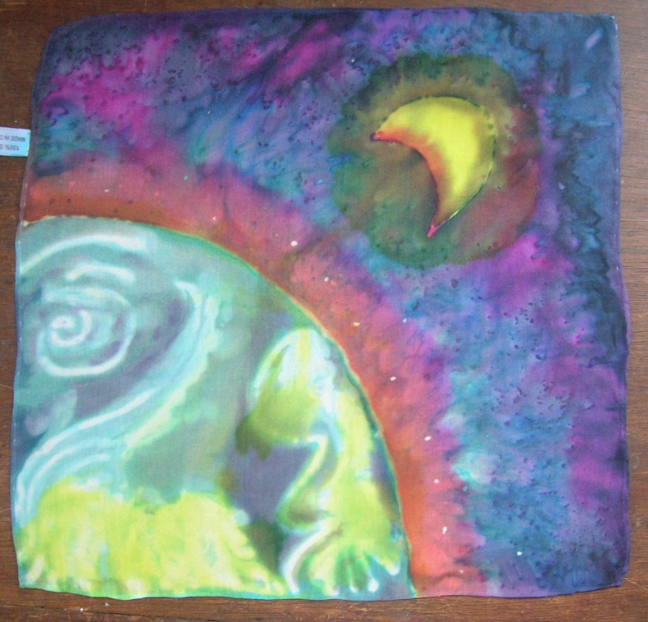
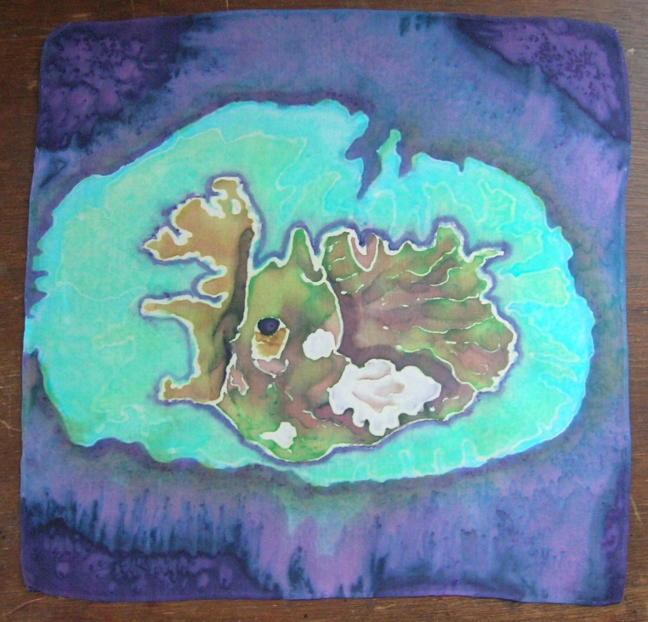
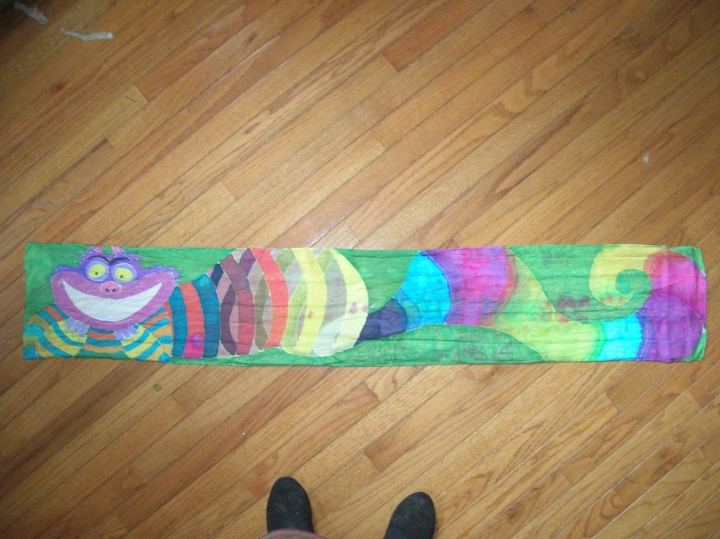
It still took another few weeks to get the acrylics all delivered and ready to go, so in the meantime I took five handkerchiefs and did five different tests. First off, I got one handkerchief wet with vinegar and let it dry (I read somewhere that adding acid to regular fiber reactive dyes turns them into acid dyes, which is what you should use for silk and wool (because bases ruin protein fibers like animal wool and insect cocoons). (don’t take my word for it, that’s why I was doing the test). I did two of the same design – the eye nebula – with one on a vinegar soaked scarf and one not. It was good to splash dye around and not count drops and record amounts.

The scarf above is the one dipped in vinegar. The one below is the same scarf, after messing with it for awhile
This scarf is a completely different scarf, and the picture is after messing with it as much as I thought I could

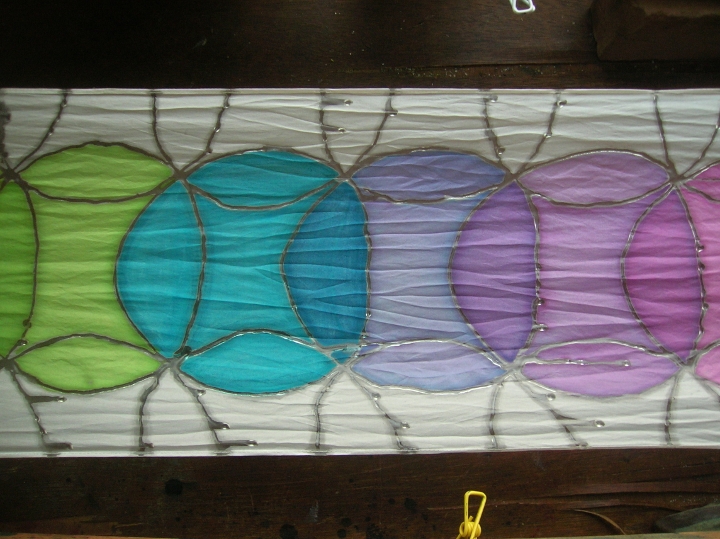
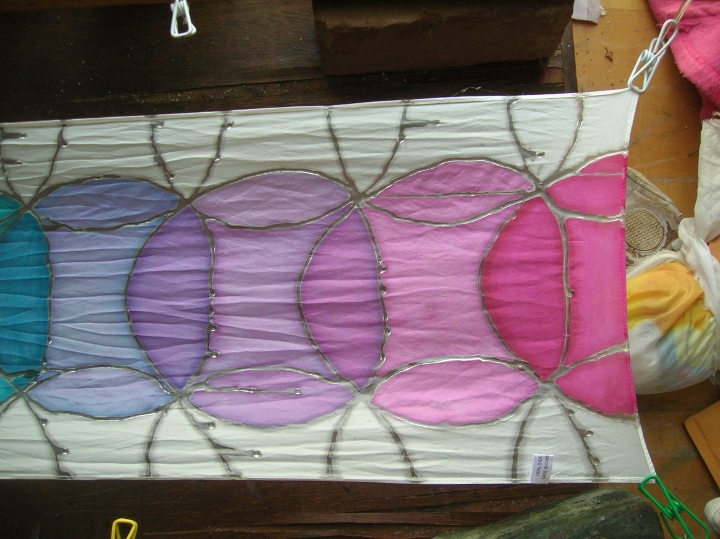
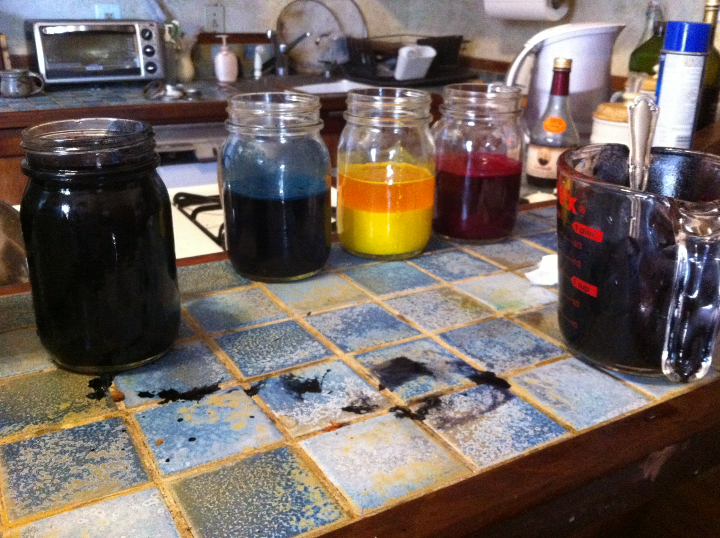
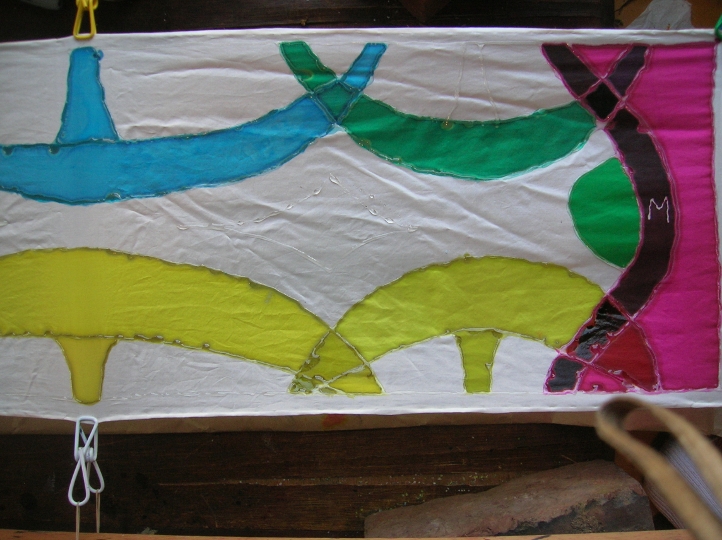
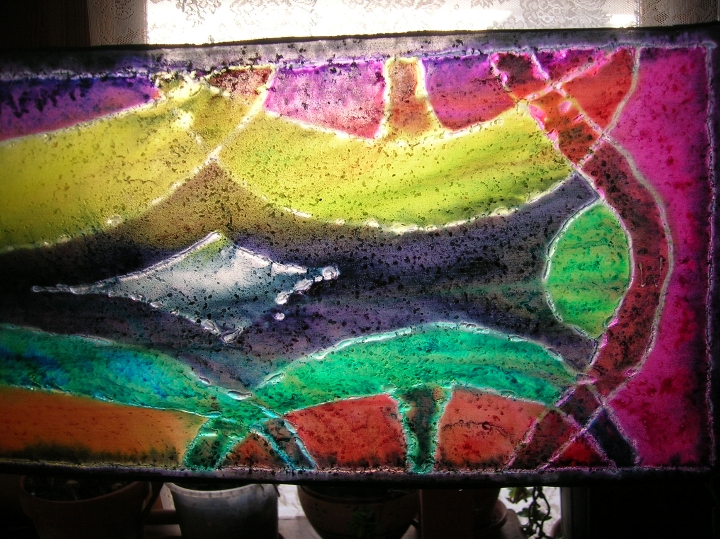
But then I got the notebook out and mixed up all the various range of mixed blues and mixed reds. I tried not to repeat any of the ratios over the range of 3 pieces (just in case there was one sample that was exactly right). I studied my notes to see what I’d already made a sample of, and tried to work in a very wide range of mixed colors (like 50:1 to 1:50). A nice red subject, and nice blue background with salt stars. the colors of the tie. A nice clear blue that’s not too dazzlingly turquoise, and a redder-than red that wasn’t orange. plus how to make a shape look like metal using diluted black.

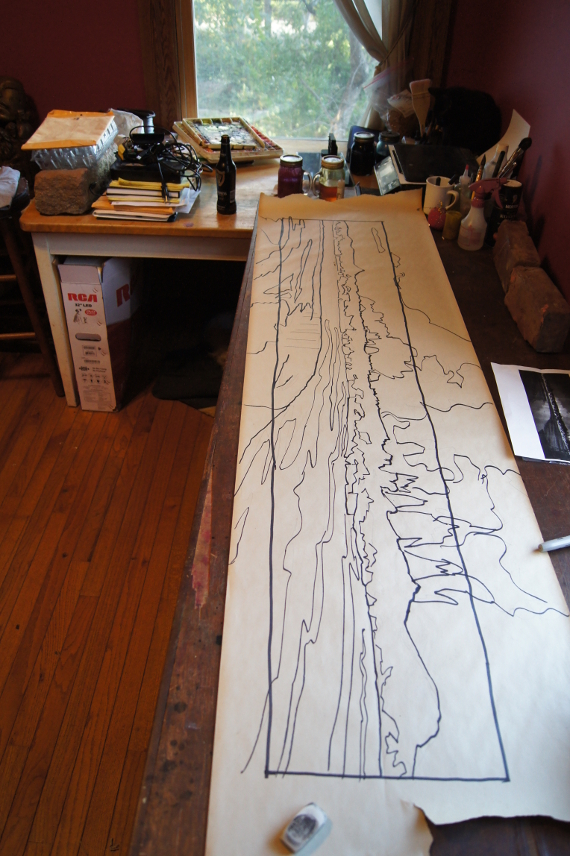
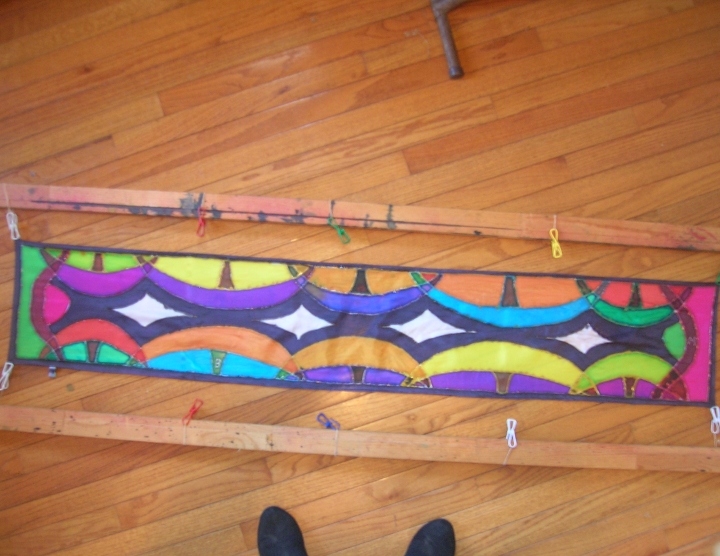
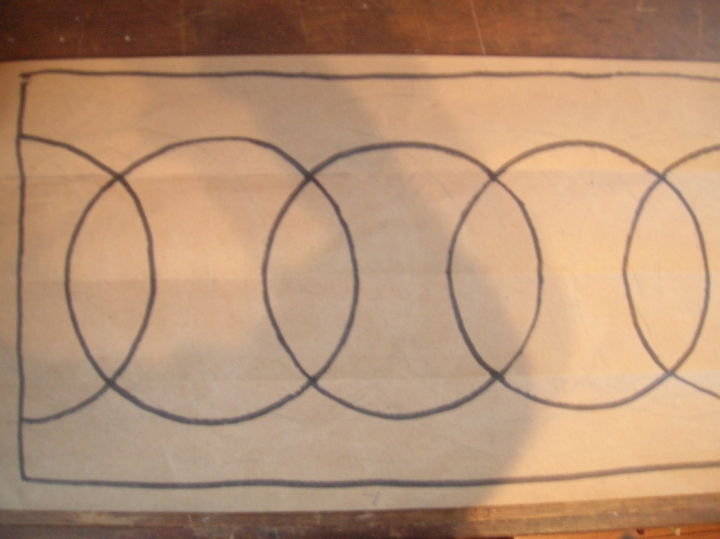
I hate grids. They’re useful for organizing things, it’s true. There’s nothing better than a grid for scaling up a drawing to fit on a wall. But I don’t like plaid. i don’t like normal color-chart marks. I usually design something in a circular format when i have to do color ranges. A spiral, concentric circles, odd sinuous forms. Just not all squares, please.

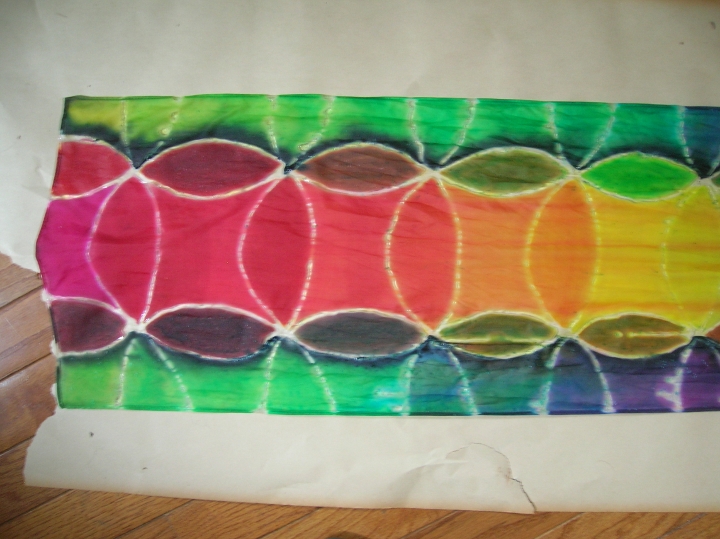
These were all designs of various combinations of red and yellow from 10:1 to 1:1 (I really didn’t want to end up with orange). Blue and black went from 50:1 down to 1:1. Even a little black makes any color darker.

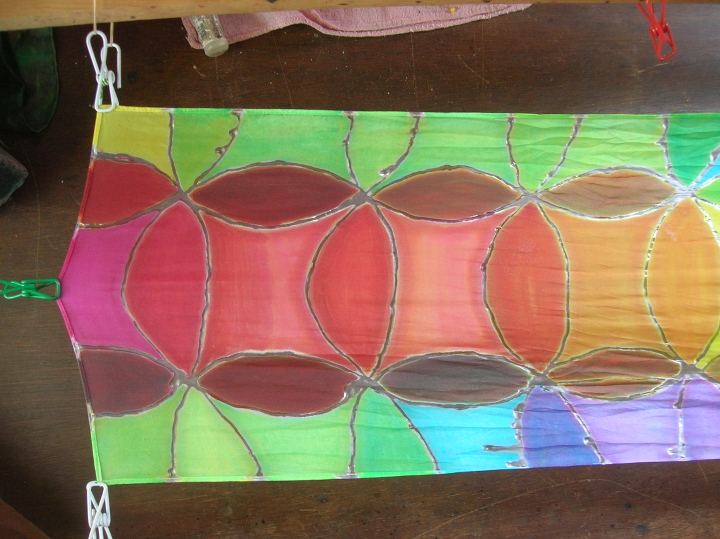
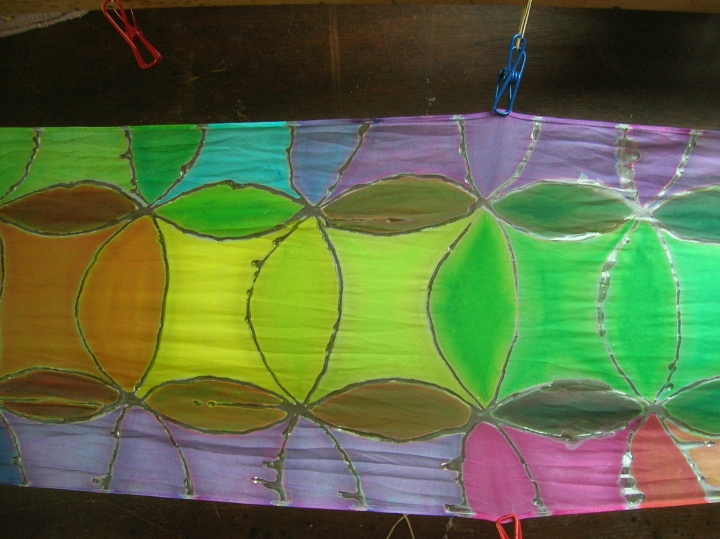
That’s something that’s different between dyeing and regular painting with pigments and a binder. I learned to paint avoiding the use of black many, many years ago (after accepting the gift of a pint of Guinness from a patron while painting the bar in which I was sitting, and putting black in everywhere, which totally messed up the delicate, nuanced portrait I had been doing so well on). So anything but black. Want a good dark? Try alizarin crimson (this was many years ago) and phthalo blue, with a touch of phthalo green for balance. Or ultramarine with burnt umber. Black deadens, robs the light from colors around it. I have trouble using black to this day. But in dyeing, you need black to make any kind of shade whatever. You can mix red, blue and yellow all you want, but it’s never going to be more than brown. A lovely glorious golden brown at that. But add just a touch of black, and it becomes a rich, dark color. So just a touch of black to blue makes all sorts of post-sunset blues, glowing blues. And here’s a good one – black and yellow make green. Yellow and blue make this nasty acid color, but black and yellow make a great olive green. The rules are different for dye.

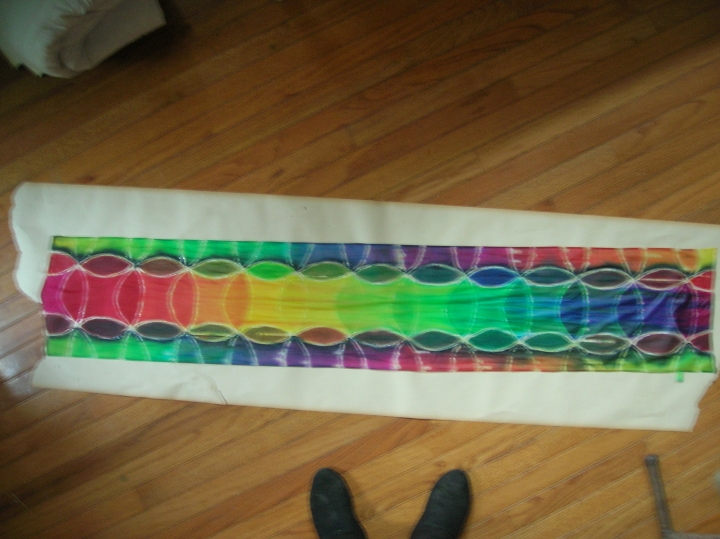
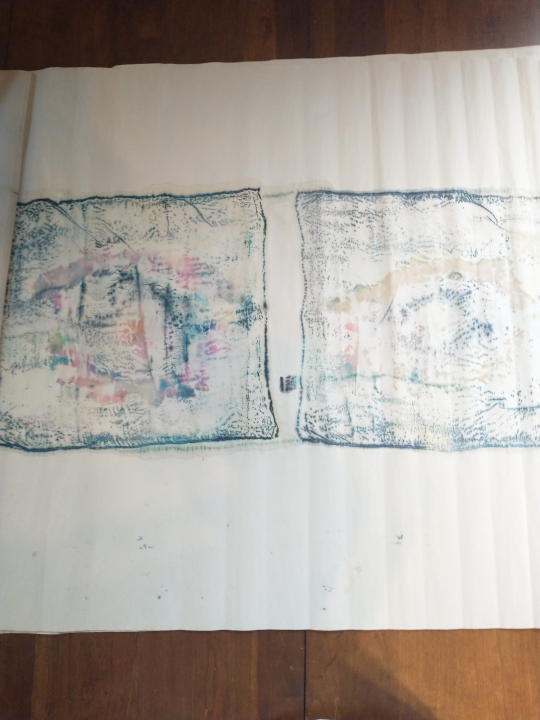
After letting them air dry for a couple of days, i took three sheets of newsprint and laid the scarves out not touching each other (because they would bleed).

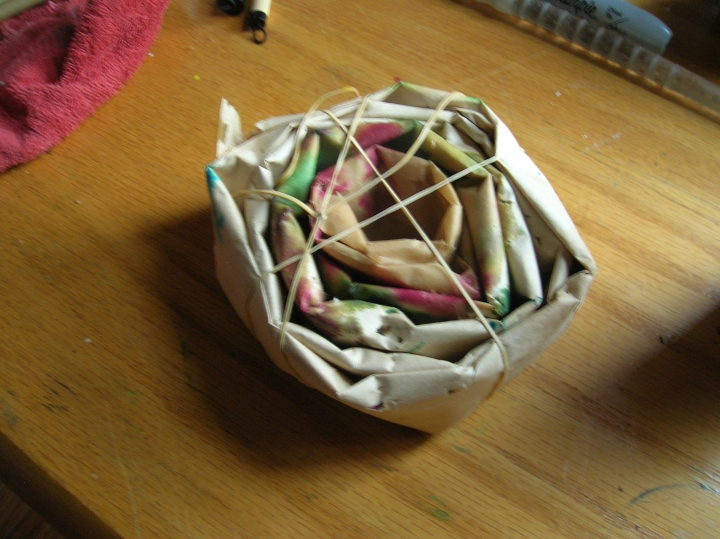
Then rolled the newsprint up and got out some craft paper to wrap the bundle in.

It’s important to seal the bundle so that it doesn’t fall apart when it gets wet. Wet paper has no strength. I’ve had dye bundles fall into the water inside my steamer. Not a good look. So I double them, and tape them strongly. Then I have to run a hole thru the top of the bundle and thread a hanging wire thru.

Then hang the wire at the top of the stovepipe and make sure the bundle doesn’t touch the sides of the pipe. Then a bunch of towels to keep the steam blocked, and a weight on top of the towels to hole them down. Easy peasy. Looks fun, doesn’t it. Looks really stable. What could go wrong with a six foot stovepipe topheavy over a stock pot full of boiling water?

Let simmer for hours and hours. Two, they say. But I’ve had things not even damp after two. I always overdo it. I’m not sure if you can steam something too long. I’m sure it’s possible.

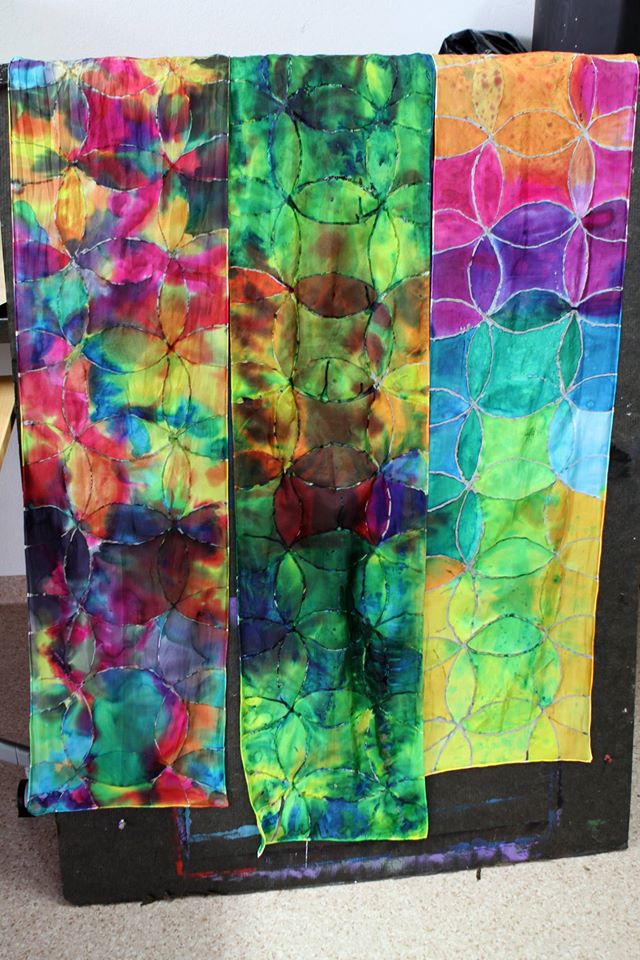
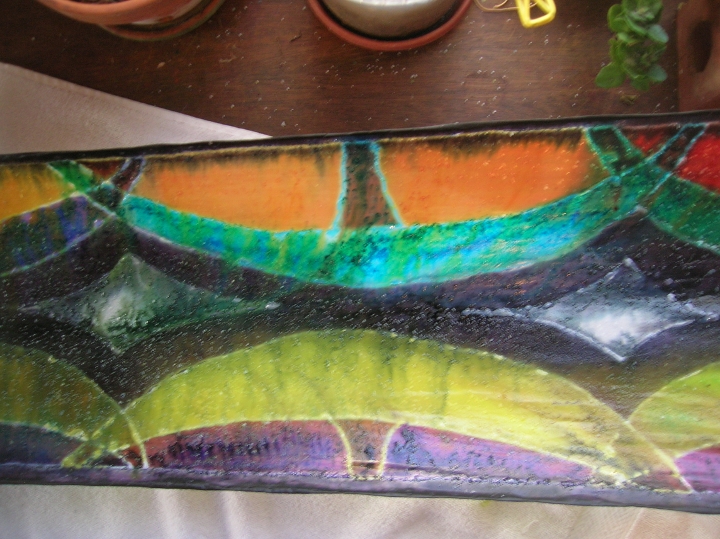
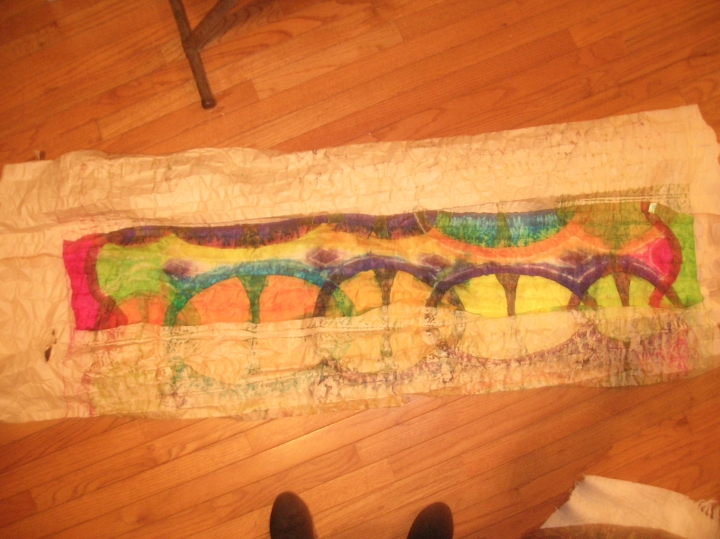
after being washed out and run thru a hot water cycle. You can see the bleeding marking up the paper. The new dyes held up very well, so that means I can proceed with the tie, because I know the colors are reliable. As far as that goes. Some of each color washed out. I can’t get an adequate blue for the background of the tie. I’ll need to do more testing.

There’s no use at all to compare how well the dyes stood up after steaming, or whether there was a color shift. These are things i need to look at for my notes, but because digital cameras and non-calibrated screens, there’s very little actual information I can get out of these photos.

All the same, these tests are quite useful. My notes give me the formulas for each experiment, and I can hunt and peck for the exact right color. Dyeing, like cooking, isn’t an exact science.

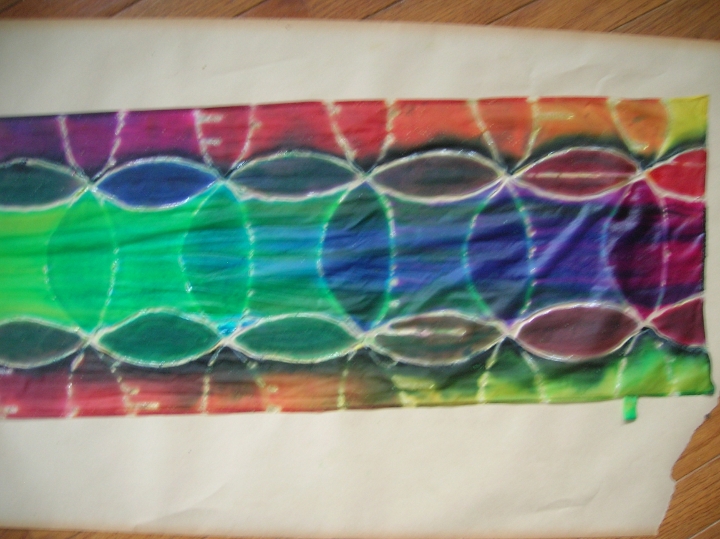
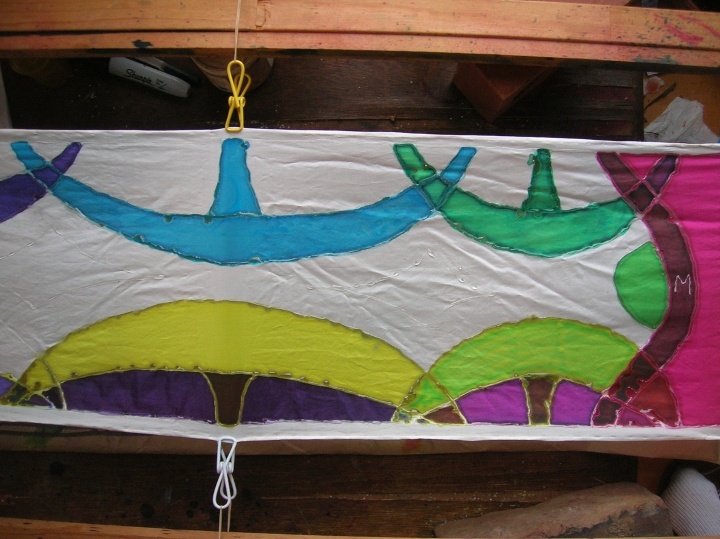
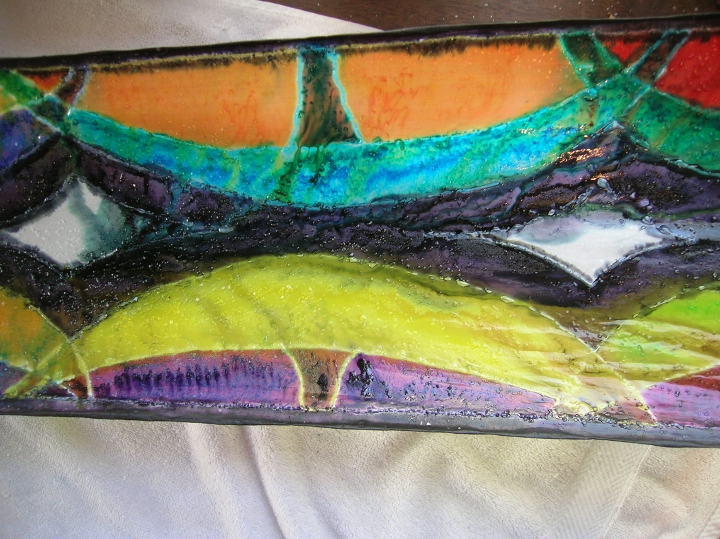
The blues are being tested not just for shade (cyan+black), but also what concentrations do well with the salt technique. I’m not getting very strong results from any of these samples.

It’s sucky how bad the colors show in these photos. To the eye there is a lot of variation of color in the reds and blues. On screen, it just looks like the same color with shadows in places. (But then, that’s how you make a shadow using dyes. Just add black, and it gets depth and form.

here’s how to tell if you’ve steamed your silk long enough. It bleeds all over the newsprint. In this case, the scarves washed mostly clear after a little time under cold running water, before i tossed them into the hot water of the washing machine. Hot water and commercial fabric detergent – synthropol or equivalent. followed by a vinegar rinse, because silk and wool need an acid environment to be strong fibers.

This is only the first part of this saga, because now I get to test a bunch of fabric paint, to see if modern improvements in materials and methods have made them a thing I might want to become involved with. Dyeing is a craft in itself, and in many ways very different from painting. But then again, it’s painting in another medium, and that makes all the difference. Plus, there’s a learning curve.

Stay tuned for more Experiments in Fabric Painting

project – lava silk painting

holuhraun, or nornahar as they’re calling it in iceland, the new lava on top of holuhraun, which is actually old lava.  from bardarbunga, a volcano that erupted JUST AFTER i left iceland this summer.  waaah.  i’ve been watching it on the web, tracking its progress.  and one day i came upon this picture:

IMG_38431

and couldn’t wait to put it down on silk.  it’s going to be one of my icelandic series of silk paintings, and by far the most difficult of them all.  i had to make three test scarves before i could be sure of the process.  and the next thing to do is make a production run of four.  but here is a sample of the irritations involved in creating a scarf way out of your own league.

the big technical deal about this scarf is that the warmest, most glowing and purest colors are right next to the most murky black, and the texture is something i can only consider sugar syrup for.  fine water-soluble resist on most of the other details, fine.  but for lava, only a smear of syrup over color is going to work.  but how?

SONY DSC

the first thing is always a template, unless i’m feeling bold, and if it’s a successful first try i’ll still transfer it to paper for a proper template.  once a scarf design is down and proven to be good, i roll it up and use it over and over for as many scarves as i feel the need to make.  usually i go for multiples of two, because i steam them side by side in a tall steamer.  in this case i’m trying to make a bunch of scarves for the giftshop in olafsfjordur (ugla (owl) gallery), so i’ll try for 4 of them.  but first i have to get it right.

IMG_3365

this is the first step of the first test scarf – put on the boldest orange where the lava will go.  and while i was at it, i put in the flames of the lava fountain above the growing cinder ridge of new lava.  the dark, gummy stuff on top is sugar syrup, squeezed from a bottle in rings, and then mushed and spread with my finger.  you can see a fingerprint in the middle.  i have already drawn in the resist lines – you can see this in the white of the bottom of the scarf.  and i have put syrup on top of the resist line for the lava, but i still drew it.

IMG_3842

here’s a closeup.  the purple is one of the streams of water that the lava is encroaching upon, which accounts for much of the smoke.  you can see the lava’s upper resist line well in this photo, with the flames above.

SONY DSC

this is how the first scarf turned out.  the good part is to find that the dye formula i’m using is washfast.  the bad thing is that i got the lava too black, and the black washed right into the lava color when it was wet, and ruined the effect.  because i made everything run after painting it all in, as i usually do.  the runs look cool everywhere else but the lava.  so i’m on the right track.

SONY DSC

the second scarf should have turned out beautifully, except i was experimenting with the steaming method.  i want to switch to my little steamer for travelling, and i also want to use fabric to steam, rather than paper.  but fabric is way too absorbent, and paper is less so.  the fabric (an old sheet) got wet, the scarf got wet instead of steamed, and ran all over my fabric.  so very little of the dye was retained on the silk.  it’s cool looking, but not what i need.  but i can see i was on the right track with the lava.

IMG_3839

so, third try is the charm.  this time i put in a bunch of colors before bothering with the sugar syrup.

IMG_3840

then when i stuck the syrup on i used a palette knife to smear it, and put it on rather more thickly in spots where i wanted more lava to shine thru.

IMG_3843

the black only went on where i didn’t want to have burning lava, and i had to make sure i was seeing the negative space when i put it on.  i will be careful not to let this part get wet so it doesn’t bleed.  usually when i use sugar syrup i want it to bleed later, for that ferny mixing effect of the colors.  but in this case, i’m using syrup because of its resistive properties, and don’t want to mess with it and dilute the color balance.

IMG_3846

okay, here i’m getting a little dark for my tastes with the surrounding night and reflections on the river.  to tell the truth, the dyes i mixed up were very strong, and didn’t flow the way i’m used to, so they streaked and i had to scrub the colors in while the surface was wet.

IMG_3847

then lots of red and everything finished and ready for water.

IMG_3849

and this is what heppened.  the blue bled the red and everything but those awful red lines in the foreground blended right down to atmospheric.

SONY DSC

but, this is the finished test scarf, all washed out and ironed.  it turned out fine.  i want to make the lava more orange, rather than yellow, but the techniques are solid, and i can start into production with the assurance that i have a viable design.

i think it’s lovely.

scarves for sale

jim yarbrough
jim yarbrough

in order to help fund our upcoming trip to venice, and coincidently because i have come across a bunch of scarves i made and hadn’t sold, i’m going to put up about a dozen scarves for sale, here on this blog as well as in our new etsy shop.  both jim and i will be selling the things we make in venice.  in his case, he’ll be making a pastel painting a day, and in my case, i’ll be making watercolor paintings and silk scarves, all with venice as the theme.

so in order to tweak my settings, i’m trying to download a paypal thingie, and trying to mark all my scarves with their own paypal ID, and all that stuff.  i’m a newbie, so this is going to be ugly until i catch the hang of it.  so please pardon the rudeness of actually trying to make money off my art.  it’s crass, but i want to go to venice, so i’ll beg.  or something.

SONY DSC

ORANGE SUNLIGHT.
this is an abstract scarf. i did a whole series of them when i first discovered the use of sugar syrup.  i’m not sure, but i might well have soaked the scarf in sugar syrup and let it dry, then twisted it lengthwise and dashed yellow and red, and maybe a bit of black onto it, and let it sit forever until the dye finished spreading into the syrup.  it’s a wonderful way to put color on silk, and this is the only one i have left of a whole batch of scarves that have flown with the wind.

SONY DSC

NEBULA.
this is one of my nebula series.  this one’s the eye of god nebula.  you can see the stars of the galaxy in the darkness, and then a nebula, outshining all the suns in the sky.  the stars were made with dots of resist, and the features of the nebula were made with sugar syrup for the spots of white, painted around with blue, then bands of purple, black, and red.  the crenellations of black in these rings were probably made by running clear water along right beside the freshly laid black.  and the texture in the inky blackness was made by pitching salt onto the fresh black dye.

SONY DSC

DRAGON.
my dragon series.  actually, jim did the drawing for the dragons, as he does so much else of the scarf designs i use.  there are two or three dragon drawings that i base my scarves on, and i’m not sure which one this is.  i still have all the dragon design templates, and can pull them out and make another batch any time.  they’re very popular, and this is only one of two that i still have (the other one is in green).  for this one the outer lines of the dragon’s form are in water based resist (sodium alginate), while the crest and the scales are outlined in sugar syrup.  to color the scales i first take red, and put just a dab inside the round top of each scale.  then i put a dab of yellow inside each scale right in the middle.  finally, a drop of blue goes right at the sharp tip of each scale.  after i’ve laid in all the colors for the head, the tale, feet, and crest, i lay in the background, using salt for texture.  and then, with careful abandon, i run clear water over everything, one section at a time.  so the head becomes blended, also the feet.  and with clear water i violate all of the syrup lines, running water over each one of them and wetting the dye so it runs all over the place.  you can see this best along the crest, where it’s obvious where the sugar line was overwhelmed by water and dye, which emerged from the crest and turned the surrounding background red.

SONY DSC

SEA TURTLES.
this is one of my most complicated scarves.  jim designed it of course.  i asked him to draw this scarf after going off to south carolina’s beaches one summer and just missing a nestfull of loggerhead turtles on their run down to the water.  my sister has several of these scarves.  the sand was done using a resist paste and a sponge, dabbing the pebbly design down on the white scarf and then coming back in with light blue or light brown.  the turtles and shells were outlined with sodium alginate resist, and the waves and tracks, as well as the details on the turtles, were put in with sugar syrup.  everywhere the syrup was put, water was put afterwards in order to make the colors bleed.  a really wonderful scarf, and the last one i have. iIt was a labor of love, and has more details than most of my scarves, and it’s absolutely gorgeous. you’ll want to frame it, but I hope you wear it.

SONY DSC

RUSSIAN BLUES.
because a friend of mine had a pair of russian blue cats, i made this design from a photo i shot at her place one afternoon.  they’re sleeping on top of a stuffed dog figure on my friend’s couch.  i made a run of these and this is the last one.

SONY DSC

CRANES AND STREAM.
too bad i can’t show this right side up, but it would take up too much of the page.  when i designed a set of kimono for my sister’s wedding, i also made the designs into scarves that went along with the kimono.  this one was based on my sister’s kimono, and there’s a standing dragon for her husband’s, which i don’t have a sample of.  but for this one, taken from the idea of japanese scrollwork, cranes hang out along a meandering stream enjoying the irises and wiggly fish in the wiggly water.  this is one of the only scarves where i left a lot of white.  the water was done with sugar syrup, and some of the internal features of the birds.  everything else was put in with alginate resist, or painted on freehand.  you will notice some places where the water has escaped the banks of the river.  we call that a happy accident.  as with all these scarves, there aren’t any more left of this particular run of scarf designs.  but i still have the templates.

SONY DSC

ALLISON WONDERLAND.
this cheshire cat is significantly altered from the disney version, while still resembling it.  it’s actually a color chart that i developed to use in my silk painting classes.  one version, which isn’t for sale, is all marked up with color directions in resist, and runs the gamut of colors.  this one plays with a gradation of blue from full strength at the head to very light at the tip of the tail, and goes from blue purple thru red and all the way to yellow on the body.  the background texture was done with salt.  i’ve never done a production run of these scarves, only the class examples, such as this one.

SONY DSC

KELP FOREST.
this is a fish scarf of my own design, based on the vast seaweed and kelp forests just offshore of most stretches of coast i’m familiar with.  the fish were outlined with water based resist, the seaweed was put in with sugar syrup, and after the background was put in (an ombre of blue and black fading to light blue at the top), the seaweed was washed over with clear water to make things run.  you can see how the blue shifted in the lower middle of the scarf.

SONY DSC

JUPITER’S RINGS.
this is my only planet scarf.  mainly, i’ve done planets in encaustic, and some of them quite big, showing the curvature of the planet as well as the gunge layer of atmosphere and space junk (in our case), and maybe a couple of stars beyond.  many of my planet encaustic paintings are 3 or 4 feet wide.  these scarves are tiny by comparison, and don’t lend themselves to roundness, so i decided to make one showing the planet all stretched out, the way you’d map a sphere.  it was done mostly with sugar syrup resist; no, i’ll say it was all sugar syrup, and parts of it were probably painted with syrup and let dry before using dye.  and then washed with clear water to make everything run.  i only did one or two of these scarves, because of the amount of work that went into them.  they’re really beautiful up close.

SONY DSC

SEA FISH.
this fish painting was a mix of the sea turtle idea and the seaweed idea.  i made wavelike forms with sugar syrup and colored them with vegetable and ocean colors, and then soaked the background to make all the colors mix.  the fish were protected from this chaos by water based sodium alginate resist, and weren’t soaked, but gently blended inside the lines.  except one or two places where the resist line got wet and broke thru.

SONY DSC

FALL PLAID.
and this scarf, not the last one i have, but the last one i’ve photographed.  it’s a fall theme, with the outlines of a bunch of leaves i picked while on a dog walk, colored in maybe somewhat like the leaves were colored (i made a bunch of these scarves, and got all fanciful with the leaf colors, but it started out with portraits of the actual leaves in their fall colors.  i put in sugar syrup wind gusts, and then drew a plaid pattern in the background, with lines of red, yellow, and blue, running clear water over the whole background and making the sugar syrup lines run along with the lines of dyed plaid.

***

as for the buy it now idea, funnily enough, i’ve got the wrong kind of wordpress blog.  i should be paying for my blog, and then i can install paypal and other plugins.  all i can do is put up a contact form.  but i can refer you to the etsy site, and link to each item from here, so i guess that’s what i’ll do.  not quite as crass as big BUY NOW buttons, but i guess that’s okay too.

i hope you enjoy the scarf designs.  they are all 11×60 inches, made of 10mm habotai silk bought as blanks from dharma trading.  these are all old scarves at this point, and their templates are rolled up in a largish box, ready to use for another batch, if the whim takes me.  however, at the moment i am making icelandic themed scarves, and working up a production batch of the three – no, four – designs i came up with based on my travels this past summer.  and during the next few months, i will be working up a whole mess of venice themed scarves.  so this will likely be the last of these scarves for some time, and once they’re gone i will have to be very whimsical indeed to run another batch of them.  except for the dragon scarves.  i always make them.

recipe for silk dyes

i’m tired of having to go thru my notes every time i get ready to mix up a batch of silk dyes. so i am going to write down the recipe here so i can just look it up when i need to.  this isn’t my own recipe, but is readily available somewhere on the internet, at dharma trading‘s information page, and paula burchs hand dyeing page, for instance.

first, i’m going to mix up a batch of what is called chemical water, and then i’m going to mix the individual dyes using this water.  i’m making magenta (fuscia), cyan (turquoise), lemon (i think) yellow, and better black.  these are the dharma names for the mx fiber reactive dyes i buy in one pound jars.

otoh, if you’re not into massive prepreparation, you can skip the chemical water step.  burch says “Instead of urea chemical water, I usually just use water with urea added (one tablespoon per cup, or 15 ml per 250 ml), or even just plain water, to dissolve the dye.”

burch: “In order to avoid problems with dissolving dye, first add just a small amount of water (or chemical water with urea etc.) to the dye, and stir it until it forms a smooth paste. Use lukewarm water to dissolve cool water dyes such as Procion MX, as hot water may encourage the dye to hydrolyze (go bad) more quickly than you want. You may add one drop of Synthrapol or hand dishwashing detergent for particularly difficult-to-dissolve colors.”

it should turn out to be a ph of 2.5 to 3.5 mx dyes on silk, just so you know.  you’ll want to test the chemical water, not the pots of dye.  i actually have ph test strips because of our family’s papermaking efforts.  i also have a food thermometer, but that doesn’t mean i use it.  which might be why my results always vary.

i’ve seen recipes for this water by the quart, using 3/4c of urea or 9 tbl (100 g), which i don’t know whether they’re equivalent or make a range, but here’s per cup, from prochem:
¾ cup (188 ml) warm 120 F (49 C) water
5 tsp (20 gm) Urea
1 tsp (6 gm) Citric Acid Crystals
¼ tsp (1.25ml) Synthrapol (detergent)
Water to equal one cup (250ml)

so that’s a quart of chemical water, or 4 cups. 20 txp urea, or 6 tbl, 4 tsp citric acid, or heaping tablespoon, tsp synthrapol, quart water.

i have 4 pint sized mason jars (actually 12 oz jars), and the mixed up silk dye corrodes the metal tops, so i have to keep replacing them.  can’t use them for food after using them for dyes, anyway.

i like my dyes as strong as possible, just because it’s easier to dilute them, and that means 2-4 tsp of dye per cup of chemical water.  i put the dye powder (measuring spoons i use only for dyeing) into a glass 2-cup measure (which you can use your glass utensils for food and dye, as long as the water runs clear and the glass isn’t nicked).  i add some salt, not necessarily because it helps make the colors brighter, but because it makes the dye easier to dissolve, as the salt rubs against it as i paste it up.  i add a little bit of lukewarm water and make a paste out of it, trying not to breathe in the dust.  a little more water prevents this.  when there are no lumps, which takes a bit, i add more water, and more, until i have a cup of chemical water and salty dye. (tho burch says salt makes the dye harder to dissolve in water…note:  word.)

based on my experience, i’ll use a full tablespoon of yellow and red, 2 full tablespoons (by full i mean heaping) of blue, and 3 or 4 tablespoons full of black, which i don’t use a lot of, and am sort of terrified of making too strong, even tho the dye sites all insist that you need twice as much blue as the other colors, and twice as much black as blue.  i lack the strength of will, and i can’t stand wasting thing,s or running out and having to buy more, or spending money.

so, that’s the recipe.  paula burch puts a tablespoon of urea into the cup of dye and never minds the chemical water, and otherwise it’s a quart of chemical stuff to a tablespoon or so of dye powder.  why do i have to keep looking it up?

IMG_3695

so, here i am mixing up the dyes.  the big bowl in the middle has got a quart (well, maybe more) of water, urea, citric acid, and salt in it.  only the tiniest bit didn’t dissolve, so i was careful not to pour it into the dye bottles.

i have mixed up the yellow (2 heaping tbs) and the red (2 heaping tbs), and now i’ve got the blue (4 heaping tablespoons) pasting up in the 2-cup measure.  i’m adding urea water from the 1/4 cup measure, a little at a time, and smoothing all the lumps out with the back of the spoon.  then i’ll add 2 more quarter cups, mix them in and pour the lot into an empty jar.  and the last quarter cup will rinse the 2-cup measure, and i’ll pour that into the jar as well.

of course everything gets rinsed until it comes clear between colors.  except that when i cleaned out the jars from the last batch of dyes, i didn’t quite scrub them, and there was a residue of blue left inside the yellow dye jar.  oops.  that will gradually taint the color, so i’m going to be working with blue green eventually.  grrr.  note to self…

IMG_3704

here’s the completed batch of dyes.  you’ll notice that the three primary colors have a lot less liquid in them than the black does.  because i measured a cup of chemical water as i mixed each color, but when it came to black, i emptied the dish into the jar.  and it turned out to be a lot more than a cup, so i was forced to mix up two more heaping tablespoons of black into a small amount of the already-mixed dye, and pour it back into the black jar.  ooops.  always measure; note to self.

IMG_3703

another good pointer is to have a proper surface to do this on.  a towel you don’t care about.  wax paper, plastic sheeting.  altho the tile itself seems to be impervious to the black dye, the grout is a bit more dramatic looking after i got thru cleaning up after myself.  note to self:  idiot.

IMG_3715

my hands are a different story.  some people wear gloves, but i wear dye stains like a badge of honor.  it’ll wear off by tomorrow if i do the dishes after dinner.  but tomorrow i will be starting the third test scarf of the lava in bardabunga volcano, in iceland.  i’ll have a post about that too.

new scarf designs

i’m designing a batch of scarves to send to the folks in olafsfjordur.  i’ve got three ideas.

one is the northern lights scarf i already do.

DSCN8454

the others are from photos i took while i was there this summer.  one up on the eastern valley where there’s still lots of snow and plenty of rocks,

DSCN8456

and the other of the vatn of olafsfjordur and its ring of mountains, taken from the bridge over the river (on the very day i saw a hidden folk jogging toward me on the bridge, and then he wasn’t there).

DSCN8455

here are the first tries at these designs (except for the northern lights one).  i am also testing my formula for making silk paints from mx dyes when i’m doing this.  and when i am done, i have three presents to send off to people.

now i have to refine them or reject them, and then do a production run of about a dozen or 1.5 dozen in all.  and preferably before xmas.

please let me know what you think of this latest batch.

silk painting workshop day 2

this is the result of two days of silk painting workshop.  i told the students it was the shortest 6 week class i’d ever taught.  because usually my silk painting classes are that long, but i showed them most of the content in only 2 days.  and it wasn’t even gruelling.  below is a sample of the range of scarves they produced: fran’s on the left, lara’s in the middle, alice’s on the right.  these haven’t been steamed yet, and your results may vary.  btw, most of these pictures came from the students, because i didn’t have time to take any photos during the class.

10255394_624553127652186_8148673039748662994_o

this is only the paper towel that metta was using to see what colors she had mixed, along with part of the egg cup palette she used.

10537980_624162097691289_6696252421028749778_o

and this is ida’s first scarf.

10384930_10152532135060479_555397055531582477_n

that’s a demo of some advanced techniques, namely the use of salt.  the idea on something with that little resist on it is to work quickly so the scarf doesn’t have time to dry before the area is covered.  drying would mean edges.

94e3e540-3be7-44f5-a7b1-dbe2fd83c783_MS

we were able to steam only two scarves during the class, and i had to do the rest of the steaming at home.  fran bundled up 4 scarves into one roll, stacking them in two layers, and another 4 scarves into another roll, and it took me all afternoon to steam them in our homemade steamer.  the stovepipe was made of plastic, and the longer it was heated the more warped it got.  it’s still usable after this, but it’s not round anymore.  there was an accident at one point, and again the steamer fell over with the scarf bundle inside.  but the reason it fell over was because all the water boiled away, adn the last little bit of water must have popped and exploded, and knocked the pipe off balance.  luckily there was no water to spill down the pipe, and so it only fell over, and the bundle did not get wet.  i put more water into the steamer once i’d set it upright again, and gave it another hour.  all told, the scarves steamed for about 2 hours each bundle.

the problem with this was that there were 2 layers.  the outer layer steamed just fine, as you can see by the marks left on the paper.  when the scarf bleeds onto the paper, it means that the steam has reached the scarf, and that means it’s set.  the inner layer of each bundle was still unmarked, which means i had to go to plan b.

IMG_1351

plan be was to get a towel wet and lay it over the scarf which was still sandwiched between paper, put the hottest possible iron on the wet towel, and steam it as well as i could.  after ten minutes of this over an 18″ section, i lifted the towel and saw the dye transfer, and then satisfied, i moved to the next section of scarf, rewet the towel in the sink, wrung it out and started again.  this took several hours because i had to do 5 scarves.  but i’ll be damned if i’ll see the scarves just wash out and fade away after all the effort the students made to make scarves they liked.

you can see all the marked up paper on the floor, the ironed scarves laid out over the transom, and the scarves i was still ironing on the table.  the steamer is the red tube sitting in the cooking pot and standing on top of a hot plate in the corner.  oh and there’s the iron in front of hte red tube.

IMG_1350

and this is the towel i used to steam the scarves with.  and this is early in the game, as well.  it got much more stained.  it will probably wash out, since these are unset dyes on cotton.  we’ll see, however.  i might just turn into tie dye over the next few days…

10407669_624553084318857_1387624635975948431_n

these are the lengths of cotton that lara and i dyed after the students went home on saturday.  i’m not sure if i can identify the techniques at this point, but the leftmost is scrunch dyeing, or low water immersion dyeing, the one with the circles was tie dyed with rubber bands.  the next one looks to have been stretched and painted, and the right one was folded and dipped.  the colors turned out very nicely.

10513314_10152181918740686_1328858376674533737_n

and then lara made pillows out of them right away.  very fast, lara.

10492262_10152183134020686_3593455257372696709_n

and that’s all she wrote on the class.  i have still to wash out all the scarves i was responsible for steaming, and iron them so they’re pretty, and then i may well include them in the group exhibition we’re holding on friday, of the work all of us have done at the residency.  if the students don’t object.


silk painting workshop, day 1

i had five students for the silk class i’m teaching in olafsfjordur, iceland this weekend.  three of them have come out as artists, two are still hiding under a veneer of respectability, but i proved them wrong.  and it was very international, with one participant from china, one from the phillipines, one from denmark, two icelanders, and me, a yank.

based on the work i’d done preparing for this workshop, which involved taking notes (oh no) and experimenting with dye concentrations and methods of fixing the dye (see earlier posts), i had come up with this simple (hahaha) color chart idea involving 12 circles.  the idea was to mix up a range of colors using red, yellow, and blue, put the 12 colors into an egg carton, transfer the colors to the scarf in order, and painting something contrasting or whatever on the margins, meaning the top and bottom widths of the scarf you can see below, if that makes sense.

teaching a course in iceland is super easy because everybody speaks english except to themselves, and some of what they say i can understand.  “this is going to be a long day” sounds the same in danish as it does in english, funnily enough.

what distinguishes artists from, say, bored housewives that i sometimes teach, is that real artists never pay attention to the rules.  i set out to have them all do the same scarf, and made them distinguish one from the other right at the beginning by putting their names or some other identifying mark on the scarf.  but i needn’t have bothered, because every single one of them deviated from the sample scarf my studio assistant (thanks fran) and i had worked on the previous week as a trial run.

even tho i had done a dry run, mixing up the dyes and chemicals, making a scarf, steaming it, finding out that the blue washed mostly out and correcting it with another application and steaming with an iron, i was kind of unprepared for even more to go wrong.  first off, i hadn’t made up enough sodium alginate resist, so we had to switch to sugar syrup right in the middle of one of the scarves.  and the resist i had made up was just that much too thick to actually apply without making several people’s hands cramp with the pressure of forcing it out of its squeeze bottle.  also, i used up all my dye powder making up enough dye for the class, and i’m really glad we didn’t get to the end of the actual mixed dye, tho we ran really close to out with the yellow.  i’m fearful for how well the scarves will set now.

IMG_1338

so this is alice’s scarf.  she mixed up the proper range of colors and then put them on the scarf the way she wanted, and shook off my offers of advice.  she wasn’t happy with a neat order of colors, either, and did her best to alter it using water and finally sprinkled-on dye.  anything to disrupt a neat, careful ordering of colors.  color charts are so boring.

IMG_1341

fran, who had to suffer thru the scarf we did together as a dry run, decided she wanted psychedelic, or stained glass, and went nuts with her scarf.  she had to stop herself in the end, as it was getting too blended.

IMG_1335

mette was the one who insisted she wasn’t an artist, but who then refused to go along with even the scheme for color mixing that i had worked out.  i don’t like that yellow, she insisted, and then used black, and made earth tones, and then made her scarf run, and then quickly did another scarf.  she worked quickly but carefully, and really knew what she wanted.  i was in awe of her ability to just take it and run like that.  turns out her dad is an artist, so it’s in her genes.  hah.

IMG_1337

and here’s ida’s scarf.  she too declared she wasn’t an artist, and of all of them she was the one who followed the plan i had laid out.  unfortunately i saddled her with the range of colors i had mixed up as a demo, so i’m not surprised.  she was terribly unhappy with the resultant color chart, and was encouraged to go over the colors she didn’t like (those horribly acid yellows and greens) with colors she liked better, and tomorrow she will be making a scarf all on her own with no help from me.  those who know her insisted that the scarf she did today was nothing like she is capable of, so i’ll be really excited to see what she does in teh morning.

IMG_1339

then there was lara, who also took no mind of the way i was planning to go.  she even voiced her dislike of the pattern i made them all draw, and after a very few minutes gave up on the colors she had mixed into her egg carton.  which is great.  and when it was still wet, she took it off the stretchers and hung it, so that it dripped and ran all over the place.  in the end she was very happy with it.

IMG_1340

here is lara’s second scarf.  she took the sugar syrup resist and made her usual doodles, then slapped all sorts of blue and black dye on it, was surprised when the sugar syrup ran, which it’s supposed to do, ruining her design but giving her another design that she was just as happy with.  i like it when students are happy with their work.  it’s a good sign of a well adjusted personality.  me, i’m never happy with my work, but that’s something else again.

i’m afraid i don’t have a picture of my sample scarf.  but we’ll be steaming these scarves tomorrow, and depending on the results, we plan to exhibit them at the group show we’re having next week.  i’ll put up another post tomorrow about how it all came out.

in the end, the students ran right thru the scarves i had intended to take a full day to make, and half of them did two scarves.  the other half, ida i’m talking about you, need to make their second one tomorrow, and then i’ll do a demo of the advanced techniques, simply because we’ve run out of scarves.  they all left after a long morning session, and will be back tomorrow for the steaming, which i’m praying goes right for once.  often the colors wash right out, and i really don’t want that to happen because these scarves turned out so nice.

when the rest of them had gone and i’d had a little lunch and a wee short nap, i went back with my soda ash, and lara and i dyed a bunch of cotton fabric using as many techniques as i could figure out.  there’s the soda soak method, there’s the low-water immersion method, there’s the fold and dip method, there’s tie-dye, there’s adding the soda ash to the dye mix, and direct painting onto soda-soaked fabric.  when we’d done, we had one jar and 4 plastic bags to go downstairs and sit next to the hot water pipes all night, and one rolled up into plastic that we forgot to take downstairs and will therefore batch at room temperature all night.  we will unwrap and wash them tomorrow after everyone else is gone, jsut so they have a chance to batch (cure and set) the longest so the colors have the best chance to develop.

silk painting tests

i’m going off to north iceland for an art residency in july.  lucky me.  i want to thank everybody who made it all possible, and you don’t know who you are but thank you anyway.  while i’m there, i’ve been asked to teach a workshop on silk painting, and these are the notes i took while i tested my materials and lesson plan.

see, i’m not a teacher type; i’m more a cheerleader.  my methods aren’t methodical enough to pass on, and my main point is that there’s a learning curve, and you’ve got to get in there and learn by experimentation and practice.  i just teach you how to mix up the colors and apply them, really.  and encourage the artist within to come out and play.

my philosophy with regards to art materials is to cut out the middleman.  i make all my own art supplies whenever possible, and the mystery is gone for me, while other people are bewildered by the hype.  so i will be showing my students how to mix up their own dyes, instead of offering handy little bottles of proprietary mixtures that nobody knows what’s in them.  i could go on ranting, but i won’t.  you can always go back to working with the little bottles.  they are admittedly more reliable, but that’s anathema to a process artist.

so what you have here is a blog post about all the testing i have to do with my materials in order to get ready to show people who have no experience everything i know.  which, i know, right?

first i mixed up a batch of mx fiber reactive dyes.  i use cyan (green-blue), magenta (purple-red), yellow (and black) as my primary colors, and mix every other color from these three, watering it down to produce light shades, and adding black to darken the color.  i tested these dyes on some handkerchiefs all stretched out next to each other on stretcher bars.  i painted one handkerchief a day, trying to test how quickly the dye mixtures would deteriorate, or become weaker.  and really i found no difference, even after a couple of weeks sitting on my table in mason jars.

FORMULAE (first stab)

first i mixed up a big jar of chemical water with which to mix the dye.  the recipe calls for a cup of water total, i mixed up a quart and a half.

Chemical Water (from pro chemical)

3/4 cup (188 ml) warm 120F (49C) water
5 tsp (20 gm) Urea (optional, a wetting agent)
1 tsp (6 gm) Citric Acid Crystals (or 11 tsp distilled vinegar)
1/4 tsp (1.25 ml) Synthrapol (detergent)
Water to equal one cup (250 ml)

this is mixed up and kept in a closed jar forever, kind of. to mix up the dye, you take a cup of this chemical water and very slowly mix it INTO several teaspoons of powdered dye, making sure it’s dissolved, and trying not to breathe any of the powder.

Water Based Resist

1 tsp sodium alginate (a little goes a long way)
couple of splashes rubbing alcohol (wetting agent)
1/4c hot water
1/2 teaspoon urea
pinch calgon (water softener)

splash a little rubbing alcohol into a jar containing the powdered sodium alginate.  then dissolve the urea and calgon in hot water, add the alginate/alcohol mix and stir until well blended. it’ll be way lumpy at first. let it sit in the fridge for a couple of hours, or overnight.  it should have the consistency of cold honey.  then ‘pour’ it into little squeeze bottles with small holes that you can use as applicator tips.

Dye Mix

for this first test batch, i mixed up 2 tablespoons of turquoise (cyan), 1 tablespoon of magenta, a large 1 tablespoon of yellow, and 2 tablespoons of black.  this is roughly what they recommend.  sort of.

now, for this first scarf, basically a color chart for the three primaries, i made a grid with the resist, and then painted in one column and row per day, so to check the life of the dye.  a yellow stripe, a red stripe, a blue stripe, a black stripe.  as you can see it makes no or little difference how old the dye was (only 5 days, not much of a test).  the first day was the extreme left column and bottom row, and you can see the numbers 3, 4, and 5, which are still marking the day’s work even after i hit everything with clear water, which i tend to do because it’s good to see how well the colors move when wet.

here are the results of my first test, a batch of 11×11 inch silk scarves.  i’m showing them to you after they were finished and washed and ironed, so they’ve faded all they’re going to.

DSCN8119

the next one was a nebula scarf, where i put down ‘stars’ with tiny marks of alginate resist, and star-formation areas with sugar syrup resist, then wetting the whole thing and tossing salt onto it,  you can’t really see the stars in the finished scarf, so that means the resist wasn’t resisting enough.  the sugar syrup moved well, dissolving into the dye, making interesting runs.  and the salt did what salt always does, and collected the dye to itself, making great splotches and streaks.

DSCN8118

the earth and moon was more of the same, only the resist lines were important and were supposed to hold. you can see where the moon bled out on the back side, so obviously it was crying out for another resist line over the first one, and i didn’t catch it in time.  the stars inside the gunge layer around the earth, and out in space showed up pretty well, so that’s good, and the sugar resist lines on the face of the earth also worked nicely.

DSCN8117

now for some detail work, to see how that holds up.  this is a rather fanciful map of iceland, done up as a troll but still retaining all the landscape features (that big white blob is a glacier).  it was all done with water based resist, and i only used salt around the edges.  the resist held up nicely.

DSCN8114

this is a dragon, taken from a pattern jim drew years ago, when i first started doing dragon scarves.  it’s the one most people want me to give them, so i do a few every year from the same pattern.  i’ve also made a quilt from dragons.  fun to work with, and such a symbol of strength; a great scarf to wear.

anyway, it reacted just as it always does. the blue was rather stronger than the other colors, tho.  else that or the yellow and red were very weak.

DSCN8115

my conclusion on this test was that the blue was too strong.  2-3 times the strength of the red and yellow.  so the next batch called for an adjustment in strength.  but for now, i continued with the dyes i had, and started on a new design.  i need something easy so that beginners can complete a scarf they can be happy with, and something challenging so that seasoned artists can pick up the deeper principles of the craft.  and as you’ll see, i came up with a series of somethings that were too hard for me to complete without drastic and embarrassing mistakes.  so the next few pictures detail scarves i will not be teaching, just so you can follow the process.

DSCN8168

first, draw a pattern.  i did this one freehand, and never really liked the rhythm of it.  but figured i’d go with it.  it’s a color chart, of sorts, and i want to give the students all the experience making a color chart provides (learn your materials).

DSCN8163

then, transfer the pattern to the scarf using resists.  you might be able to see that the lines in the middle of the scarf are thicker, gooier than the rest of the lines.  the middle lines are sugar resist, and the outer lines are alginate.  this will make a difference later, because i’m going to violate the sugar resist lines to make the colors run, and will try my hardest not to violate the alginate lines.

DSCN8166

a close up shows the goopiness of the sugar syrup.  as ever, the idea of the resist lines is to keep the dye within boundaries, and that means that the resist lines need to be solid, joined at every part, or else dye will seep thru even the tiniest gap.

DSCN8171

and here are my primary dyes.  i’m not sure if i have a picture of the end result, but i have put a measured amount of dye into the cups at these positions, and will be mixing the primary colors into the empty cups in order to make every color in the rainbow.  i will be filling in the scarves in this order, also.

DSCN8183

first i put on these three primaries.  you can see an m on the left, where i put the magenta.

DSCN8187

the process i went thru here was to mix a certain number of drops of yellow and a certain number of drops of magenta into the empty space between red and yellow, and to call this orange.  same with the green, a few drops of yellow and just a touch of blue.

DSCN8190

as it went on, i mixed other colors, here a purple and a red violet.  and it seems i’ve put the complementary green over the red “m” stripe.

DSCN8193

the purple is the complement, or opposite, of the yellow. the little stem between the two shows what they look like mixed together.  i put a coat of yellow into the stem, and when it dried i put a coat of purple over it.  it makes a nice rich brown.  all the complements should mix to be a nice brown, since they contain all three primary colors.  how this works in practice isn’t so easy (see what happened to the “m” line on the left).

DSCN8210

the colors on there now are, clockwise from top – turquoise capping orange, blue green capping red orange, a blob of green attached to the side of magenta (the “m”), yellow green capping red purple, and yellow capping purple.  these are the opposites on the color wheel, and make up half the color wheel, just done up differently.

at this point, i spent some considerable time touching up the colors, making the purple halfway in tone between cyan and magenta, making the orange look orange instead of red orange or orange red.  and of course, changing one color meant changing the nearby colors to harmonize.  all in all a couple of days tinkering with the tones.

DSCN8215

now i have put a black stripe into the space i outlined with resist, i believe it must be sugar syrup resist.

DSCN8225

and now i’ve drawn in chevrons in the middle part, and painted around them with black.

DSCN8230

and this is what it looks like before i start messing with it.

DSCN8240

this is a closeup of the before.  you can see where the black has started to bleed thru the sugar syrup resist line, especially to the right.  that’s because i didn’t let the line dry before painting,  with alginate resist, you can wait half an hour and it’ll be dry; with sugar syrup you can wait days if it’s humid outside.

DSCN8242

see those runs?  i took the stretcher off the bricks that was holding it off the tabletop, and turned it vertical on top of the bricks.  then i took my spray bottle and spritzed it a couple of times, and let it run.  when it was dry i turned it upside down and sprayed it again, and let it run.

DSCN8243

then i set it back flat on the bricks and sprayed it again (with a towel underneath), then took a large brush and clear water and violated all the lines, both sugar resist and alginate resist lines.  then i salted it heavily.  and then i went back in with strong colors and oversaturated the colors, just to encourage them to move and mix, and then i went in with black to violate the lines in some places, and sprayed it with water again.  i used all my kosher salt.  then i had to add more dye to the outside border to make it run.

DSCN8258

et voila.  a mess.

DSCN8252

i love making messes.

DSCN8245

this is what all this looks like up close.  when you get sugar syrup wet and pour salt into it, you get this gooey oozing glaze that dries to a crackly finish (if it dries at all).

DSCN8262

you can really see the salt.  by now the salt particles are dyed themselves.  i will collect them after i brush them off the scarf, and use them again for their interesting effects.

DSCN8266

the grandkid is holding the scarf wrapped in its newsprint.  i wrapped it the long way so to make a long thin bundle instead of a fat short bundle, the way you’d normally roll something 11×60.

DSCN8269

this is my steamer, a small vegetable steamer about 4″ high.  the dye bundle is all rolled up and tied with rubber bands.  there’s as much water in the bottom under the seive as the pot will hold without coming up over the holes when it boils.

DSCN8271

i put the bundle in a plastic bag and poked plenty of holes in the bag,  i rolled the top, and left it open.

DSCN8274

i put the bag and bundle into the steamer upside down, so that the bundle rests on the open rolled part of the bag, and allows as much steam as possible to enter the bundle, while protecting it from condensation dripping off the pot lid.  very important.

i put the lid on and steamed it for an hour or so.  it all depends.  some references say three hours, some say 45 minutes.  i always err on the side of boiling it to death.

DSCN8276

here’ s what the bundle looked like after steaming on the stove for an hour.  i took it apart and reversed the wrapping so that both ends of the scarf would be steamed.  how can i tell the one end was steamed?  there’s bleedthru on the part in the middle (which was the part on the outside), and so i reversed it and put it back in for another while, hoping to get both sides equally done.

DSCN8311

and this is what it looks like when it’s all washed out and everything,  it’s backward from what i’ve been showing you – ooops.  a lot of the black has toned down, and a bunch of stuff has washed out and faded, but the general color chart gradient shows up.

at this point i rethunk the design and did another one, this time without a lot of the black.  i thought the black in the middle was overwhelming, and thought i would reduce the space between curves to limit the black to only about half an inch.  i played with turning the curves into angular pieces, or intertwining colors intstead of having a neutral background.  but i wasn’t happy with the whole idea,

DSCN8306

see where the dye bled onto the newsprint.  this is a sign that the dye has been steamed, and is presumably set into the fabric.

DSCN8309

the second curves scarf design.  both interesting, both awkward.

DSCN8313

i even got out one of my old color chart scarf designs and did it up, hoping to finally make something i wouldn’t screw up (not suitable for class).  and in this case, the scarf bled on itself there at the middle part of the tail.  see the purple bleed spots? and thruout the scarf in other places.

so i gave up on those ideas and decided to make something i could deal with.  a series of circles overlapping each other.  i had it all figured out, where the circles in the middle would go the whole rainbow gamut, and the circles on the outside would contain the complementary colors of each of the circles in the middle.  which meant using the same color scheme in mixing up my dyes.  but first, altering the dye mixture formula.

Second Try at Dye Mixing

1 cup of chemical water (above)
and mixed in different jars
1 tablespoon turquoise
2 teaspoons magenta (that’s 2/3 of a tablespoon)
a large 2 tablespoons yellow
3 tablespoons black

this produced some interesting effects.  like, the yellow dye and the red dyes never really dissolved, even tho i had no trouble with them at the concentrations i started with earlier.

DSCN8393

for the final pattern, i took out my protractor and adjusted it so that it would make 13 interlocking circles down the length of the brown paper, cut to the size of my scarves.  i wanted to make them small enough to leave lots of room at the top and bottom, but large enough to cover the whole spectrum from magenta to magenta, which is 12 (or a spread of four colors for each primary color – red, red-orange, orange, yellow-orange).

720

using the protractor, i traced out the secondary circles above and below, and made nice fat legible lines with a magic marker.  then i stretched the scarf over the pattern, secured it with clips, and drew in the resist lines on the scarf.  when i was finished with that, while it was still wet (being careful not to let any part of the scarf touch any other part of the scarf), transferred it from the paper onto the stretchers.

DSCN8316

where i started putting on the colors.  when i did this last time, i mixed up all the colors in the cups, right on my palette.  and found that because the concentrations of the dyes weren’t equal, that i had to constantly adjust the colors on the scarf, which came to resemble the colors in the cups not at all, so this time i did it my way,

DSCN8399

i took my red, and put it on the first four of the circles.  then i went back and put another coat on the first three circles, and when that had dried, another coat on the first two circles, and then a final coat on the first circle.  and then i did the same thing with the yellow, with the second circle only getting one yellow coat, the third circle getting two, the fourth circle getting three coats of yellow, and the yellow circle getting bunches of yellow.  in this way, the colors mixed themselves on the scarf, and all i had to do was the same tinkering i’d been doing with the other scarves, without the headache of counting drops.

DSCN8400
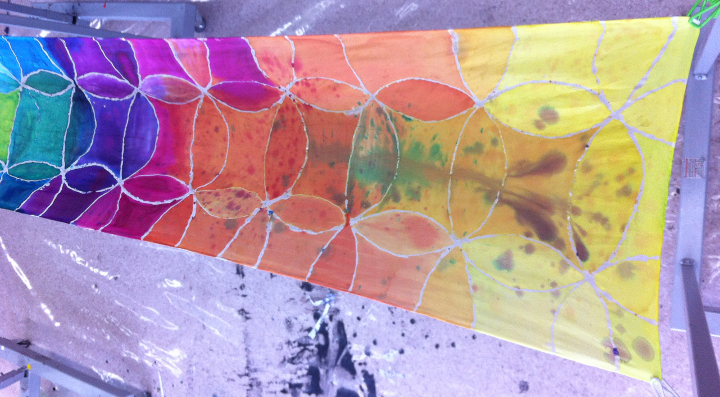
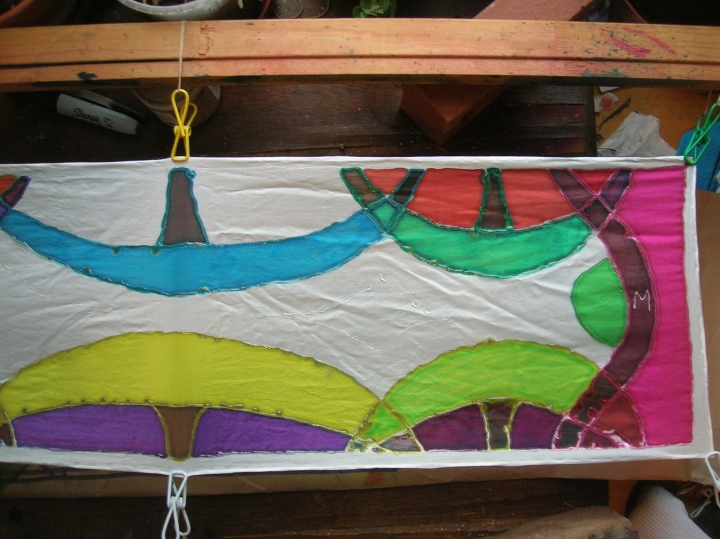
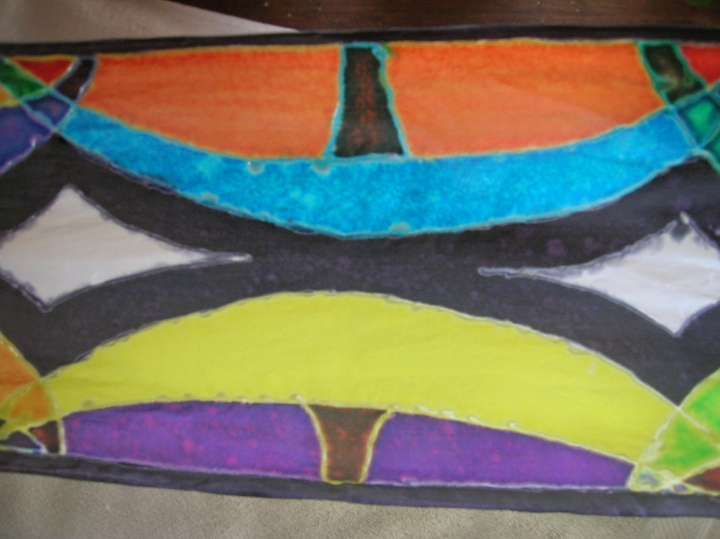
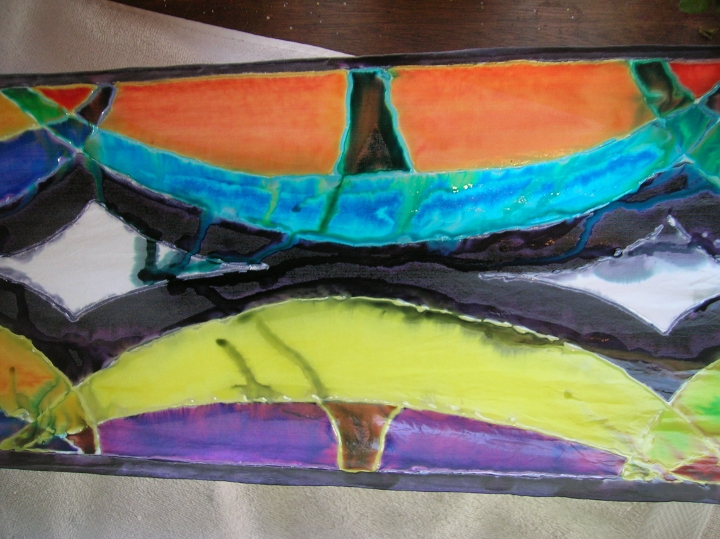
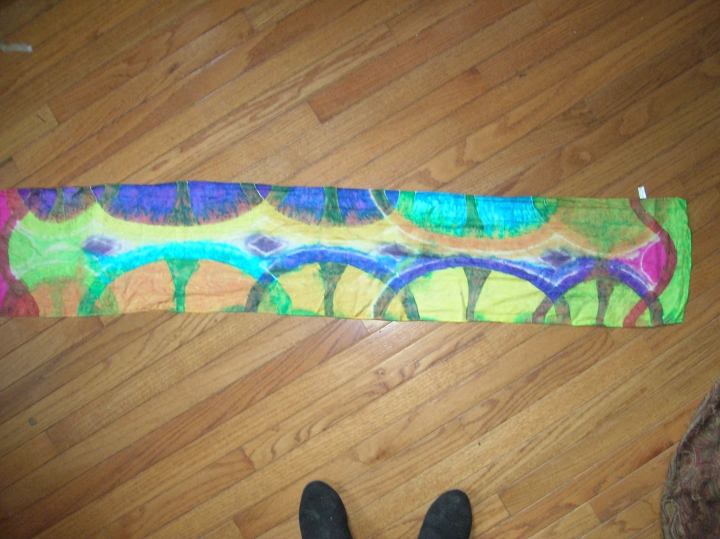
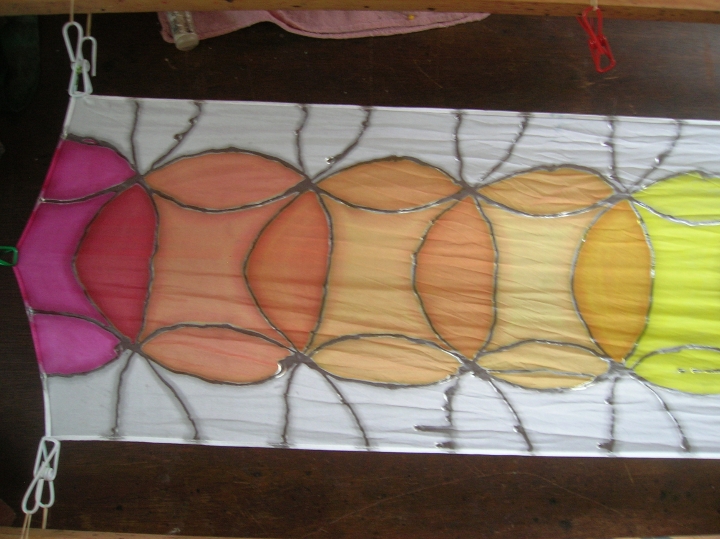
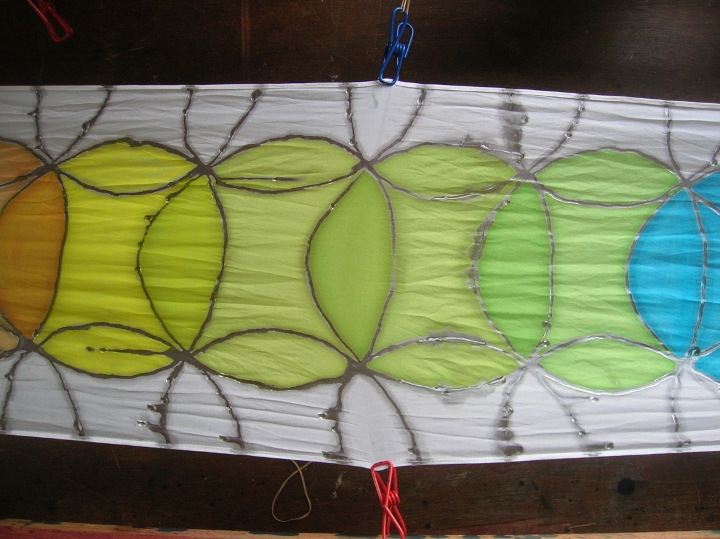
.and so on down the line.  here’s the range from yellow orange to blue

DSCN8401

from blue green to red violet.

DSCN8403

from blue to red.

DSCN8404

and here’s what it looks like when all the colors are filled in.

DSCN8405

DSCN8406

and here’s how it looks when i’m finished mixing it with black and making the black bleed toward the outside of the scarf.  i’m pretty sure i took a brush with clean water and violated all the lines within the middle circles, so that the colors would bleed into each other a bit.

DSCN8418

this is before steaming.

DSCN8412

see how the intersecting circles on the outside of the middle circles are all brown and muddy looking?  that’s the complementary mixing again.

DSCN8413

DSCN8414

it’s important to note that you can’t get away without steaming your scarf, or setting it some how.  it’s too bad, because i always have problems with fading.

DSCN8424

but you’ll notice that the muddy mixing of the complementary colors washes right down to something nice once it’s been washed.

DSCN8419 DSCN8420DSCN8421   DSCN8422

i think the thing to note is the difference between batches of dyes.  i used 2 tablespoons of cyan to a cup of water the first time, and it was way too much.  i used 1 ttablespoon cyan the second time, and it was too weak.  i used way too much yellow the second batch, 2+ tablespoons, and not enough magenta at 2 teaspoonfulls, and probably way too much black.  i will have to think about this.  now, this batch of dyes was all wrong.  so the next batch i will do, hopefully i can do a final test batch before the workshop, will use approximately these measurements.

Proposed Dye Mixture

to each cup of chemical water
1 tb turquoise
1 tb magenta
1 tb yellow
1 tb black.

we’ll see.  below are the recommended amounts from paula burch’s website.

Table I. Amount of dye to use for one cup (250 ml) of mixture for tie-dyeing.

pale medium dark black recipe
source
½ tsp.
or 1 g**
2 tsp.
or 5 g**
4 tsp.
or 10 g**
8 tsp.
or 20 g**
ProChem
[PDF]
2 or more tsp. Jacquard
two to eight tsp., depending on color*** 4x as much Dharma

*abbreviations: tsp. = teaspoon = 5 ml; tbs. = tablespoon = 15 ml; g = gram = 1/28 dry ounce.
**Note that the weights and volumes given are often not equivalent. Dyeing by weight gives more reproducible results.
***see section about different colors, above


preparing to be color coordinated

i’m getting ready to go on an art residency in iceland, just to get arctic for my current novel, which is set in antarctica without ice. and i’ve got to wear winter clothes, because their summer is as cold as our typical winter (altho today they’re warmer than we are, and it’s raining there and snowing here, but this is a freak). so i’m trying out all my winter clothes to see which ones i will be wearing on residency.

i’ve got this great skirt that covers my knees which i wear winter and summer, and underneath that i do leggings when it gets cold, layers of them. so i’ve been collecting layers.

i got a pair of cotton leggings at target, i got another pair from dharma, and a silk pair of leggings from the same place. and died the cotton red and the silk dark blue.

i got myself a down jacket, but only had black to choose from because of the sale that was on.

and i was given a fleece vest for xmas, but it was white, and that’s a disastrous color on me (it gets filthy), so i’m getting the dyes to change the color, even tho the manufacturer is horrified, because you really shouldn’t try to change the color of polartec. you sure as hell aren’t supposed to use dye transfer crayons on it, because that hot iron will melt the vest. so i’m going to be dyeing my vest. and i’ve got this great wool lumberjack shirt that’s all the wrong colors of green and blue to harmonize with the skirt.

so i’m upstairs simmering my wool shirt in red dye at the moment. as a sort of prep to dyeing my fleece vest.

there’s still that ripstop nylon parachute material. i found a scant 3 yards of white, and another 2 yards of white, and tested it beautifully with steamed silk dyes, so i’m still thinking about hte scene to put on this much fabric, because i detest white. it’s an open invitation to color.

i’m not taking process pictures. not of a bunch of dye pots and soaking material. i may assemble the ensemble when i’m done and post a picture.

since jim and i will be working up a sketch of dancing trolls to maybe embroider on my silk vest after dyeing it, i will take pictures of that process. if i actually do that.

i’ve got so much to do before my residency starts in july. i have to make paper, i have to assemble my travel journal, i have to order supplies to teach a silk dyeing workshop, a million and one things. i’m detailing all the practical stuff over on my other blog.

sodium alginate as a water-based resist

in recent posts (the prior two i think) i experimented to find a cheap water-based resist for silk painting. you can get little tubes or bottles of proprietary resist from the dye houses, but they’re way expensive, and i’ll be damned if i’m going to be held hostage to somebody’s formula. grrr.

so i thought about it, and looked it up, and found recipes for rice starch paste and other things that i didn’t like the look of. and i cast my eye on my little unused bag of sodium alginate. i had it because all the books said to have it. to thicken the dye. but in silk painting you want watery dyes. thick dyes are for like painting dye directly on cotton fabrics. for silk you use a resist line.

of course, this is mere tradition. you can use what you like on what you like. that’s art. the question is rather of the integrity of your materials. how long will your work last is more important than what brand of paint you used.

so i’ve developed a secret recipe for sodium alginate water-based resist that you can have FOR FREE.

that’s right, knowledge should be free.  free for all to use as best they can.

using the recipe for print paste that i probably found on paula burch’s hand-dyeing website, or mostly using the recipe, because i am constitutionally barred from following  recipes exactly, here’s a go at remembering how i did it

i only made up half a batch at a time, too, not to waste any.

1 tsp sodium alginate

generous splash of rubbing alcohol (1 tsp)

put alginate into a container with smooth sides so that you can mix thoroughly in it.  moisten with alcohol.  set aside.

1/4c hot water

1/2 teaspoon urea

pinch calgon

dissolve urea and calgon in hot water, then add to alginate/alcohol mix and stir until well blended. might as well make it in a blender, except in these amounts it would be ridiculous.

basically, this secret recipe follows this print paste recipe except double or fourple the amount of alginate, then add alcohol and calgon for various reasons et voila.

it thins with water to go on with a brush – as noflow or antifusant.

it goes into a little squeeze bottle with a tip and comes out in thin lines that resist the spread of dye.

and i save big time by making my own.

one bottle of brand name water-based resist $8.75 for 3.5 oz

one bottle of antifusant $5.48 for 8 oz

one pound of sodium alginate $20. guess how many 3.5 oz bottles you can make up with a pound of alginate measured out a teaspoon at a time.

i’m keeping some in the fridge because i forgot about it, but one of these days real soon now i’ll take it out and see if it’s still good, or has it gone runny and gloppy. it’s got alcohol in it, so maybe it’ll last awhile.

even the $9 for 3.5 oz goes bad after awhile.

so i’m crowing.

now, i’m certain i’ve just reinvented the wheel. dyers have undoubtedly known about this for donkeys’ years.

but it’s news to me.

i just hate paying for the convenience of someone making it up for me. i hate paying the 10,000% profit that somebody is making just because i don’t know how to do it myself.

that’s another kind of slavery. so here’s a way to get around buying one more little thing you need to make art.

rant – it’s all part of a conspiracy to hobble the artist. artists traditionally made it all themselves, from powdering the rocks to building the stretchers. and more and more, art stores are marketing to artists as if art is just a hobby, as if convenience was the thing, as if we were too damned busy making a living so we could afford to go to an art supply store and plunk down a couple of hundred dollars for a bunch of things we have no idea how to make.

i prefer to make them. and the knowledge i’ve gained enables me to make art out of anything. cue evil laugh.