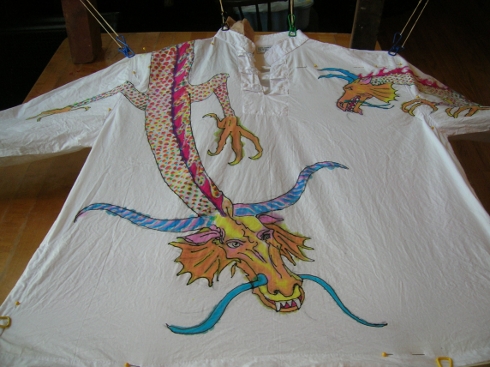
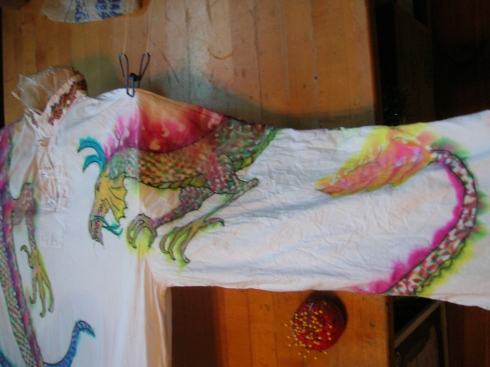
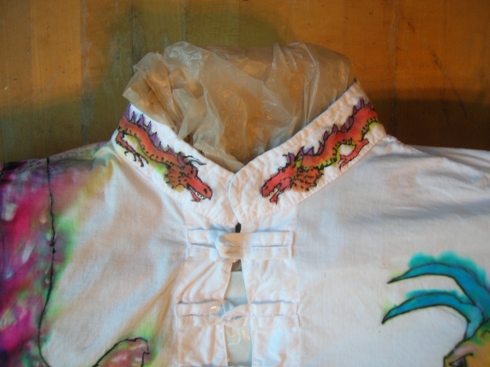
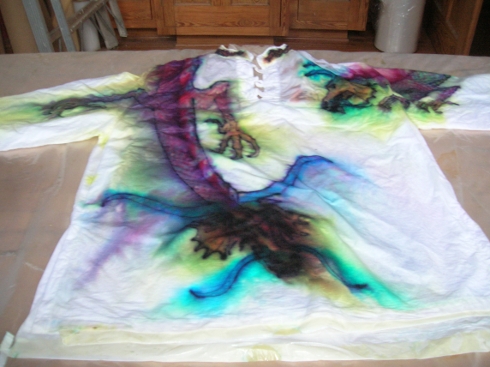
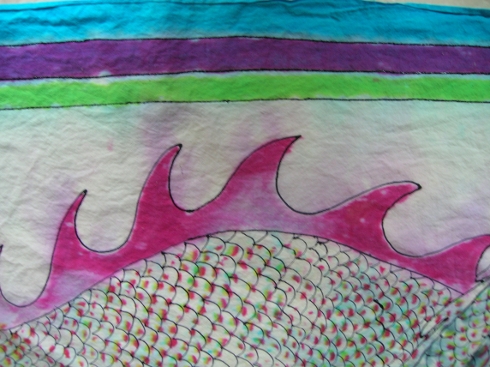
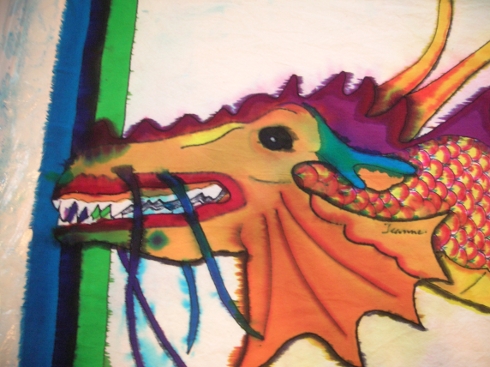
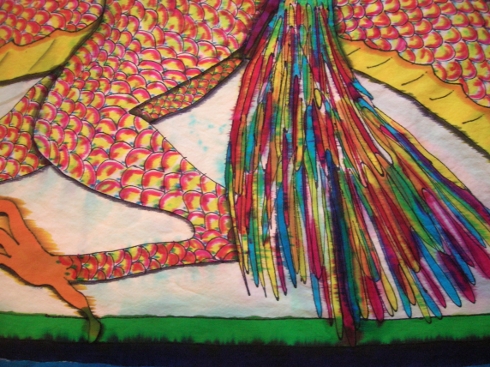
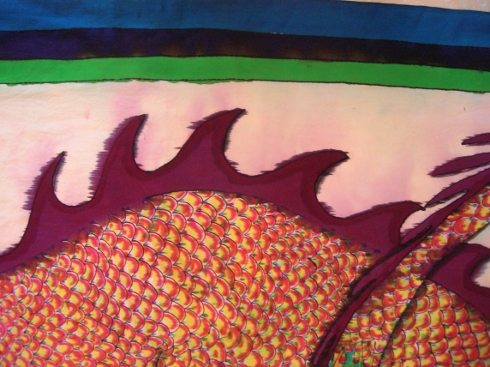
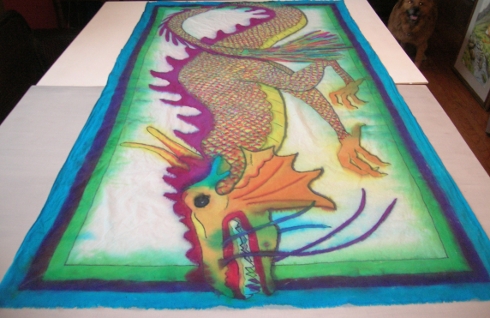
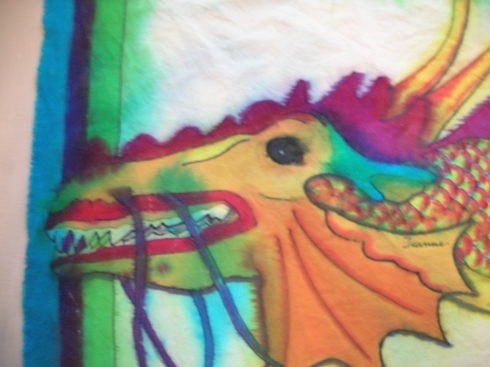
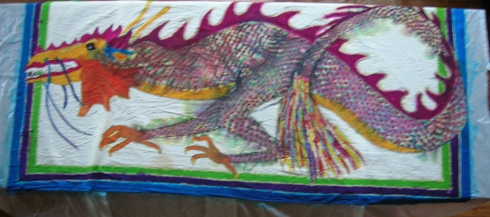
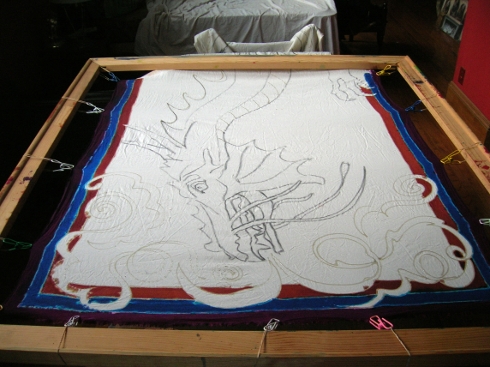
another try – dragon shirt

this is where we left off last time, with the final result being a washed-out failure of the dye to take.

and no clue how i got there.  really.

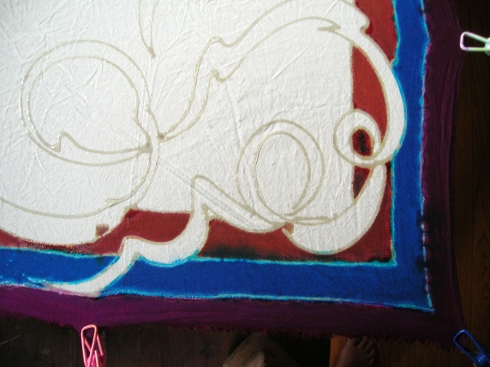
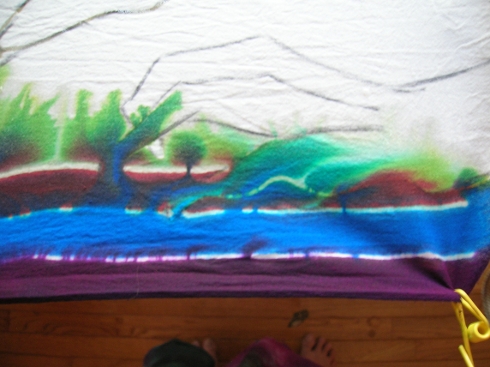
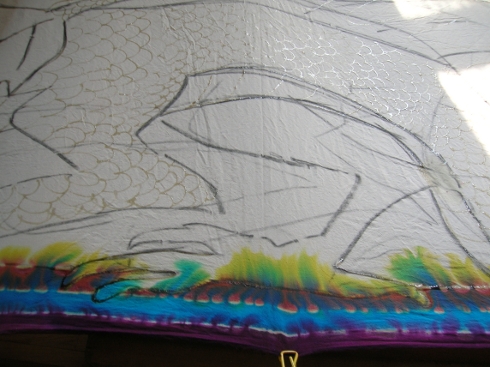
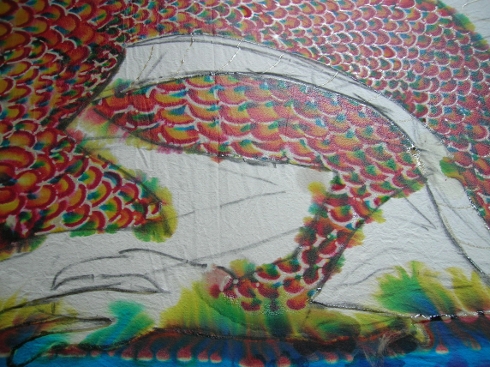
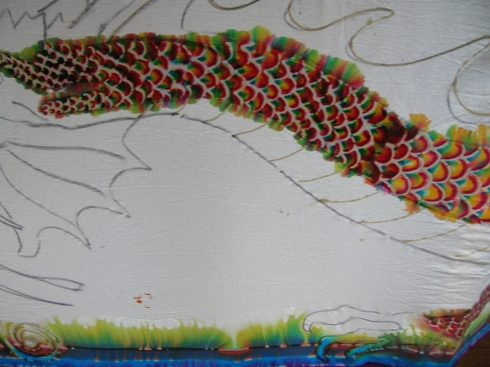
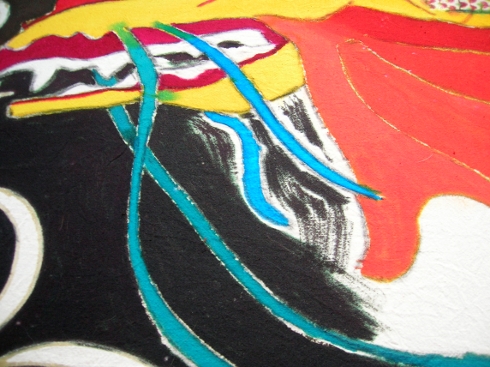
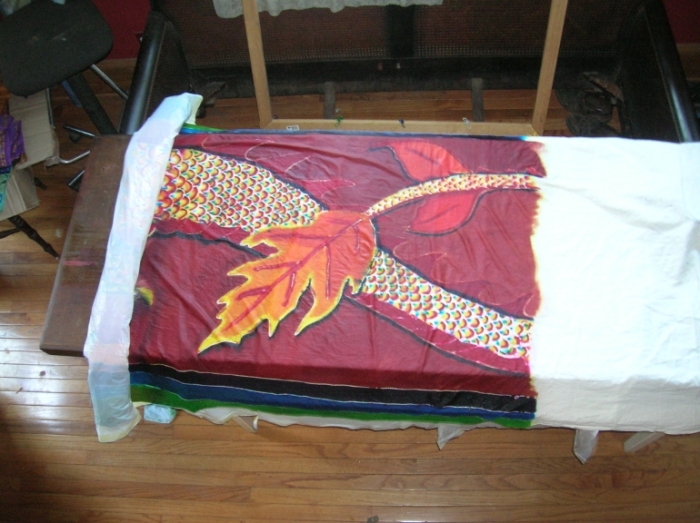
so for this try, i’m not going to bore you with details.  i stuffed the shirt full of plastic bag again, pinned it on securely, and let jim work on it.  this time, he added a tsp or more of sodium alginate to fresh batches of dye-and-water, making a very thick ‘paint’ or an extremely thin ‘resist’ depending on your intended use.  like my theory of baking as a spectrum of proportions (maybe a later post.)

then he used his methods of painting to go over what remained from the first (wasted(?)) 3 days of work.

i use a watercolor technique.  jim paints it on like egg tempera.  he basically accentuated my work with a layer of texture.

and when we washed it out, it was better, but still looked like we’d had it for awhile.

and no, sister mine, we’re not throwing it away.  but i am making a copy of it on another shirt.  so stay tuned.

project: dyed cotton shirt for dragon.con

we’re going to dragon.con this year as participants.  this is our first year.  we have no idea what to expect, but we’re dressing up.  i’ve got a dragon sari and a dragon dhoti and i decided that jim needed a dragon shirt.  so i got a blank from dharma trading, and jim sketched a couple of dragons on with charcoal, and i’m going to try to put my experience to work painting dyes on cotton.  if you’re curious, you can look back over the last month of blog posts for more experiments on cotton.

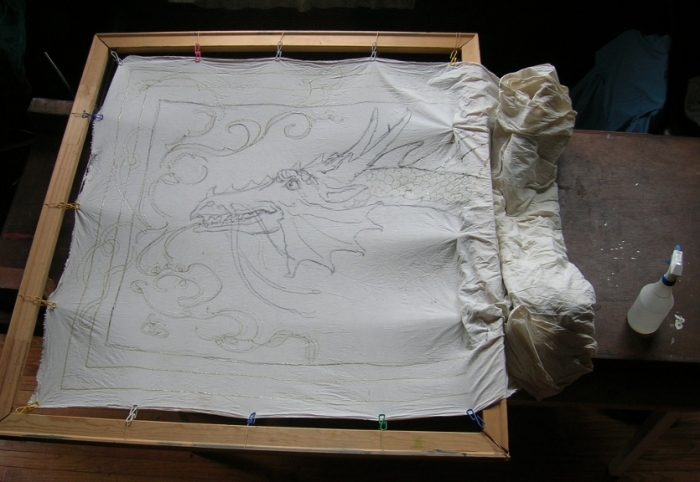
the first picture is the resist.  i made up my resist from sodium alginate and applied it with a squeeze bottle and a steel tip.  for the dark resist, i mixed a tiny tip of a teaspoon of red and blue and a little more of yellow, and that made black for all intents and purposes, but i was hoping it would be a little softer than black.  everything that’s not black, like the wavy crest along the back, and the outline of scales within the black contour lines, is sugar syrup resist applied from another plastic squeeze bottle with a tip.

i’ve gone ahead and stuffed the shirt with folded up plastic.  i’ve pinned the fabric to the plastic (which runs the risk of leaking thru the pinholes to the back side of the shirt.  the arms have the same treatment, and inside the collar.

for this try, i’m going to wait until the very end to set it with soda ash, and batch it.  i’ve tried doing it soda ash first, and didn’t get to use my favorite flow techniques, so now i’m doing my second try at fixing it after painting it.  my problem, i think, is i use too much water and get it sopping instead of just damp, to set it.  we’ll see.

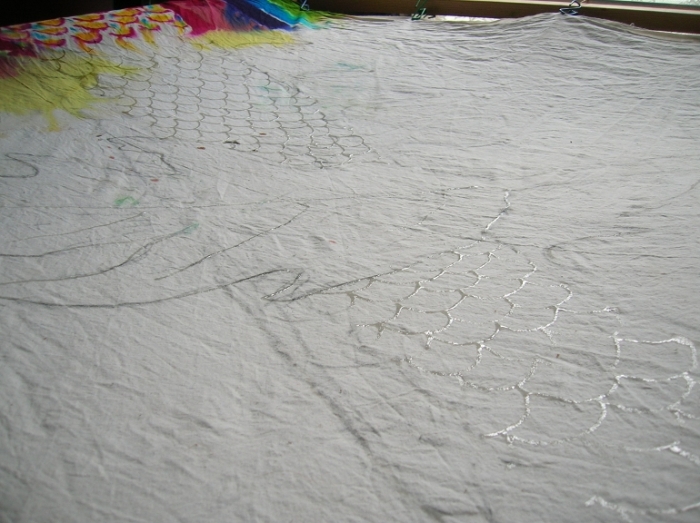
this is the back of the shirt, where i started.  i was having trouble figuring out how to suspend the fabric in order to paint it.  at first i had rigged up an inverted tomato cage, covered in plastic, with a broom handle running across the top ring.  but that was awkward, so i took it off the form and laid it flat to do the drawing.

by the time it was ready for resist, i had decided to stretch it, and got out my 50″ and my 64″ stretchers and lots of rubber bands, and suspended it from the corners.  then we flipped the whole thing over when it was time to work on the other side.  i needed help.

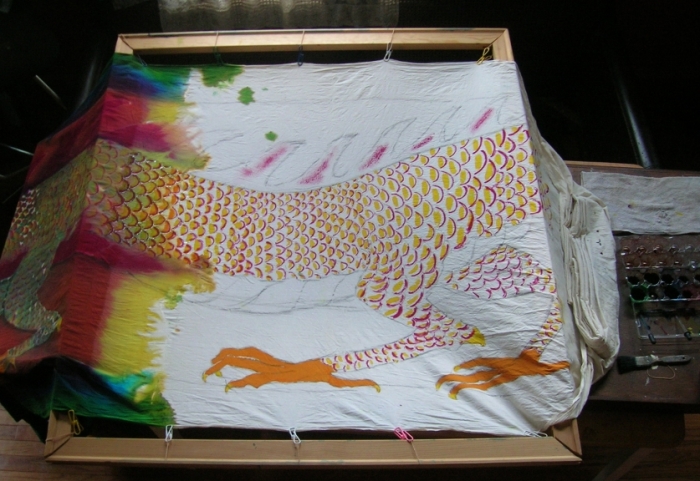
for the body, i used my normal technique, which is a line of red on the outside of the scale, a line of yellow in the middle, and a dot of blue at the inside point.  the crest is magenta with a line of cyan on the inside, and the belly is yellow with a line of cyan on the inside.  i have yet to mix up a light red (4 pipettes of water to a dropper of magenta) to wash over the claws.

here i’ve washed the completed figure with clear water, keeping inside the body lines to do the scales, and not using much water there, sloshing water over the crest, violating the resist lines and going far into the white area with clear water, to draw the red into it.  i don’t think i touched the belly, but the water on the scales hit the plastic behind the fabric, and ran right thru the belly area and out into the white fabric.  so i ended up surrounding the figure with water way out into the white area.  this picture is only the first few moments of having wtaer on it.  i don’t think i’ve wetted the surrounding white area yet.

this is how it looked after it dried.  the scales are almost completely washed out an d obscured, and it remains to be seen how much of that muddy color will survive rinsing.  the crest is too blown, and i’m not happy with the general mess.  but it’s not the way it’s going to look when it’s done, so the only thing to do is proceed.

i used less water on the dragon on the sleeve.  it ran less.  the crest is really nice.

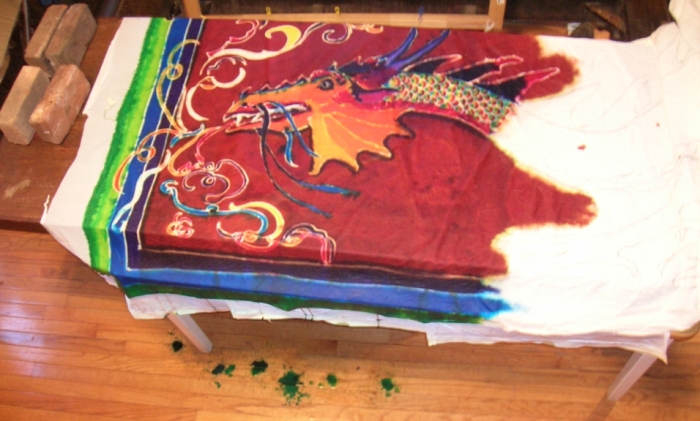
so now we start on the front.  i’ve had practice screwing up the back, so now i can do the important part.  at this point, all painted in, it looks very cartoonish.

this is after the water.  the thing has dried, and i’ve just gone back in with more red on the horns, and red on the face, and hit the areas with water to help spread it.  i tried to not use so much water this time.

again, the little dragon turned out lovely after the application.

jim came in after i’d finished watering the paintings back and front, and drew in two dragons around the collar.  first charcoal, then he drew it in with dark resist.  i colored it, using a really dry brush and already mixed up orange.

then i laid out plastic on the table, spread the shirt out, mixed up soda ash water, spritzed the hell out of one side, quickly lifted and turned it and spritzed the hell out of the other side, and then rolled it up in the plastic and left it overnight.

and it was a right mess the next morning, all crumpled up inside the plastic where the rolling wasn’t very smooth.  it’s uncomfortable not to be able to see the face.

again, it’s not over until it all comes out in the wash.

this is how it looks after the wash.  almost completely faded.  what the fuck.

did i do everything right?  obviously not.  but i sure as hell used soda ash, and it was plenty strong (even added an extra tsp), and it sat at temperatures in the upper 80s for ten hours.  i mixed up dye at the prescribed strength (i tsp per cup).  i dissolved the dye in cold water, i didn’t use salt, i didn’t use heat (unless upper 80s is considered heat), i didn’t use calgon.  and i know the dye hasn’t gone bad because i just did a successful dye job with the very same dyes, and it’s been cooler in the past few weeks.

the dye that stuck on the shirt is the dye that moved the first time water was added, not the dye that ran after all the soda ash water was applied.  the resist worked plenty well, but the colors just washed out beyond a very weak tint.

perhaps i’ll steam it the next time.  or set it in the dryer for an hour.  or try mixing the soda ash in with the dye itself.

something.  i’m not giving up.  jim’s going to tackle it again with the dark resist tomorrow, and i’m going to mix up some alginate into a new batch of dye to thicken it, and let him have a hand at it.

finishing sari/dhoti/sarong projects

okay, i’m done.  there’s more i could do, of course, but i’m not going to be a perfectionist.  if i were a perfectionist, i would throw them all out and start over.  but the hell with that.

i’ve learned a lot about doing direct painting with dyes on cotton, and there’s more to learn, but i will try to sum it all up here.  hahaaahaa.

i took the faded first attempt at susie’s sarong and laid it back out on top of split plastic bags.  then i did something new – i mixed a tiny tip of a spoonful of black dye in with the sodium alginate resist and loaded it into my squeeze bottle.  i’ve never worked with colored resist before, not since i started making my own.

i couldn’t see my lines is one of my problems with the other two pieces.  i could see anything put down with sugar syrup resist, but that spread and caused all sorts of problems before.  but sodium alginate, put on thinly with my smallest diameter squeeze bottle, didn’t go all the way thru the fabric, as is necessary to form a physical resist, and when the resist dried, it turned invisible, and i could only tell where my lines were by feeling them with a finger.  and i wasn’t up for that.

this time i decided not to use any sugar syrup at all.  it was all sodium alginate, even the borders, even the scales.  all put on with a small tiny-holed bottle.  dyed black so i could see it.  it’s a matter of speculation at this point whether or not the black will wash out with the alginate.

we’ll only see when it all comes out in the wash.  that’s the problem with this kind of work.  you only see the end result in the end.  it’s like etching, where you have to make a print to see what you’ve actually done, and then go back to the plate to make changes.

this time i made up all new dyes, using a tsp of yellow to a cup of urea water, a tsp of red the same, and two tsp of blue in a 6-oz baby food jar of urea water, and a tsp of black the same.

i did my reading, and found that there are basically three ways to fix the dye.  you can put the soda ash on first, which i did for the first three dragons.  and that has limited use, and my last one washed all the way fucking out.  you can fix your dye by adding soda ash to the dye itself, but at that point it begins to get weaker, and by the end of a session the dyes are spent and you have to make up some more tomorrow.  i’ve never done it this way.  the third way is to put the soda ash on last, and this is how you do low water immersion, or scrunch dyeing.  i like doing it this way.  so i thought i would adapt it for direct painting, and see if i couldn’t figure out a method that i would like to use again.

so my plan was to paint on the prepared dye and water solution, then let it dry, and then – the same way i do with my silk dyes – move it and fix it with the water/soda ash wash at the end.

but to the process.  starting with the end result of the first attempt at dyeing the sarong.

i’ve done the tail again.  i really liked the tail before.  it was a scribble picture, and i’ve done those since i was a kid, and always have any 3-5 year old students do lots of them.

now, we’re only talking about resist lines here.  i drew in the resist lines for the tail, like i did for (almost all of) the scales.  but the color, all the color, is from the last dye attempt.  i’m going to go completely over all these colors, and the process is called overdyeing, where the colors already on the fabric are going to influence what color that the fabric ends up.

i couldn’t make the outlines for the scales line up completely, and i stopped trying about the third row from the neckline.  i usually end up playing some sort of game with the scales as i draw them, because otherwise that many would become incredibly tedious.  usually it’s a game to do with the bend of the body and the movement of the outer boundaries.

here’s the whole thing, dyed and ready to set.  i skipped all the intermediate steps because i did it three times already and you can have a look at previous posts if you want details.  me, i’m kind of tired of details at this point.

all the bleeding you see is from the application of the dye, and not any added water.  they oozed right around the edges of the resist, probably crawling along the under surface of the fabric, in contact with the plastic sheets the fabric’s lying on.  for most jobs, where you don’t want this crawling to happen, you stretch the fabric so that it never touches anything but the clips you’re using to suspend it.  but for this, i’m being deliberately dodgy with my methods because i want an unconventional result.

i do this in the kitchen, and it used to drive my ex bonkers.  it wouldn’t just be orange juice, nossir, it’d be orange juice with carrot and cabbage.  it would start out as cheese potatoes with a little garlic, and end up something that looked like ethnic food, with turmeric and peas and littered with herbs, where you never noticed the potatoes for all the unidentified stuff swimming in them.

but i’ll say this – it always tasted good.

i’ve already started having trouble with the blue dye, even before putting any extra water on it.  the blue dye travels farther than anything else, and it’s particularly bad where the purple border’s bleeding into the green.  note the black isn ‘t moving at all.  i’ve run black around all the outside bottom edges of the dragon, especially under the belly.  and i’m expecting it to run out and become a nice fuzzy drop shadow.  but it’s only bleeding a little into the yellow and a very little into the white.

but the blue is well enough behaved in the border otherwise, because the purple and the green are mostly blue, just with a little red and a little yellow added.  the red/blue crest is bleeding into the dry white fabric just from being painted, and any movement in the scales seems to be a softening of the red line with the yellow i put on top, and a little crawling of the blue dot at the top of each scale.  i think i should have left the black outlining off the crest as it crosses the body near the tail.  before i put the black in, i could see the scales peeking thru, and i liked it.  now they’re gone and it’s just dark.

here’s the whole thing again from the head, before i put any water on it.

at this point i stopped to mix up the soda ash water.  here’s where it got technical.  because the dye had already dried on the fabric, i felt i should mix up enough soda ash to raise the ph of only as much water as i was going to wet the fabric with.  it’s a teaspoon per cup.  so i put in a heaping teaspoon and went over the scales first with as dry a brush as i could.  trouble with that is that i get impatient when i don’t see anything happening, and end up using more and more water until i’m spilling it off the brush as i lift it from the cup.

i noticed that things didn’t run very much.  is this maybe because the soda ash immediately bonds the dye particle to the fabric?  duh?

i didn’t spray the whole thing with water first and start it running before putting on the soda ash because i really wanted to do it one section at a time, first the scales, then the crest, then the tail and th e head, and finally the border.  and i wanted each one to run a bit, and then set.  and i wanted the crest to run the most, followed by the border.  so i started with soda ash in a controlled application, and i fixed the fabric.  oh.

next time spritz lightly once, then twice, then wait ten minutes, then add soda ash, just the same way you do in low water immersion dyeing.

but i didn’t do that.  i did this.  actually, when i realized that the scales and crest weren’t bleeding very actively, i stopped, took plain clear water and went around the border, and then went back in over it with stronger soda ash water (2 heaping tsp/cup).  and while i was slopping this over the border, i was noticing a lot of blue was scrubbing right up into the brush, and i was sloshing green soda ash water over the white, so i hurried up and stopped.

i probably should have let the borders hang over the side and drip off the excess water onto the floor.  the whole border really bled more than i would have liked (see the irony here?), and it would have been nice not to seal that up in the bag with the rest of the fabric.

in fact, i didn’t make a bag of fabric.  i folded over the plastic bags the fabric was sitting on, and then put that plastic tarp i used last time over that, and that was enough to seal it.  because it was a cool cloudy couple of days, with the temperatures not getting into the 80s, i let it batch for two whole days, and when the clouds started breaking up yesterday afternoon, i took off the plastic tarp and rolled the split garbage bags around the fabric, and took the roll out across the street to the neighbor’s driveway, where there was a great deal of sun in the late afternoon.  when i went to fetch it, the roll was hot in my hands.

i rinsed it out in the kitchen sink with loads of water (too bad about the water usage when dyeing fabric), and tossed it in the washing machine for a hot wash with synthrapol, and then a regular wash with the rest of the laundry in regular detergent.

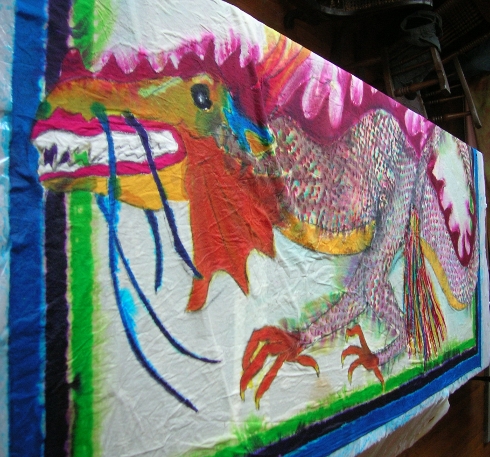
and this is what it looks like:

the blue and green ran way too much, even in the tentacles, which were treated first thing with soda ash water.  the blue of the ear washed right out, also.  in general the blue seems not only very weak, but very stainy, very apt to run and ‘ruin’ other areas.  i’m not sure if i’m making the blue too strong, or whether it mostly tends to wash out, or what.

sorry for the blur.  i put some very thin black between the teeth so they’d show.  see how little the black has spread under the chin and around the cowl on his neck.  see how much the blue of the ear has spread into the violet of the crest, and bled into the snout from the right tentacle, which was straight blue, while the left ones were blue plus a little red.  so blue by itself runs wild?  and red inhibits blue from running?  the purple band in the border didn’t do much, just here and there a little bleeding.  maybe the blue bled right into the purple and i just can’t see it.

but i think it’s great that the black resist stayed.  and i find it interesting that on the antlers, the red edges are left over from the first dyeing.

the tail could have worked out a little nicer, if i’d used less blue.  if you look at the complete picture, you’ll notice that the green border resist line fades right out between the two claws.  i’m not sure why this is, but it indicates that if i violate the resist with enough clear water, it will wash out.  before it’s fixed by the soda ash.  the other black resist lines didn’t move at all, and fixed right in place.  i wonder what would happen if i colored the sugar syrup?  coming up, i reckon, next project.  maybe the dragon shirt…

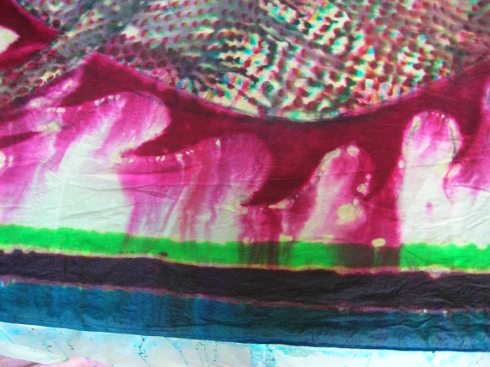
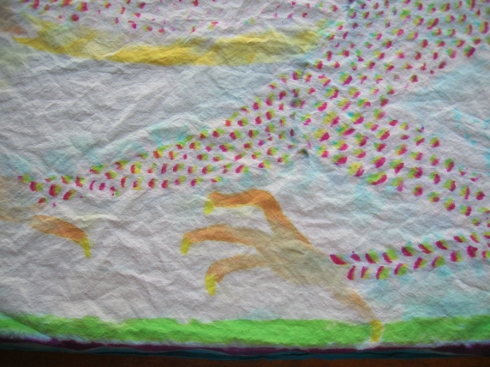
here’s the prewashed section, above, and the final, washed out and dried section below, for comparison.  a lot of the blue seems to have washed right out of the crest, and the only bleeding it did was in the initial painting.  the only thing that seems to have moved once the soda ash hit it is the blue.  the blue dot inside the scales bled right out into the yellow and the red, and looks like it went all over the entire body.

you can see in the border where some of the purple seems to have dashed into the white space, and the green just ran strong as wide again as it was painted.  the purple dashes are from the way the plastic sheeting was laid down underneath the fabric.  it formed runnels, and the dye pooled and ran down in there, and soaked into the fabric that was lying on top of it.  i’ve done this on purpose on occasion, and it makes really nice effects.  i noticed it happening when it was wet, but didn’t want to flatten the plastic out for fear of making a smudgy mess of the fabric.

and here’s the entire thing, washed and dried and lying on my work table this morning.  i’m above on a handy dandy ladder that’s sitting out because we’ve been moving artwork around on the walls.

it looks okay.  i’d have rather the crest bled more, and think the border bled too much, but we know that, and we can live with it.  now to practice the hundreds of ways you can wrap a sarong with my sister.

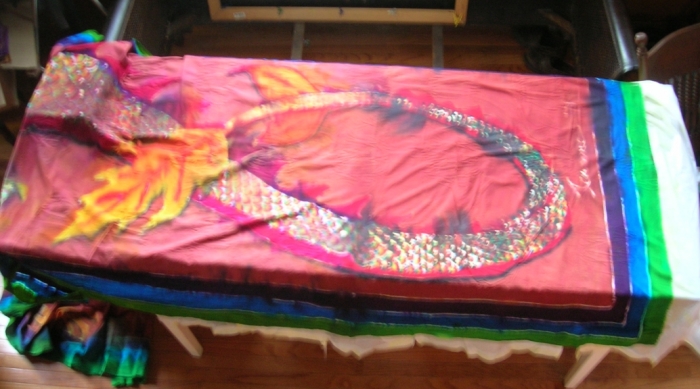
below are all three of the dragon sari series.  the light spot in the middle is the reflection off a window.  all three are traditional sari length (6 yd), dhoti length (4 yd), and sarong length (2 yd), of cotton muslin, and they’ll all be worn as my own personal wardrobe, except for the bottom one, which is my sister’s.

i could do more to each of them, but i’m going to turn my attention to some silk work for awhile.  that, and print production for a stint at dragon.con.  whee hah.

susie’s sarong

this is the reason why i made the sari and the dhoti, so i could practice for making my sister a sarong.  it’s not over yet, but i wanted to report the progress so far.

it was great right up until the moment i washed it.

now it sucks.

it went just like the others.  but this time i mixed up all new dyes, following the actual instructions for ratio of dye to urea to water to salt to soda ash.

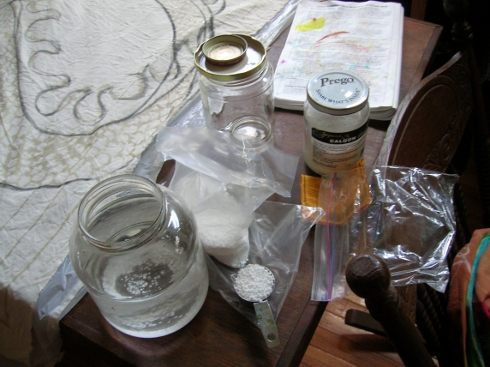
circling clockwise from bottom left, there’s a big jar of warm water and urea waiting to be stirred.  there’s the bag of urea pellets next, some empty jars for the various dye mixes, my dharma catalog open to the recipes page, then a jar of calgon to make the water softer, then an empty baggie (whatever) and a 1/8 cup measure (1 oz.) full of urea pellets.  this mixture is what i diluted all my dyes with.  it’s supposed to keep the dye wet longer, and the make the flow better.

the first thing i did was to take my original sari-length design on 6 yards of cotton muslin, lay it out on my worktable, which is 7 feet long (an old door), and scrunch it up until the 18 feet was down to 6.  it took a lot of folding and scrunching, but it finally fit.

this length of muslin is a good deal narrower than the original version, so i had much less room between the dragon’s body and the border.  i had to sacrifice all the cool curlicue smoke, but oh well.

here’s the drawing in charcoal.  and actually i think i’ve finished putting in all the resist lines, too.  you can barely see the scales inside his body.

but in the picture below you can see a problem.  the resist i’m using for the scales is sugar syrup.  unfortunately, i’ve put it in a bottle with a wide opening, and used a bunch of force laying down my lines, and the syrup has run, and all the lines are big gumby sloppy things, and many of the lines have run together and pooled into a big mass of sugar syrup.

and this is bad because?

it’s bad because all those blobs of syrup are not going to take the dye, and will appear as white areas when it’s all said and done.

here is the whole body, just the scales, right before i hit it with clear water and dissolve the sugar syrup resist so that the whole thing will run.  you can’t see a problem at this stage.  you have to proceed on faith.

first examine the scales.  i have put water on them, and let them dry, and you can see where they’ve run all over themselves, and also bled out, especially around the legs.

when i had dried the scales under a fan, i went in with a red purple (8 droppers of red, 6 drops of blue) and got all the spine (but i’m only halfway thru here) and then went in with a golden orange (8 droppers of yellow and 6 drops of red).

and here’s what it looks like before i douse everything but the scales in fresh water.

and right after dousing the whole thing with water (except the scale and the teeth).  it was a large brush, and i slopped water on it, starting with the crest and working into the white, starting with the green and working toward the blue.  you can see the water underneath the cloth by the heaviness of te wrinkles.  and you can see everything starting to bleed.  notice the difference between the color of the lips and the crest.  the lips are straight magenta, and the crest has a tiny bit of blue.

i had laid the cloth out on plastic from the beginning.  i wanted to try to keep the dye wet as i was putting it all on (trying to keep it damp in 90+ degree temperatures is impossible, even with the fan off and me dripping sweat onto my work.

this is what happens when you have to lay your work over an edge and let it hang off the table.  it drops.  the purple’s flooding the blue, the red of the scales is dripping across the green, everything goes on the floor and has to be mopped up before it stains the varnish on the wood.  and i still maintain you can tell it’s wet by looking at how translucent the white part is.  you can see the overlapping plastic underneath.

i really liked what happened with the tail.  i had made a bunch of scribble marks with the resist, and colored the primary colors between the lines, and when i covered it with clear water, it ran and blended wonderfully.

see how nicely the crest red flows into the white, and how the blue tentacles flow, and the green and purple and blue border.

and the lovely gravity pulling the red down into the blue.  great effects.  i’m very pleased.

here i’m batching it.  i found some plastic tarp, folded it up, and lay it on top of the wet fabric.  then i folded the end over onto the plastic because there wasn’t enough tarp.  you can see how the bottom plastic sticks to the fabric and how it’s bleeding color.  it’s very wet.

and here it is this morning, all cured and set, and ready to be washed out.  i really like the crest, and the tail, and the border and everything.  magnificent.

one thing, tho.  you can’t tell the difference between the teeth and the background.  it just looks like a funny looking open mouth.  so i took a very small brush and some black, and went in and outlined the teeth.  then i covered it with plastic and left it for several hours while i did other things.  like make ice cream.

so now to wash it out.  first a rinse in cold water until the dye stops being so thick.  then a wash in hot water and synthropol, and then another wash with my dirty clothes (the darks, duh), and then into the drier.

oh no!  it’s all faded.  practically nothing stayed on the fabric, and practically everything washed out.

and i don’t know why.  see where there’s only half the teeth left that i outlined with black.  i must have painted right on the resist and not on the cotton.

the blue, purple and green border ha faded terribly.  the red violet on the crest and the lips, which were magenta, are now the same color, which is a washed out magenta.

the scales are pitiful.  the orange claws and the golden belly are almost all gone.  the area of the belly where the sugar syrup fused is almost entirely blank.

and the tail, that i was so proud of, is just a miserable string of rags.

so that’s not going to work.  i first have to figure out what i did wrong, and then go back and fix it.

this may be it right here:

The material must be wet the entire time the dye reaction is occurring. The reaction will stop when the material is dry.

it’s possible that it’s something else, like the calgon:

Dharma Trading Company says that it inhibits dye from transferring to and adhering to fabric.

i suspect that there’s a problem with putting dye on a pre-urea-treated fabric, letting it dry, and then batching it later.  or else the dyes in my studio have gone off because of how hot they’ve gotten at ambient temperature (mid 90s inside at times).  i followed the damned directions, so it’s not my usual loose-cannon treatment of the rules that’s gotten me here.

when i finished the sarong i had a lot of dye left.  well, 3 oz of yellow, 4 oz of red, 6 oz of blue, and 8 oz of black.  so i took a sheet with holes in it, and found a sweatshirt i hadn’t dyed yet, and scrunched them into a plastic tub, poured the dye all over them, added some water, let it sit and soak, then poured in soda ash and water to fix it.  it’s batching out in the sun at the moment, and when i wash it out tomorrow i’ll see what happened to the very same dyes done another way.  if the colors are great then i’ve got more evidence to what went wrong. if they’re weak then it might be that i have to make my dyes stronger, or that there’s some mystery problem.

it’s a full moon, maybe that has something to do with how well dyes set.  you never know.

better luck next time.

to be continued

project continued: cotton dhoti

a dhoti is four yards of cloth used to make a pants wrap, in this case, cotton muslin.  after making a sari, which is 6 yards of cloth, i am making a smaller version, using different methods that maybe reflect what i’m learning about this process.  after that, i will make a 2-yard veshti, or sarong, or kanga, hopefully reflecting something approaching a journeyman’s understanding of what i’m doing.

but like jim observed this morning when we saw the results of the dhoti – my work is almost crude, vigorous and monumental and with frayed edges and rubbed out marks and mistakes.  but that’s better than slick.  so at times tho my work is painfully individualistic, and would never sell in the shops, i’ll still wear it around, and my sister will still let me give it to her.

i’m going to be using a different technique this time.  last time, i painted each stretched section, then got it good and wet, and rolled it up in plastic overnight to batch, then let it dry, stretched the next section, and repeated the process.  this time i’m not going to roll it up in plastic and drench it until the end, but i am still going to do each section individually, and i am going to wet sections and let them bleed.  i’m just not going to spritz anything, i’m going to do it with a brush, and be very selective about what i wet and what i keep dry (she says.  but just wait).

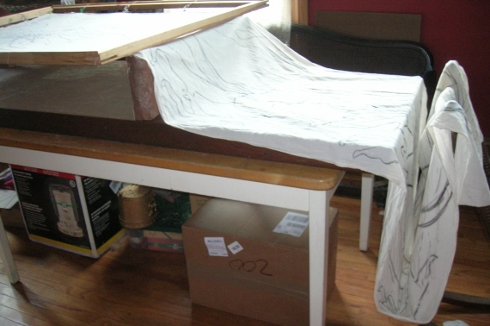
what you see below is the left side of the cloth being stretched, and up on four bricks.  the middle part is laying on the table, and the right hand side is folded over a chair with a length looping down.  i’ve traced the pattern from laying the bare 4 yard cloth on top of the 6 yard cloth and adjusting the length and figures.  i’ve only drawn resist over the stretched part, and now i’m waiting to ink it in with dyes.  the rest of the length is just charcoal lines.

below, i’ve gone around the stretched border and painted in dark purple on the outside, which you can’t even see, then blue, and then my mixed golden brown.  i’m deliberately watering down the dyes this time as i mix them up.  this time i’m putting as much water as dyestock, because i judged that too much excess dye washed out of the sari from last time, so i’m using less dye this time.  it seems to go on just as heavily, so we’ll see.  one thing about the mixed brown color.  it seems to be thicker than when i used it on the first piece.  thicker and grainier.  i know i’m not pasting up the dye as carefully as you’re supposed to, but it seems like the grains of dye just swelled individually during the week they’ve been sitting there.

now, this is simply dye powder and urea water.  no salt, no alcohol, no soda ash.  if it were paint i’d say i should have mulled it, really ground the particles into the smallest pieces i could.  but as it was dye, i simply shook it to mix it back in, measured it out, and diluted it.

it seems to have changed color slightly as well.  but that could just be because it’s more dilute.  i would expect a color change when diluted, that’s how you get tints of a color.  obviously i’m working with too many changing variables to be sure what problems i’m encountering.  but that’s always the way with me.  muddy the waters right away, and then thrash in the shallows.

this is after i put on the border dyes (now you can see the purple), and before i brushed clear water on the fabric and over the resist lines so it can bleed.  you can see were i mainly overshot the red/brown line with the blue on the bottom edge to the right, and you can see where my resist lines weren’t joined between the purple and the blue on the bottom right corner.  in projects where i don’t need bleedthru, i would have checked and double checked my resist lines to make sure there were no breaks.  but i put this stuff on fast and let it jump when it hit a fabric wrinkle just so i’d have plenty of broken resist lines.  because i love the mess it makes.

here’s after i brushed the same area with clear water.  you can see how far out i put the water by the slightly darker white, because the water darkens the edges, and then the dye bleeds into where it’s wet, slowly, and according to how each pigment/color reacts to water.  reds don’t seem to move very much.  blues seem to move a great deal, and to wash out, also.  and yellows can be completely not there in the final product.  and you can’t tell beforehand.  at least, i can’t tell.

here’s another example.  this one’s still wet, you can see the shiny soppy place.  the purple has started to creep over the resist on the border, which resist i believe is sugar syrup, while the resist on the fingers is sodium alginate.  you can see that the sugar syrup is thicker (because the applicator bottle has a larger hole).  the blue has started seeping over the resist into the red, much faster and more completely than the purple into the blue.  the brown/red is hardly moving at all.  on the other hand, the red is the last thing i got wet, and then i grabbed the camera.

here it is once it had dried.  you can see how the blue just tore thru the brown/red, and invaded the fingers.  the brown/red did something different, because it is made of a lot of yellow, some red, and just a pinch of blue.  nonetheless, when wet, it separated into its constituent colors, and they each moved into the wet area at a different rate.  the blue and yellow combined and ranged far beyond the red.  the last piece i did had a big yellow reaching stain at the end of the previous night’s work, the yellow finally outstripping the blue.

it’s all happy accidents when i do art.  that’s why i’m allergic to slick.  magic and slick don’t work unless you’re faking it.  real magicians sweat.

and here’s another example, from farther down the beast.  see the lovely spreading blue on the border.  cuts right thru the brown/red, turns it completely neutral.

what i’m wondering is about the chemical action of soda ash and procion dyes.  supposedly the ash reacts with the first dye it comes across, and when it’s had enough reacting, then the rest of the dye just washes off.  which we saw with the first piece.  it looked horribly muddy right thru the whole process, before it was washed out.  and then it was crystal clear.  so i’m wondering how this is going to turn out, which so much bleed at the border.  what’s the background color going to do if the bled part has already reacted?

now to the scales.  i’m using my own personal shorthand with the scales, both in drawing them as little round things, and in coloring them with stripes of red, yellow, and a dot of blue.  it looks kind of funky when it’s just being done.  the colors just sit there where i put them, the red doesn’t move much, the yellow looks awkward, the blue is isolated.

but the moment you put water on it, the whole thing starts running.  first into itself, blending the red, yellow, and blue, and then over the sugar syrup resist, letting the colors mix and flow however far the water will take them.

i’ve just finished brushing the surface of the scales with clear water.  i have tried to stay inside the outer lines, but that’s not always perfect, and as well, the water will flow right thru it if there’s enough.  the cotton is still shiny, tho you can see several scales that look drier, darker.  there’s one in the top middle of the picture.  i’m dumping varying amounts of water with each brush load as i go over the scales.  there are such a lot of them, and i feel that i have to rush to get them all coated at once so they can bleed until they dry.  so how far they run and muddy is pretty changeable.  but again, i wouldn’t want it to be uniform.

here’s the whole length of scales finished and brushed with clear water.  the borders are complete all around, and now i’ve gone up and down the length, stretching each part to paint in the scales.  now i’m going to work my way back up to the head doing the hands and the crest, and then i’ll do the background.  how much more wetting and bleeding i’m going to do, i’ll see when i get there.

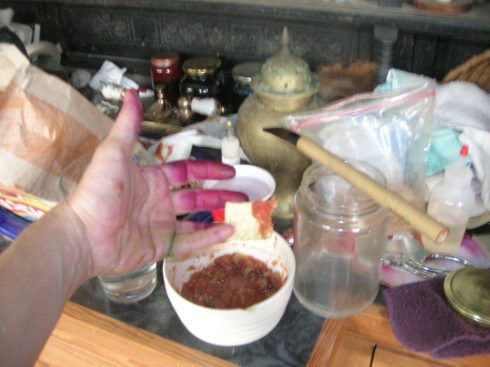
taking a break.  i use my hands for everything, including these relatively nontoxic dyes.  but i still have to snack, so here i am using my undyed little finger to grab a chip and scoop salsa onto it.  the only real danger is if i dip my brush into the salsa, thinking it’s brown/red dye.  but i’m careful.

don’t drink the dye, fine.

back to work.  i just love the look of sugar syrup resist in the morning.  this is what the piece looked like when i had worked my way up and was ready to start work on the first section again.  the blue has bled right thru the red/brown and marched on into the background.  it looks really cool and i should leave it like that.  oh well.  i’ve had this mixed green sitting and waiting since i first pasted it up, and that’s going on the background of this piece.

see, in trying to mix up that red/brown, the one i used on the background of the sari piece, i used an old mixing chart that went with a different brand of dye for use on silk rather than cotton.  that’s three kinds of wrong.  so of course it didn’t work.  i was trying for a rich tobacco brown.  i used a jacquard’s silk dye mixing chart for ‘caramel’, which was five parts yellow, one part red, two parts blue.  this formula used a yellow they don’t even make any more, which is way stronger than what they switched to, which is why i stopped using their dyes seven or eight years ago at this point.  and the dyes i’m using now i’m mixing up from powders according to whim, basically.  so why would i bother using a formula?  or mixing up a 1/8 cup scoop full of each color?  such a fool.  so i wound up with enough paste for a gallon of dye, sitting in a jar for two weeks.

on my hands as i mixed it up with increasing frustrations, it was a nice dark, rich green.  so i put it aside and told myself i would use it on the background of the second piece.  so i’m coloring in everything for that green.  and thinking that the red/brown border which is now completely neutralized by the blue bleeding over it will look better for being next to a nice rich green.

here’s jim’s great drawing before i make the mess i usually make of it.

this is the neck before i hit it with water.  it looks pretty silly.

and looks a lot stronger once it runs.  i really like what it does when i make it run.  i like it so much that i never mind precision and clean lines and repeatable patterns.  screw that, i want to see what it does by itself, and will move a lot of things out of the way in order to see it.

i sort of skipped photographing the coloring in of the head, and the red on the crest and the yellow on the belly, and the red on the feet that was supposed to be orange.  it’s a very rudimentary laying in of color.  usually i do shading and sculpting with color, but i’m kind of overwhelmed here.  getting a panel painted in takes all day, three or four hours of standing there with a brush in my hand, walking back and forth from the palette to the work, bending over, feeling my feet swell and my varicose vein itch.

so i tend to rush things a bit maybe.  it’s a balance.  hasty rushing, or cooperating with the happy accident of running dye.

here is a place where i paused in my mad rush toward finishing in order to take a picture.  i end up spending hours at a time on something like a background.  it’s very important not to let your edges dry right in the middle of the background space, because it’ll show up as a hard line later.  so you have to keep going until you’ve filled in all the background.  this is why you design your space so that it’s broken up and you have small areas to fill instead of an endless expanse of background.

the way cotton takes dye, i went over it lightly with a full brush, quickly so the dye didn’t have time to flood out into a small area.  moving the brush quickly means that the fill is spotty, streaky.  and i had to go over it several times with a dry brush in order to get the color to fill in solidly.

if the brush comes to a good point, then i can go close to the resist line and fill in in nice and solid.  if it doesn’t, which this one doesn’t very well, then i have to go in far away from the edge and then come back in physically holding the brush in a point, and get the fine edges.

i’m using the biggest silk painting brush i have.  when it splits into individual clumps of hairs, as it does almost immediately, then each individual clump holds a great deal of dye.  and if it even so much as sweeps over a section, it will leave a nice, spreading trail of dye.  which means if i’m not careful, i violate my resist lines and end up putting background dye on my objects.  which i don’t want, as it’s a horrible black color.

what happened to that nice rich green?  wtf?  did it turn colors sitting on the shelf mixed with urea water?  dye can do that?  did i read something about the way colors continue to change with age?

did i use black in the mix?  did the blue get way strong, and the red, and do they only look like black?  wtf, i repeat.  wthf.

this is not what i planned.  sure does pop the dragon colors, tho, doesn’t it?  and once i started painting in the background, i couldn’t just stop and reconsider.

didn’t make a test mark anywhere, did i?  no, of course not.  again, i blame the overwhelming area i had to cover and my fatigue after a week and several days working with familiar techniques on an unfamiliar substrate.  but hey, you use what you’ve got, right?

in the end, i took it off the stretcher and filled in all the black background right there on the table.  i wasn’t putting it on very heavily; it wasn’t soaking all the way thru the back, which was actually a kind of black green so i wasn’t all that far off (did i really use black in the mixture?  i could have sworn not…).  the background is isolated enough that i didn’t worry about letting the wet fabric touch another part of the design.  and it’s stiff from the resist and sugar syrup, which spreads all thru the fabric once i get it wet to spread the dye.

at this point i’m getting ready to batch, or cure, the dye, so i’m putting a plastic tarp underneath it.  i’m not sure if the tarp is long enough, so i’m getting ready to double up with my torn garbage bags if i have to.

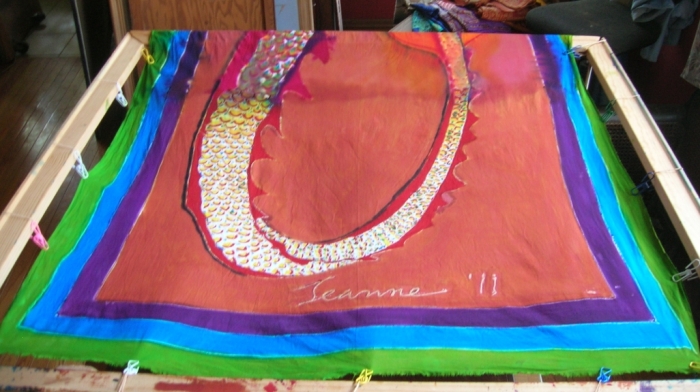
i even signed it.  that’s just alginate resist, with the black coming right up to it.  you can see into the black a little, especially at the top right.  it’s still wet, actually.  a little.  anyway, there’s a really dark green going on in there.  when i remade this color and used it on the background of the first piece, i used five, no, six yellows to one red, or maybe two, and a teaspoon of blue (only a pinch) in the mix.

here’s a detail, showing all the bleeding border dye covered up.  you can’t see it thru the black background, but you can see it thru the red (shouldabeen orange) hands and the green of the wrist.

and here it is after batching out in the yard during the last part of the day, when the temperature was a lovely 90 in the waning sun.  before covering it, i spritzed it all over, just to get it a little wet, and not to make it run at all.  i wanted it wet enough to bleed, but not to run.  and then i rolled it up in the plastic.  you can see the roll on the floor.

i unrolled it and laid it out on the table to dry, just because i wanted to look at it before washing it out.

it looks pretty impressive before washing out.  things didn’t run too much, and the green bleeding away from the black looks pretty interesting.  i can also just barely see the bleeding of the border thru the background.

but you can’t tell anything until it’s washed out.  and what i can tell is that it looks faded.  so diluting the colors maybe wasn’t such a good idea.  unless the colors only last so long once they’re mixed with urea water.  i know they only last so long if you mix soda ash into the paint, but i didn’t do that, i put the soda ash into the fabric.  the paint should last forever (?) if it’s only got urea water in it?????

but i don’t know that.  i’m going to have to do research, go haunt paula burch’s site for awhile and see if i can find something.

it’s interesting to see that some of the yellow washed out.  the fins on her cheeks were a lot more orange than that.  and it’s interesting to see that the scales are a lot less rich than they were when i got them wet.  so some of the richness was only excess dye, and washed right out.  and look where the bleeding from the border into the background meant that there wasn’t enough room on the fabric for the black to take, so the black background washed out, leaving the bleed from the border.

all in all not a bad job, but it looks raw and unfinished, or like something happened and half the color washed out.

i got really scared and dumped all my colors after this dragon.  i don’t like what happened to the colors, so i’m going to make up new colors for my final piece.  that’ll mean using a pinch here and there, rather than a 1/8 cup measure, but i can live with that.  but i don’t know what’s going wrong, so i’m not taking chances.

actually, after reading up on it, i’m getting convinced that i’ve held these mixed-up dyes at a very high room temperature (80s) for the two or three weeks they’ve been made up.  and even the dye powder itself will expire if let get too hot or damp.  and god knows i’m not very careful with things like that.  so it’s probably temperature that’s been killing the power of my dyes.  that, and diluting it too much.  i’m so silly.

the next piece i’m going to do is two yards.  it’ll fit on the table entirely (except the borders still hang over), and it’ll only take several sessions, rather than days and days.  i’m going to leave the background white and concentrate on bleeding the border and the dragon into the background.  and i’m going to pay more attention to coloring and texturing on the head and crest and belly.  i’ve already started it upstairs, and will begin laying in colors in the morning.  but since i wasn’t sleeping, i came down to get this post out of the way.

project: cotton sari

before we start, i just want to jot down what i’ve accomplished between completing my dolphin commission and starting my sari project.  i’ve had a whole bunch of stuff on hold ever since i started working on dolphins, right after getting back from a long residency, so really, on hold since last september.  so i’ve got a lot of bits and  pieces still in the pipeline, and a whole bunch of new things that have just fallen in my lap – and a couple of neckties too!

i finally finished a set of quilted pillow covers for my friend marlene.  this is stuff that’s been sitting on the sewing machine for months.  i didn’t bother documenting it, mostly because the camera was in the studio and i did it over such a long period.  it was strip-pieced out of two fat quarters i picked up in holland – of cats, marlene’s favorite subject.  i got another fat quarter of a completely different color scheme in decatur, and then harmonized it with a length of fabric i found in my stash.  then invented a modified box pillow structure (because i didn’t follow directions for either flat or box pillow but added the strip around the side as an afterthought).

i spent several hours cataloging and photographing my 38 new saris, several of which are wearable.  now i can go to my biggest customer (my sister) and she can pick out which of these lovely lengths of silk she wants me to make her a strip-pieced kimono out of.  and i can go to friends with offers of silk rags.

i’ve got a tunic and pants that i made and hand-dyed several years ago soaking in a brown overdye bath, waiting to go into the washing machine.  and, next morning, they’re being washed now.

so, to the project.  i’ve been getting into saris lately.  i’m tired of wearing sweatpants and a t-shirt.  i hate most clothes because they weren’t made for me, and i have an oddly shaped body that doesn’t look good in conventional clothes, and so i either slink around in shapeless black or i say fuck it and dress the way i want to.  which is basically to wrap a rag around myself.  a towel.   a robe.  it can be a colorful rag.  i’m actually quite happy wrapping myself in some of my fabrics.  i’ve been known to confiscate a nice piece of portrait linen to use as a skirt.

anyway, first i tore up a bedsheet that had seen its last use, and dyed it a nice green/blue/purple, tore it into 2-yard lengths, and started learning how to wrap sarongs, or kangas.  skirts and tops, endlessly.  then i went to the indian part of town and got myself a 4-yard dhoti, dyed that basically the same way, and started learning how to wrap pants on myself the indian way.

i bought a couple of saris from someone who goes to india and brings them back to sell.  they were my xmas present to me.  and i practiced with my book and my mirror every day.  i don’t usually stand in front of mirrors; sweatpants don’t take that much fuss.  but if you’re trying to put on a sari from minimal directions then a mirror is essential.

as it got warmer, i started changing out of my sari right after the dog walk.  i wasn’t draping it too well in the beginning, and it would trip me up, or fall right apart while i was out in the neighborhood.  and it was a big deal not catching my foot in my pants hem and tripping myself going up stairs.  but i’ve been wearing lengths of cloth around my body for almost four months now, and don’t often wear anything else.  mostly, since it’s hot, i wear my kanga/sarong length cloths, one as a shirt, one as a skirt, and i’m folding the skirt in half so it’s short.  in the evenings and morning i change into a sari, using the book, and move uncomfortably while adjusting it constantly.

but i’m getting the hang of it.  i can put on a 4-yard dhoti as a pair of pants in no time flat, and can do it several ways.  and if i put on pants using a 6-yard sari, then i can usually figure out what to do with the two yards at the end.

i’m still flummoxed by most styles of wearing the sari, however.  it looks great on the model and in the drawing, but on me it looks like a badly wrapped package.  but as i’m getting used to it, each different style of wrapping 6 yards of cloth is beginning to make more sense.

which is good, because i’ve just invested in 10 kg of used silk saris, and some of them are actually wearable.

after all, if you look at it, you can knot any corner against any other, so that’s 8 ways to tie it, plus all sorts of ways to knot the middle parts together.  it all makes sense, but it takes time to figure out just how.  i’ll just keep putting on lengths of cloth in front of mirrors, and i’ll eventually stop looking like a dork.
jim drew me one of his wonderful dragons, 6 yards long.  he used charcoal.  i had ordered six yards of muslin, prewashed it, and soaked the whole length in a soda ash solution (1 cup per gallon).  then when that dried, i stretched it using spring clips.  it was way wrinkled, so i spritzed it with water and let it dry under the fans.  the stretcher is 48″x 45″, so it only takes a little more than a yard at a time.  that was a big consideration.  it meant a lot of thinking about how i was going to do this.

i’ve done silk pieces of a size before.  i did a 3 yard veil for my friend asha.  but i haven’t worked on cotton in any size except a test strip.  so all that follows is first of all guesswork and only secondarily experience and knowledge of my materials.

i frankly don’t know what i’m doing with this method of dyeing.  i’m familiar with silk dyeing, have been doing it for ten years, and still make loads of mistakes, still have colors completely wash out on me.  but on cotton, and doing direct application on cotton, and using the soda soak method – permeating the fabric with soda ash instead of putting the soda ash into the dye liquid, which shortens the life of the dyes, and i don’t paint quickly so that’s not going to work for me.  if i put the ash into the fabric, then i can let it sit for however long i need to until i’m finished with my project.  which was several weeks.  if i’d set silk there for several weeks with soda ash all over it, the silk would fall apart when i picked it up.  cotton reacts differently, but nobody could tell me how long i could keep cotton and caustic soda together before it ate thru the fabric.  so this is partially an experiment to see how well the cotton lasts.  it was maybe three weeks sitting on a shelf after having been soaked in soda ash and not rinsed.  so we’ll see.

my big issue with 28 feet of fabric is dyeing the background.  since it has to be dyed in pieces, i’m going to be having edges at the edge of every day’s progress.  and the color of the dyes changes from day to day, as well as the thickness and the impurities, and maybe even the water itself ages who knows.

the way i understand this direct method of painting is that you’re supposed to paint it and then keep it damp until the chemical reaction sets the dye.  this is like from an hour to a day of keeping the fabric damp.  but with painting over a square yard at a time, in an open room, in the middle of summer, with the overhead fan on, is that the damned thing dries as you’re painting it.  so my plan was to paint it, let it dry, and then at the end of every day’s work, get it damp, roll it up in plastic, and let it cure until the next morning.

why i didn’t realize i could wait until the end and then do the batching, i don’t know.  possibly because it would take 6 yards of plastic bags to do it that way, and the way i did it only took 4 bags.  it was a real pain in the ass batching one section of a continuous length of fabric at a time, tho.  the edges bled right out into the following day’s workspace, the yellow travelling fastest.

according to this method of dyeing, soda soaking followed by direct application, according to the way soda ash and procion dyes supposedly react, the moment the dye touches the ash, it becomes bonded to the fabric, and when there’s no more soda ash to bond, then the dye ceases to stick to the fabric and will wash off as excess dye.

but i wasn’t seeing it when i spritzed my work at the end of the day, right before rolling it into the plastic bags.  it ran like anything when the water got on it.  but maybe it didn’t.  maybe it was just excess dye running off, not going to stick to anything because the bonding had already happened.  maybe i needn’t have batched anything, because maybe the very laying down of dye over the fabric and soda ash was enough to bond it.  if that was the case, then i wouldn’t be able to do the kind of blending and bleeding i was looking forward to.  oh, it would run all right, but it would wash right out of the finished product.  maybe.  so here was another experiment.  how well does the dye go on and how well can it be moved, when does it set, and how much difference does it make when i set it.

this sari-length (about three inches, goes the punchline) cotton fabric is just the first part of this project.  when i’m done with the six-yard dragon, i’m going to take the other six yards i bought of a slightly narrower muslin, cut it into a four-yard length and a two-yard length, and make two more dragons.  i’ll apply what i’ve learned doing the large dragon to the middle one (like not batching it until the end), and then apply what i learn from that to the small one, and that one will turn out just right.  and my sister will get the small one.  as a sarong.  she’d be intimidated by a sari, but she’ll love the sarong.

so.  back to the project.

i made up a batch of sodium alginate into a water-based resist, and put that into a squeeze bottle, and then put a mess of karo syrup into another squeeze bottle.  then i went over jim’s drawing with a bead of sodium alginate.  of the two, it’s the stronger resist.  i use the syrup because it dissolves fast.  it goes gummy and travels when it gets wet, and makes great runs of one dye into another.  i use the syrup to draw the scales and the crest.  and i used syrup on the border, where i made lines for three stripes of color.

this is all the stuff i worked with.  i’ll run off the list.  from left to right in the back, the spritz bottle of water, the karo syrup in a squeeze bottle, a baggie of urea, a corroded mason jar of soda ash, a bottle with sodium alginate powder in it, a cup measure with a teal lid holding the batch of sodium alginate i mixed up using this recipe, then another squeeze bottle with sodium alginate in it.

on the front row is a jar with urea water, for thinning the dyes, then the bottles of dye powder in back and the bottles of mixed-up dye in front, then spoons and brushes and measuring instruments.  i made up the dye using one 1/8 cup scoop of dye powder into a jar, pasted up with urea water (1/8c to 1 cup hot water), and filled to about the 6 oz mark (more or less; i’m a terrible chemist).  these are all the things i need to decorate my sari.

below is the end of my first day’s painting work.  as you can see by the drops on the floor, i’ve lined the table underneath the cloth with cut-open plastic garbage bags, and have already wetted the painting to make the dyes run.  i’ve taken it off the stretchers (you can see the edge of the stretcher at the top of the picture, and the bricks it was resting on to the left).  i’ve tried to make the transition from dyed area to white area soft by brushing out the dye as i applied it, so that there won’t be a hard edge after it’s batched.  i thoroughly wetted the painted areas, until the cloth was shiny and sopping, and dripping readily off the edges.

then i rolled it up very carefully, making sure there was plenty of overlap between bag edges.  if the wet fabric is allowed to touch another piece of wet fabric, the two will bleed all over each other.  by rolling the whole thing up in plastic, i’m isolating the painting from everything else, each layer surrounded by plastic.
because i’m a lazy documentarian, you’re missing any possible view of what the first part looked like the next morning.  it was nothing like as clear as it looked on the above picture.  all that white space in the curlicues was gone, and the bleeding of the blue into the surrounding areas was horrible to behold.  the scales were muddy, the background was splotchy.  i didn’t want to  continue.

but i did.  i rolled it all away from the plastic, set it out in the morning sun to dry, and then stretched the next part of the panel.  but because i’m such a slob, you’re not going to see the process photo on the second part of the panel, either.  i forgot to take pictures.  however, on the photo below, you can see the results of the same level of wetting the next morning as happened on the first part of the panel.  see that yellow bleed?  that’s how far the yellow part of the reddish brown color travels when it’s wet.  and at the edge of that yellow line,  there’s a crust of soda ash, redried from how far the wet crawled.

there was something strange happening every now and again.  the muddy scale thing.  i guess maybe i got that part a little too wet (more than sopping isn’t enough?) and maybe the colors pooled in the plastic…
this is how it looked when i was finished for the day, and ready to wet it down and roll it up.  you can see all the colors i’ve been playing with in the egg tray to the right.

then i sprayed it, a little less than i had the prior two panels, just to see what would happen, and forgot to take a picture before i rolled it up.  but here’s a picture of the roll.  i let it sit there all night, and then rolled it out and let it air dry, and started on the next part.  it took five days of this, and on the sixth day, i did the laundry.

here’s the start of the 4th day’s work.  the tail is crossing the body here, and you can see the long straight alginate resist lines outlining the body, and the shiny scales made out of karo syrup.  as the alginate resist dries, it goes clear, and you can only feel it with a finger.  the sugar syrup dries too, but stays sticky and shiny, and you can always see it.  that’s why it’s okay not to draw in the lines you’re going to resist with sugar syrup, but you’d better follow the charcoal lines with the alginate resist, or you’re not going to know what to color in which color once the resist has dried.  i found that out, and so there are a number of resist lines that i crossed at random, and if i were being good about this experiment i would have kept better notes…
this is the end of the painting in process on the second to last piece of the panel.  it looks all smooth from a distance, but notice the extreme left side of the stretched part, where the reddish brown has a real dark edge.  a couple of edges, actually.  this marks the overlap between this day’s work and the previous day’s work.  note on the previous day’s dragon body, where the back leg is, how obscured and cloudy it is there.  and also note where the purple border at the top has run into the reddish background.

in this next shot, i’ve laid the cotton down on cut up plastic garbage bags, and sprayed it with water.  you can see how it looks wet, theres a kind of glisten on the surface.  and the running has started, where the dyes get wet and start to move across the weave of the fabric.  it’s a great process, and fun to watch, tho it’s a little like watching water come to a boil.
hmm, no picture of the dried part after it had batched all night.  so let’s move on to the final part of the panel.  you can see where i left off the day before, and you can see where the background has bled, but it’s not as bad as before because i used less water to dampen the fabric before batching.  but there’s still significant bleeding, especially in the scales, where they’re quite washed out looking.  you can see the yellow bleed of the background on the left hand top of the scales in today’s work.  you can’t see it where i’ve put reddish background, well you can but it’s subtle.
here’s a closeup.  my standard scale treatment is a line of red at the outer edge near the the resist, with a line of yellow next to it, and a dot of blue at the small end.  it’s a shorthand i use to represent scales, and it’s supposed to run all together and make a rainbow in every scale.  on this cotton, at this large size of scale, i’m finding that there’s a lot of white space, and the colors aren’t running like i want them to do.  it seems the blue just bleeds all away, and does stranger things than the other colors.  because i like to strip my processes to the basics, i only use the four primary colors – yellow, magenta, cyan and black, and mix up any color i want using these four colors.  and so that’s my shortcut for the scales, just more of the same and let the water mix it.

here are three plastic garbage bags, split on both sides and unfolded across my worktable.  when i lay the fabric down over it, the plastic will hang down about 2″ lower than the fabric on both sides, so that i can properly seal the edges.  when i roll the fabric up into the plastic, each part of the fabric will be surrounded, both by the plastic it’s lying on, and the bottom of the plastic the next part of length is lying on, as it’s rolled together.  as long as there are no leaks, there’ll be no bleeding.  as long as i haven’t made it too wet, as long as i don’t roll a break in the plastic overlap into it, as long as…

here’s the fabric laid out on top of the plastic.  this is the next morning, after having batched all night in a little ball, wrapped in plastic.  you can see all the bleeding going on.  i’m pretty sure one of those large mud puddles on the scales is because there was too much water and it all bled together.  but anyway, this is a case of the blue getting out from the resist around te scales, and going nuts.  and there wasn’t that much blue.  the purple strip on the border seems to have run away with itself, too.  all in all, pretty damned ugly.  but so what.

this is just another view from above on the ladder.  the whole of the sari is piled on the floor to the left.  and it’s finished.  time to wash it out, because the whole thing has batched and it’s ready to finish in the washer.
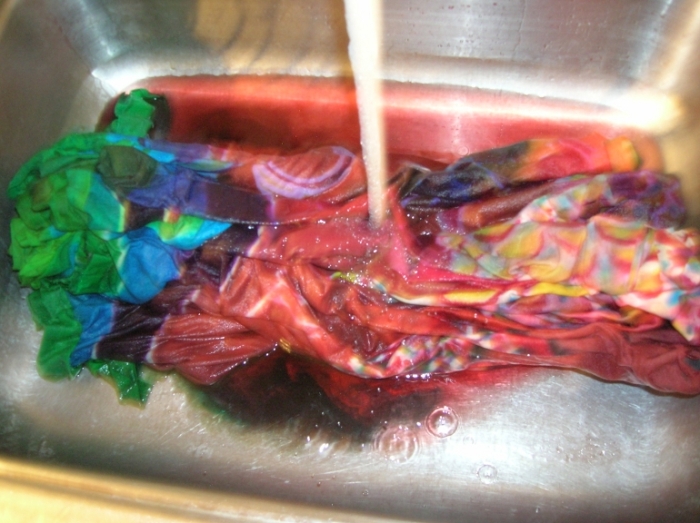
so i dragged it to the sink in the kitchen and am running cold water over it to wash out the excess dye.  this takes forever, and uses many many gallons of water.  very wasteful.  maybe someday i’ll just use enough dye to take to the fabric, and not leave any excess to wash out.
i apologize for the blur.  my camera doesn’t like focusing on such things.  this is the sink.  i’ve gone thru the entire length of the fabric, washing out one side of it and piling it up against the far side of the sink.  now i’m turning it on its side and continuing to rinse it.  i’ve got it all neatly piled together because the border leaks the darkest blues and greens, and the body of the fabric leaks bright red, and i don’t want them mixing, so i’m laying the border all together as much as i can.
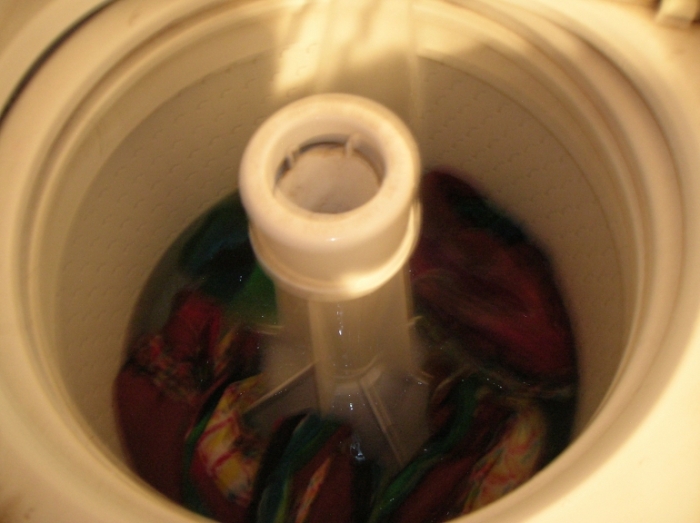
then it got washed in hot water and synthropol, or actually, the house brand that’s way stinkier but also way cheaper.  industrial strength detergent.  it got a wash and a rinse, and then i stuck it on a regular load with regular detergent and did it again, because it was still bleeding.  this is the second rinse, and you can still see colors in the water.
then i didn’t bother heating the room up running the drier, but hung it outside off the porch railing until it was dry.

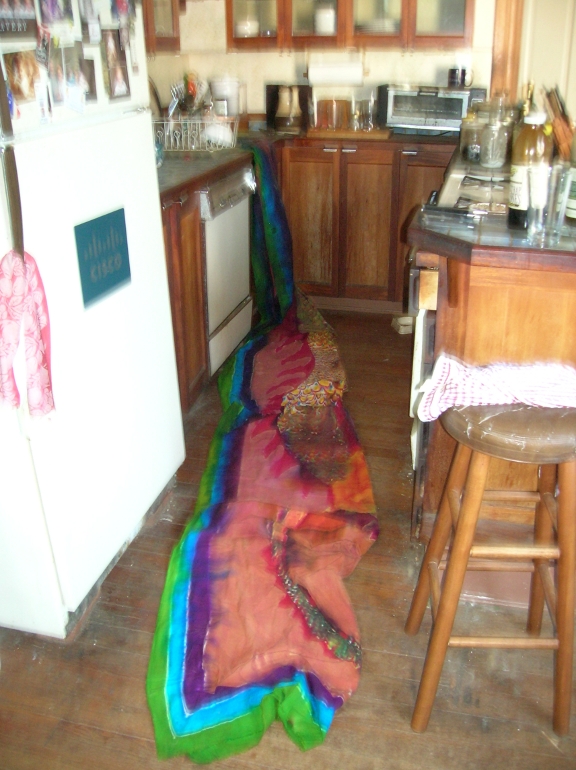
this is it lying on the bedroom floor at full length.  it was still a bit stiff, so i washed it again, and this time stuck it in the drier with the rest of the load.  it’s stopped bleeding, so it’s fine to do that.  but we’re not washing any whites with the load after that, just in case.  my brother’s staying with us and doesn’t need pink socks.
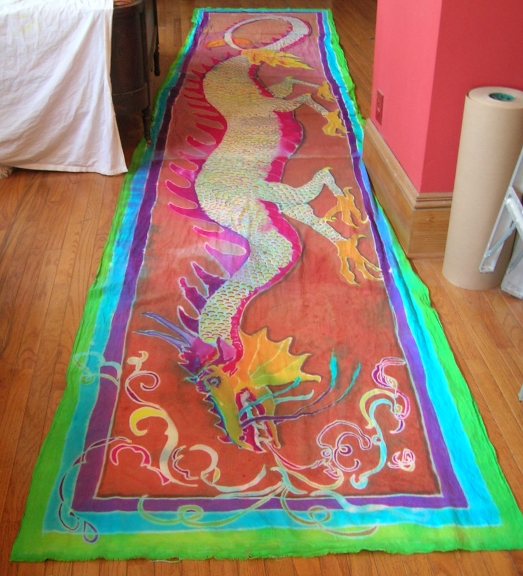
so this is the result of direct dyeing on cotton muslin.  as you can see, most of the mud washed right out.  after i’d batched the front panel, for example, you couldn’t see any of the breath, it was all dark and muddy.  but that didn’t take, and washed right out.  so there’s something to be said for the idea that the dye sets the moment it touches the soda ash.  there’s a little movement of the scale colors, possibly since they didn’t get saturated when i painted them in, but only when i spritzed them and then batched them covered.  but for the most part, the colors stayed where i put them, and there’s no large-scale bleeding from the crest, or over the border lines.  and those are made of sugar syrup, and are designed to move.

this means that i can’t really use the sugar syrup running technique, the way i use it on silk.  because of the soda ash, i’ve got to fiigure out another way to do it.  but i might be able to.

what’s next:  i’ve already got the next six-yard piece lying in a bucket of soda ash and water.  this evening i’m going to take it out and dry it off on the railings of the porch, and then tomorrow i’m going to cut it into two lengths, and lay the longer one over the sari.  i’ll trace the dragon onto it, shortening it appropriately, and then i’ll stretch it and mix up some more sodium alginate, and some more dye, and begin again.  but this time i’m going to paint the whole thing, and then batch it.  that way i don’t have to worry about the background bleeding on.  i’ll have to worry about encasing 4 yards in plastic, however.  how many plastic bags do i have to waste?