new project – encaustic painting series

okay, i’m doing another encaustic demo.  this blog is full of encaustic painting demos.  and i never get tired of doing them, either.  so here’s yet another one.

while i was on residency in the west of ireland last year, at cill rialaig, i was very taken with the idea of a series of paintings exploring the elements.  things like paintings of only rocks, paintings of only skies, only water.  i dreamed of painting the air, but that’s just about as difficult a thing to paint as you can think of.  painting nothing would be harder, but only just.

i spent my studio time a lot more prosaically, painting tourist pictures and gifts for people who don’t like my more experimental experiments with art.  there was one artist there who liked me right up until the moment she saw the paintings i was working on.  this was an artist whose name is being made right this second by inscrutable museum-quality art involving springs and piano wires.  she was so upset that she told me about her disappointment as if she was talking about another artist altogether, but her heartfelt looks when she confessed that this artist’s work was awful gave her away.  and i’ve never heard from her again, of course, but this is the way it goes on residency; you make instant friends that you never hear from afterwards.  artists pissing in the night.

anyway, on to the work.  you can see the reference photo on the left of the pastel outline.  it was one of those cloudy days were all the color is in the sky.  the light comes peering thru the cloud in vast beams, and there’s nothing as bright as that silvery gleam where the light is hitting the water.  you can only barely see the peninsula just a mile or two across the bay, and there are places were the water comes out of the clouds and fogs the space between cloud and ocean with rain that’s more like thick smoke.

so i’m into the elements.  in this case, it’s water.  i guess water and air.  but the clouds are water, and the sea is water, and the rain is water, and the air blocking the view of the peninsula is water.

the trouble with water being the entire picture is that there’s no real difference between water in its various states.  just varying shades of visibility, really.

there happened to be a roughly 1:2 board all ready to go, so i took it off the stack and started in.  there’s a stack of boards all gessoed up, all sorts of sizes.  this one is 12″x24″ gessoed masonite (or whatever they’re calling it now) and i’ve dragged pastel all over it as merely placemarks.  my method for transferring the image from the reference photo to the board is to stand about 5′ back and hold the photo up in front of my face, covering the board as much as possible.  then i focus my eyes on a detail and whip the paper aside, noting where it falls on the board.  then i rush to the board and swipe a line right there with my pastel, and go back to my position and pick another spot to focus on.  easy.

there are good points and bad about this method.  using a projector also has its good and bad points.  in general, i prefer the distortions of my own eyes to the distortions of a projection lens, so i usually go with that.  and abstracting my marks to only the most obvious and important ones is usually the best way for me to go, lest i get caught up in the details before i’ve even established the general marks.

in sketching out the painting, i’ve used only black, or dark gray, pastel.  and a touch of blue for the sky.  the light gray stuff is the first layer of wax.  i thought i’d get a picture before going too far.  it looks to me as if i’ve already burned in this first layer.  you can tell that i’m not fixing the pastel before starting in on the underpainting.  i don’t really care if i get pastel all over my underpainting.  there’s going to be so many layers of wax that nobody’s going to know much about the first layers.

here’s a closeup of the next layer (inverted), a darker gray filling in the areas around the light gray.  the blue is still pastel.  ad the black you can see, that’s also pastel.  again, i’m pretty sure i’ve burned this in.  but i’ll let you know if i have some ‘raw’ wax in any of the shots.

this is the far shot.  i’ve got dark gray in the ocean and the peninsula, and a little in the top part of the clouds.

and at this point i’ve started taking the painting outside to shoot progress photos, so it’s a little better picture.  sorry about the quality before.  i’ve added a little more black to the clouds, and more white to the sky and water.  you can only tell i’m doing anything to the water by the progressive breaking up of the thin black line in the middle of the white part of the sea.  i really shouldn’t have bothered putting in that detail so soon, and it will haunt me.

for this one i’ve finally put in some blue paint, but it’s old blue dug out from a hardened lump in cup, and there’s green in it.  oops, so what.  i took the same gray i was using in the clouds, which has a bunch of purple and blue in it, and put it over the peninsula, where it’s now way dark.

so i took a bunch more of the gray with the purple, and slathered it all over the clouds.  i’m burning everything in before shooting it at this stage, just so you know, and in many cases there’s more than one layer being put on and burned in before i take the next process shot.  else i’d be running outside every half hour with the board and the camera.

now i’ve gone in and put the same gray in the sea and the shiny area.  and come in with some dark gray and emphasized the peninsula and the darkest of the waves in the foreground.

now there’s more darker gray on top of the clouds.  i’ve added some raw umber into the gray mix.  basically my grays are black and white, dioxazine purple, ultramarine blue, raw sienna, a little green, and whatever else i think of.

now there’s darker grays over the lowest clouds.  and i’ve begun to come back in with lighter gray underneath that cloud, partially obscuring the peninsula.

and now some less-than-terribly dark grays over the sea.  at this point i have white, made with bleached beeswax and titanium white pigment, and i have cream, made with regular beeswax and titanium.  and then i have four or five grays, going from very nice bluish dove gray to angry greasy looking toxic sludgy gray and mostly running along the purple edge.

and now the whole thing looks too dark and brooding, so i basically go over the entire thing with light purply gray, and lighten the whole thing up.  the light ocean is gotten a bit polluted by the dark gray thin line, so i add more white and burn the hell out of it.

and then it was getting dark, and i stopped work, brought the painting up to the front porch, and sat out and looked at it while the light went.  it was painfully purple, but almost done.  a funny thing happened.  as the natural light faded and the incandescent porch light took over, the painting got less and less purple, and finally less and less detailed, and flatter, and finally it looked very photographic, almost like the reference photo, which my paintings never turn out looking like the photos.

i was intrigued by this, and wondered what i’d have to do to the painting under natural light in order to get it to look like it did at night under a 40 watt bulb.

this led to a conversation about george beattie, who painted some of his paintings with that would show up when someone flicked on the paintsblacklight that was installed to provide alternate lighting.  seems a little tacky now, maybe, but i’ll bet now people are coming up with high tech ways to do the same thing.

,

now the white of the ocean is blue, because of that dark line finally disappearing into a churn of white wax.  so i  am going to have to add more white and start again.

and now i add more black.  i’m messing a little with the cream in the clouds, also.

and now the peninsula was too dark, so i’ve obscured that with some more medium gray atmosphere, and added little dark touches to the upper clouds.

and i guess i’m done.  it needs a thin black frame, an some nice buffing to bring out the shine of the wax, and i’m ready to move on to my next painting.  the series will be called elements – water, or maybe kerry water, tho that sounds like a brand.  or maybe just water and air.  anyway, this is number 1.  now i just need a place to show it.

next painting – clouds raining on the ocean, with a barely visible peninsula in the background.  part 2.

furthering the progress

today it’s progress on the oil paintings, both on panel and on linen, and starting an encaustic on the new luan panels i cut from a big lumber-store sheet ($1.42 per 16×20 1/4″ panel, can’t beat it).

continuing the oil on panel painting of the beach at night from our cabin, i mixed up a very small amount of phthalo green and put it over the plants.  this will need some toning down, obviously, but i wanted a transparent wash to work from.

then i scraped up some ultramarine blue and mixed some of my white into it, and added some linseed oil, which is the first time i’ve done that.  so far, i’ve been using the calcium carbonate and sun-thickened linseed oil in a tube that jim made up some years ago, and if it needed thinning, i added some orange oil.  but this time i thinned the tube stuff with oil, probably going way too far with the fat over lean rule.  i mean, from orange oil thinner, which is like turpentine in that it evaporates immediately, to a way oily veil of blue and white – there have to be several steps of oilinity that i’ve passed over at once.

after that i mixed up some raw umber, another transparent color, and stuck it over the green, hoping to make it look like proper plants in the almost-darkness.

yesterday i mixed up some chrome green, and some ultramarine green into separate pools, and used each in different parts of the painting to represent the actual things that you can see are green.  there are lots of the painting where what you see isn’t really green, but reads that way.  these are actual green things because they’re either out in full sun, or are catching and reflecting the light while in the shade.  i also mixed up the smallest bit of cadmium red dark and after awhile a little white too, and put it on the barn and in the trees.

when i’d finished putting the sky in on the beach painting, i still had a bit of blue paint left, so i washed it over the sky and the house, and in fact made it stretch over all the background trees.  the result is mainly so spectacular because i let photoshop do the correction automatically, which is usually not the way i do it.  the photo above was done by hand, and you can see there the colors just aren’t right.  the automatic value correction is actually too garish, but at least the colors seem more true.

when i got done with the paintings i’d been working on, i turned my attention to my new luan panels.  this one is 16×20, which is large for the modern encaustic painting, but actually quite small for me.  the reason it’s the size it is is because it’s going in my luggage with me to ireland, and that’s as large a standard size as i can fit into my bag.  will i take all 14 with me?   stay tuned.

this one got a coat of clear acrylic gel medium, my ideas about sealing and priming my surfaces having changed after i lost a goodly amount of wax to the underneath side of my fabric during the previous attempt at encaustic.  i would still be working on panels jim made years ago and stacked against the wall if i weren’t gearing up to go on an artist’s residency, and going cold turkey on my reliance on commercially prepared paint.

at this stage the painting looks like a francis bacon.  i started with charcoal, and quickly ran into trouble, because i didn’t know which lines to mark down.  i was actually trying to represent the white lines by using the black charcoal.  so i got out my pastels, which jim gave me for xmas one year, and started in with the real colors.

and thank god.  there are white lines, and gray ones, sienna walls and prussian glass in the windows, black and brown shadows, and they all follow their own paths in all directions.  it’s a nightmare trying to get all the lines right, because you actually have to draw a web, working in all directions and making all the edges meet.

working in pastel is maybe not the greatest idea, since it’s really hard to rub it out and start over, especially when you’re working with a board that has an incredible amount of tooth once it’s been coated out with acrylic.

i was surprised how quickly i finished the pastel underpainting.  i noticed yesterday, when i was just starting the drawing, that i had an enormous amount of artistic resistance.  looking at the reference photo overwhelmed me immediately, especially when i was trying to draw it in with charcoal.  the complexity is maddening, but the distortions all have a rhythm, and all match up with another distortion in another part of the painting.  it all fits together, and if the proportions aren’t right, it looks awkward.

except you don’t notice, because you don’t have the reference photo to judge by, and one distortion looks like another when it comes to water.  so you won’t notice that the middle-left of the painting is squinched up too much, and i had to compensate by stretching it on the left side.  water could well do that, especially if there was some other disturbance interfering with the interference.

this isn’t the first time i’ve painted this image.  the first was several years ago, in oil on canvas, and 30×40, and hangs in my studio.  so i’ve been looking at it and wanting to do it in wax.  for an exercise painting, to see how well it’s going to work in the field, i really shouldn’t have chosen such a complex painting, one that will take weeks to finish and be every bit as complex in wax as it in in any other medium.

but i had to paint it again, and so i started on in.  it takes pastel really well, and i can see no reason why it won’t take wax even better, so i can stop now, and leave this painting until i get back from europe (or else take it and the reference photo and complete it at the residency).

jim actually painted the image first.  he did it up with acrylic on canvas, 30×40, and i remembered wanting to paint it when i took the photo, so the minute he was done, i grabbed the photo and started my own painting.  for awhile his hung on the studio wall, but then we switched out and now it’s my painting, but we take his back out for comparison when people want to see our work.

jim’s is different from mine.  he took great care rendering the walls and the moss and the boat, and was kind of slapdash about the reflections, whereas i’m not too good at rendering moss and boats and walls, but i get way into reflections and distortions, and mine are much more accurate than his.

after awhile of working on the impossible reflections, i began to notice that they looked like animals, or faces.  that’s our human tendency to make sense our of chaos, and i’ve always done this – after working on a jigsaw puzzle all day i’d go out for a breath of air, look up at the trees, and see giant jigsaw pieces in the treetops where i would normally see treetops, leaves and branches.

i thought last time i did this painting that this time i would paint the animals and never mind making lines out of them.  the eye will do that at a distance anyway.

i may not proceed with this painting, as i only have 3 weeks left to come up to speed with my materials.  i may stick it aside, but i’ll link back to this post if i do.

holbox house 2

holbox349

here’s the process picture for the encaustic painting i’m doing as a thanks to tia mercedes down in holbox.  she put us up for three days when we went down there to visit jim’s son’s wife’s relatives, and i was grateful, so thought i’d paint her a picture.  i’d do it in watercolor, but watercolor will fade horribly quickly in a tropical environment.  it’s the intensity of the light and the thinness of the pigment layer.  but wax is another animal, and a wax painting won’t fade nearly as quickly.  there are wax paintings still extant that were done in the first century bc, and they haven’t faded.

you’ll have to look further down the blog to find the first images.  the painting has come a long way since then, without being anything like nearly finished.  it’s still got a long way to go.

the first thing i did was to put in the black windows. once they were melted, i went in with a cestrum and scratched out the white mullion lines.  on reflection, this was a mistake.

when you learn watercolor, they teach you to start with the lights and move toward dark.  of course, i routinely violate that rule, not being able to resist putting in some darks right away.  it’s only when i’m building a portrait that i go strictly from light to dark, and that’s because i’m feeling my way with a portrait, and want nothing committed until the very end.

when you do wax painting, you realize pretty quickly that one of the biggest influences on melting point temperature is the color.  the lighter the color, the longer it takes to melt.  this is due to albedo, and is one of the things we had to study when i was taking environmental science in college, back in the 70s yes i’m that old.  albedo is a measure of a body’s reflectiveness.  when you heat up white wax, a whole lot of the heat gets reflected back off the surface, and the wax takes a long time to soften.  when you heat up black wax, the heat goes into the wax and stays there, and you have to be really careful not to enmolten the pool of wax and have it run all over the place, because it’ll keep heating up even after you’ve removed the heat source, dark wax is that temperature absorbent.

so, turns out i’m a real idiot for putting the black windows in as early as i did.  every time i pass a light over the house, the black starts to glisten and the white is just as solid as ever. this is where i start to use masking to protect elements of the painting.  at this point i’ve put on 3 or 4 layers of white on the house, as well as 2-3 layers of shadow of various darknesses, and when i try to burn it in, the two colors mix in a way not conducive to showing architectural details.  like, no straight lines, not after you’ve melted the wax.  wonderful accidental curves and curlicues, great sedimentation the way you get with some pigments in watercolor, blending of a type not possible any other way than by melting and pooling.  but architectural details?  forget it.  very fucking difficult.  might as well find a way to avoid needing straight lines and sharp edges in the making of a wax painting, because it is very fucking difficult.

so i’m going to end up with another fuzzy painting.  i’m not complaining, because i’m not sure that i don’t like the effect, but it’s about as far away as the nit-picky way i used to paint with watercolors as is possible.  look at some of the detail i used to do in watercolor and you’ll see the difference.

nyc

can’t do that in wax. not unless it’s on a very large scale.

back to the holbox painting.  i worked on the background.  there’s 2 palapas and an airplane back there, and now that’s a little clearer.  but you still won’t see it without knowing there’s an airport down the street.  and i put some clear wax on the road and worked some more blues and purples into it.  and i worked on the palm trees with a fan brush, enabling me to put on actual palm frond-looking spiky leaf things.  of course, all this came for naught on the left palm tree, the one behind the house.  when i went to melt that white wax, i ended up obliterating the palm details, because all that lovely green and textured wax turned into a transparent pool of floating pigments, and started to churn.  not happy.

using one of my handy sculpting tools (a case of about 10 small tools with different points on each one) i scratched out the negative space in the railings around both floors of the house, as well as the holes between the stair railings.  i filled these scraped places with dark wax, wiped it off the positive areas, and burned it in, not enough to where the scraped places became level with the built-up places.  that would be to moltenify the wax, and it would have meant the colors would have runned and flowed.  i’m at the point where i don’t want that.  this was one of those points where it becomes obvious that the drawing is wrong.  the tilt of each floor is off just enough to make me nauseous.  i corrected the roofline a couple of times, and corrected the second floor line as well, and it finally got to the point where i was just getting a crick in my neck from looking at it.  this involved scraping away the excess or carving out space for the negative space, depending on whether the original line was too low or high as a perspective line, and filling it with either sky, white, or shadow, depending.  when i was done fucking with the railings i saw that i was going to have to restate both the white walls and the shadows and edges one more time.

there’s lots of work still left in it, and today’s session was very frustrating, because i’m going thru a hate the painting phase.  it’s the middle phase of a painting, when things are horribly ugly and you don’t want to go on.  i must have cleaned seven things today, trying to avoid the ugliness.  but at 8-10 feet it starts to look not so bad, and so i’ll finish it.

i reinforced the shadows and restated the white today.  to do this i had to use 4 pieces of paper to mask off the areas i didn’t want to heat.  at this point i’m putting in a color, masking off everything but that color, and then toasting that color only, while everything remains cool and unmelted behind a layer of white shiny paper that bounces all that heat back into the atmosphere.  theoretically.  what happens when your arm slips and the heatlamp cord bumps into the edge of the paper and it moves?  what happens when the melted wax gets underneath the edge of the paper protecting the delicate parts?  what happens when the heat lamp momentarily rests on the top of the paper?  what happens to the black windows underneath the paper when the white wall next to it is finally melted enough?

all those horrible details you don’t see in the photo above, that’s what.  i scraped some of the wandering wax off while it was still cooling down, and i’m going to have to restate the windows (restate, that’s a laugh.  how about scrape completely out and redo?)

so today’s work was a series of passes with a single color, followed by careful masking off of the old wax and a careful melting of the new layer just until it began to move, just a little.  and then move on to the next area and repeat.  this way i did the shadows more solidly and deeper, and the white walls whiter, and a golden sheen on the burnt sienna tiles (which still looks stupid, and i may have to excise some mortar lines into it to stop it looking so fakey).

i’m nothing like thru.  i have to do more background, and more road, and restate the windows, and make the grass greener.  all this in something like 8×10 inches.  i detest putting details into such a small scale.

because it was a new moon today, i found myself hunting for new projects.  there’s mom’s quilt.  there’s a new unpublished novel idea.  i went looking for water reflections to do in encaustic for my next painting, and found reference photos of the stream at sugar hollow in virginia, a river in north georgia stocked with trout, and a canal reflecting buildings in venice.  i cleaned up a lot.

and now it’s 4 am again.  i’m not up because of anything except i couldn’t sleep.  and now jim’s up as well, and he’s put o the coffee, and found a magazine, so i’m going to go sit with him in bed and talk for awhile, after which we’ll both go back to sleep.

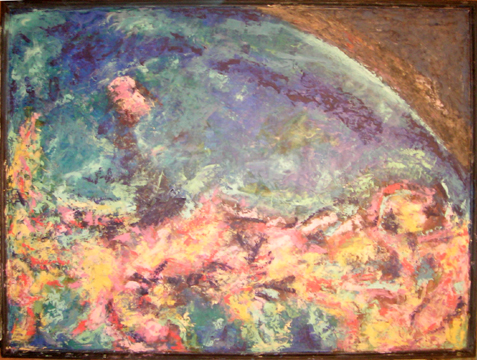
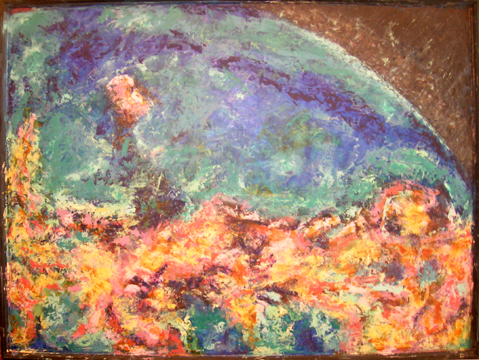
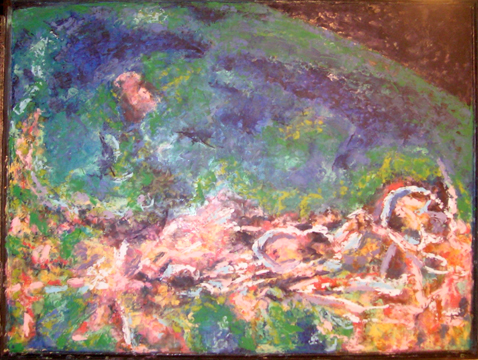
encaustic venus

not de milo – de planet.

this will be my nth encaustic painting of a planet or moon. i’m obsessed, happily, with soft looking rounded shapes floating in space. cosmic breasts. and i keep finding correspondences in life – i saw my mammogram image on the screen behind me in radiology, and it looked just like one of the moons of saturn. so i’ll be doing a mammogram disguised as a planet any old time now. and antarctica without the ice. and the crescent earth with long  shadows cast by the clouds.

so cool.

venus by radar image, color coded. venus uncoded

for this painting i’m using a 30×40″ panel coated out with rabbit skin glue gesso. i outlined it in pastel, as i have been doing, and sprayed with acrylic medium thru a mouth atomizer to fix the pastels.

this is the first pass, just to block in the colors. i’m using beeswax thinned with orange oil except on the sky, where i’m using microcrystalline wax and orange oil, mixed with dry pigments, and put on with a palette knife.

then i burned it in with a heat lamp.

after putting on the base colors – pink, blue and green, i worked in some brighter pinks and some acid greens, as well as a purplish red. i used the ex-wax i keep in a jar with orange oil to make the atmospheric gunge.

venus315

interesting how nothing seems to change even tho a great deal has been done. i put in dark blue (dioxazine purple and prussian blue), and started working the “landmass” toward yellow and orange, because i just don’t like pink.

then i burned it in, a little less deeply this time (as if it’s easy to avoid liquifying the whole thing). i’m trying to only barely glisten the wax, only to barely soften the outlines, only enough to swell the wax, not to melt it. but i find it very difficult to do this because it all happens so fast, and because i continuously have to keep coming back around to that spot in order to continue heating the nearby wax.

the interesting thing is that it’s not very visible, the difference, whether you melt the shit out of it or barely warm it. you can’t really tell until you get close that there’s been any running at all.

which is why i like encaustic paintings close up.

venus317

not being able to leave anything alone, as soon as i’m fnished melting the planet, i start in adding more paint. about the only difference i can see in this picture is that i’ve started messing with the gunge in the atmosphere again. oh yeah, and i remember slapping a bunch of quinacridone gold over the “landmass”, which gives it an overall richer and yellower cast.

venus320

sorry about the shakes. i took it outside to get the real colors, after putting on some nice acid green (viridian and cadmium yellow dark) and starting to define the circular features with various shades of purple.

venus321

this is how i left it last night. it’s ready to be melted again, and then i might have to do something else to it. the ring things are god knows what. let me look it up. volcanic features.

i included this as a post. it’d been sitting in my draft box for months, and i figured it had things that i was never going to say again about this painting.